A simple marinade recipe for sable fish (black cod); sake kasu is the “lees” that remain after the fermented rice mash has been processed during the sake making process. It is a natural flavor enhancer for meats, fish and soups, available at Japanese food stores (see sources below).
Ingredients (enough for 4 servings (almost two pounds) of black cod (each fillet 1 inch in thickness) : 1/2 cup of sake kasu (sake lees – you can find it available at Japanese food store in the refrigerated section*), 1/4 cup water, 1/4 cup mirin, 1 to 2 Tablespoons coconut brown sugar (my preference), 2 Table organic white miso paste, sea salt for seasoning
Preparation:
Using paper towel, pat the fish dry completely.
In a large mixing bowl, combine sake kasu, miso, water, mirin and sugar, slowly whisk and blend until the mixture is smooth.
Fill a large zip lock bag with the marinade, carefully place the fish and make sure they are completely covered with marinade. Put the bag and lay it flat on a prep tray (I used stainless prep trays, available at Japanese stores). Seal and refrigerate for 1 (minimum) to 2 days.
When you are ready to cook the fish:
Preheat the broiler.
Remove sable fish from marinade, using paper towel, carefully wipe the fillets dry without breaking them. Do not rinse with water!
Lined a rimmed baking sheet with aluminium foil
Place the fish skin side down, lightly season with sea salt
Broil until the surface is nicely browned and fish begins to flake, about 5 minutes. Keep an eye closely and make sure you don’t burn the fish!
Turn the fish gently to brown the skin, 2 to 3 minutes.
To test if the fish is done, I used Japanese metal chopsticks (thin skewers will do) to poke the fish gently. If it slides in smoothly, it’s done.
Remove the bones before serving.
***Instead of broiling, I baked the sable fish (parchment paper lined rimmed baking tray) at 400 degrees, it took 10- 12 minutes to cook through. Sear the fish first if you want the “browning” effect.
FYI: I served the cod with a shiitake and shimeji mushroom dashi “jus” with sea asparagus and Shanghai bok choy, seaweed flakes and green onion (recipe will be posted at later date).
Resources:
*Osake Artisan Sake Makersake kasu, available directly from their store in Granville Island (Vancouver) or online, It is also available at Fujiya (912 Clark Drive, Vancouver, BC)
For sea salt: I met the wonderful team from Vancouver Island Salt Company a couple of months ago through Dinner Party YVR; my personal favourite is their smoked sea salt. Their products are available at finer food stores, check out their website, eat and shop local!
For sable fish: My go to place in Granville Island, Seafood City; owner Brian and his crew will take good care of you! They carry condiments also which go well with seafood; I got a bottle of Jonny Hetherington’s Habanero pineapple hot sauce which I used for my spicy sweet and sour sauce, something very tasty to try and “think outside of the box”.
The pie I made for Thanksgiving Dinner – this picture was selected and made it to this week’s Vancouver Sun Gastropost.
My sister-in-law Marcia is a pescatarian/vegetarian and a serious dessert/chocolate connoisseur; for almost every Festive family dinner gatherings when a “meat” dish is usually the main event, our mother-in-law would happily make our family’s favourite “Not real sushi – California rolls” (recipe already posted) or baked a salmon fillet for her, changing the sauce (Teriyaki, beurre blanc) each time. Although she enjoyed them always, it became a routine…
I decided to change things up just a bit after revisiting the classic recipe: I know it’s not major or “life defining” culinary moment, the thought process behind the thinner crispy potato crust (instead of usual mashed potatoes) was very simple; the “pie’ idea was inspired by Marcia’s past lovely desserts and believe my entire extended family will find this more enjoyable, it’s less carbs (haha) and less fat (from the sauce to the filling). Over time, I find myself putting even more consideration and thought into the food which I cooked for family and friends, a lot of times it is for health reasons and their preference; this is my way to express my love to those close and dear to me.
This dish, along with the juiciest turkey I’ve ever cooked together with my mother-in-law, and the sides and salads (Thanks Barb and Gina) and desserts (thanks Marcia! The chocolate truffle cake and apple galette were divine) prepared by my sisters-in-law were devoured in no time.
That was another happy busy day in the kitchen, happy meal, happy gathering, happy family moment together…I have so much to be thankful for.
On another happy note: I submitted the “pie” picture to Vancouver Gastropost for last week’s “Pie Oh My” Mission, it was selected and featured in Saturday’s weekend paper! Thank you Vancouver Sun for the acknowledgement (OO).
Ingredients: (For 9 1/2 inch pie plate)
500 g wild sockeye salmon fillet, 2 leeks (white part only, finely sliced), 4 to 6 Yukon gold potatoes (peeled and grated into strips), Japanese panko (handful), fresh juice of 1 lemon, 1 Tablespoon fresh dill (chopped), 1-2 Tablespoon grapeseed oil, sea salt and white pepper (for seasoning), grated cheddar (as you like and it is optional)
For Lemon dill infused bechamel: 4 cups of “tempered” unsweetened almond milk, 3 to 4 sprigs of fresh dill, peel of 1 lemon (strips), 1 bay leaf, 1/4 teaspoon kosher or sea salt (or to taste), 1/4 cup (approximately) of all-purpose flour, 3 to 4 Tablespoon grapeseed oil (traditional roux calls for butter, fat and flour is usually 1-1 ratio, I’ve used less than 3 Tablespoon of grapeseed oil). **Using grapeseed oil and unsweetened almond milk is my personal choice.
Preparation:
One Day Ahead: Prepare Lemon dill infused Bechamel Sauce
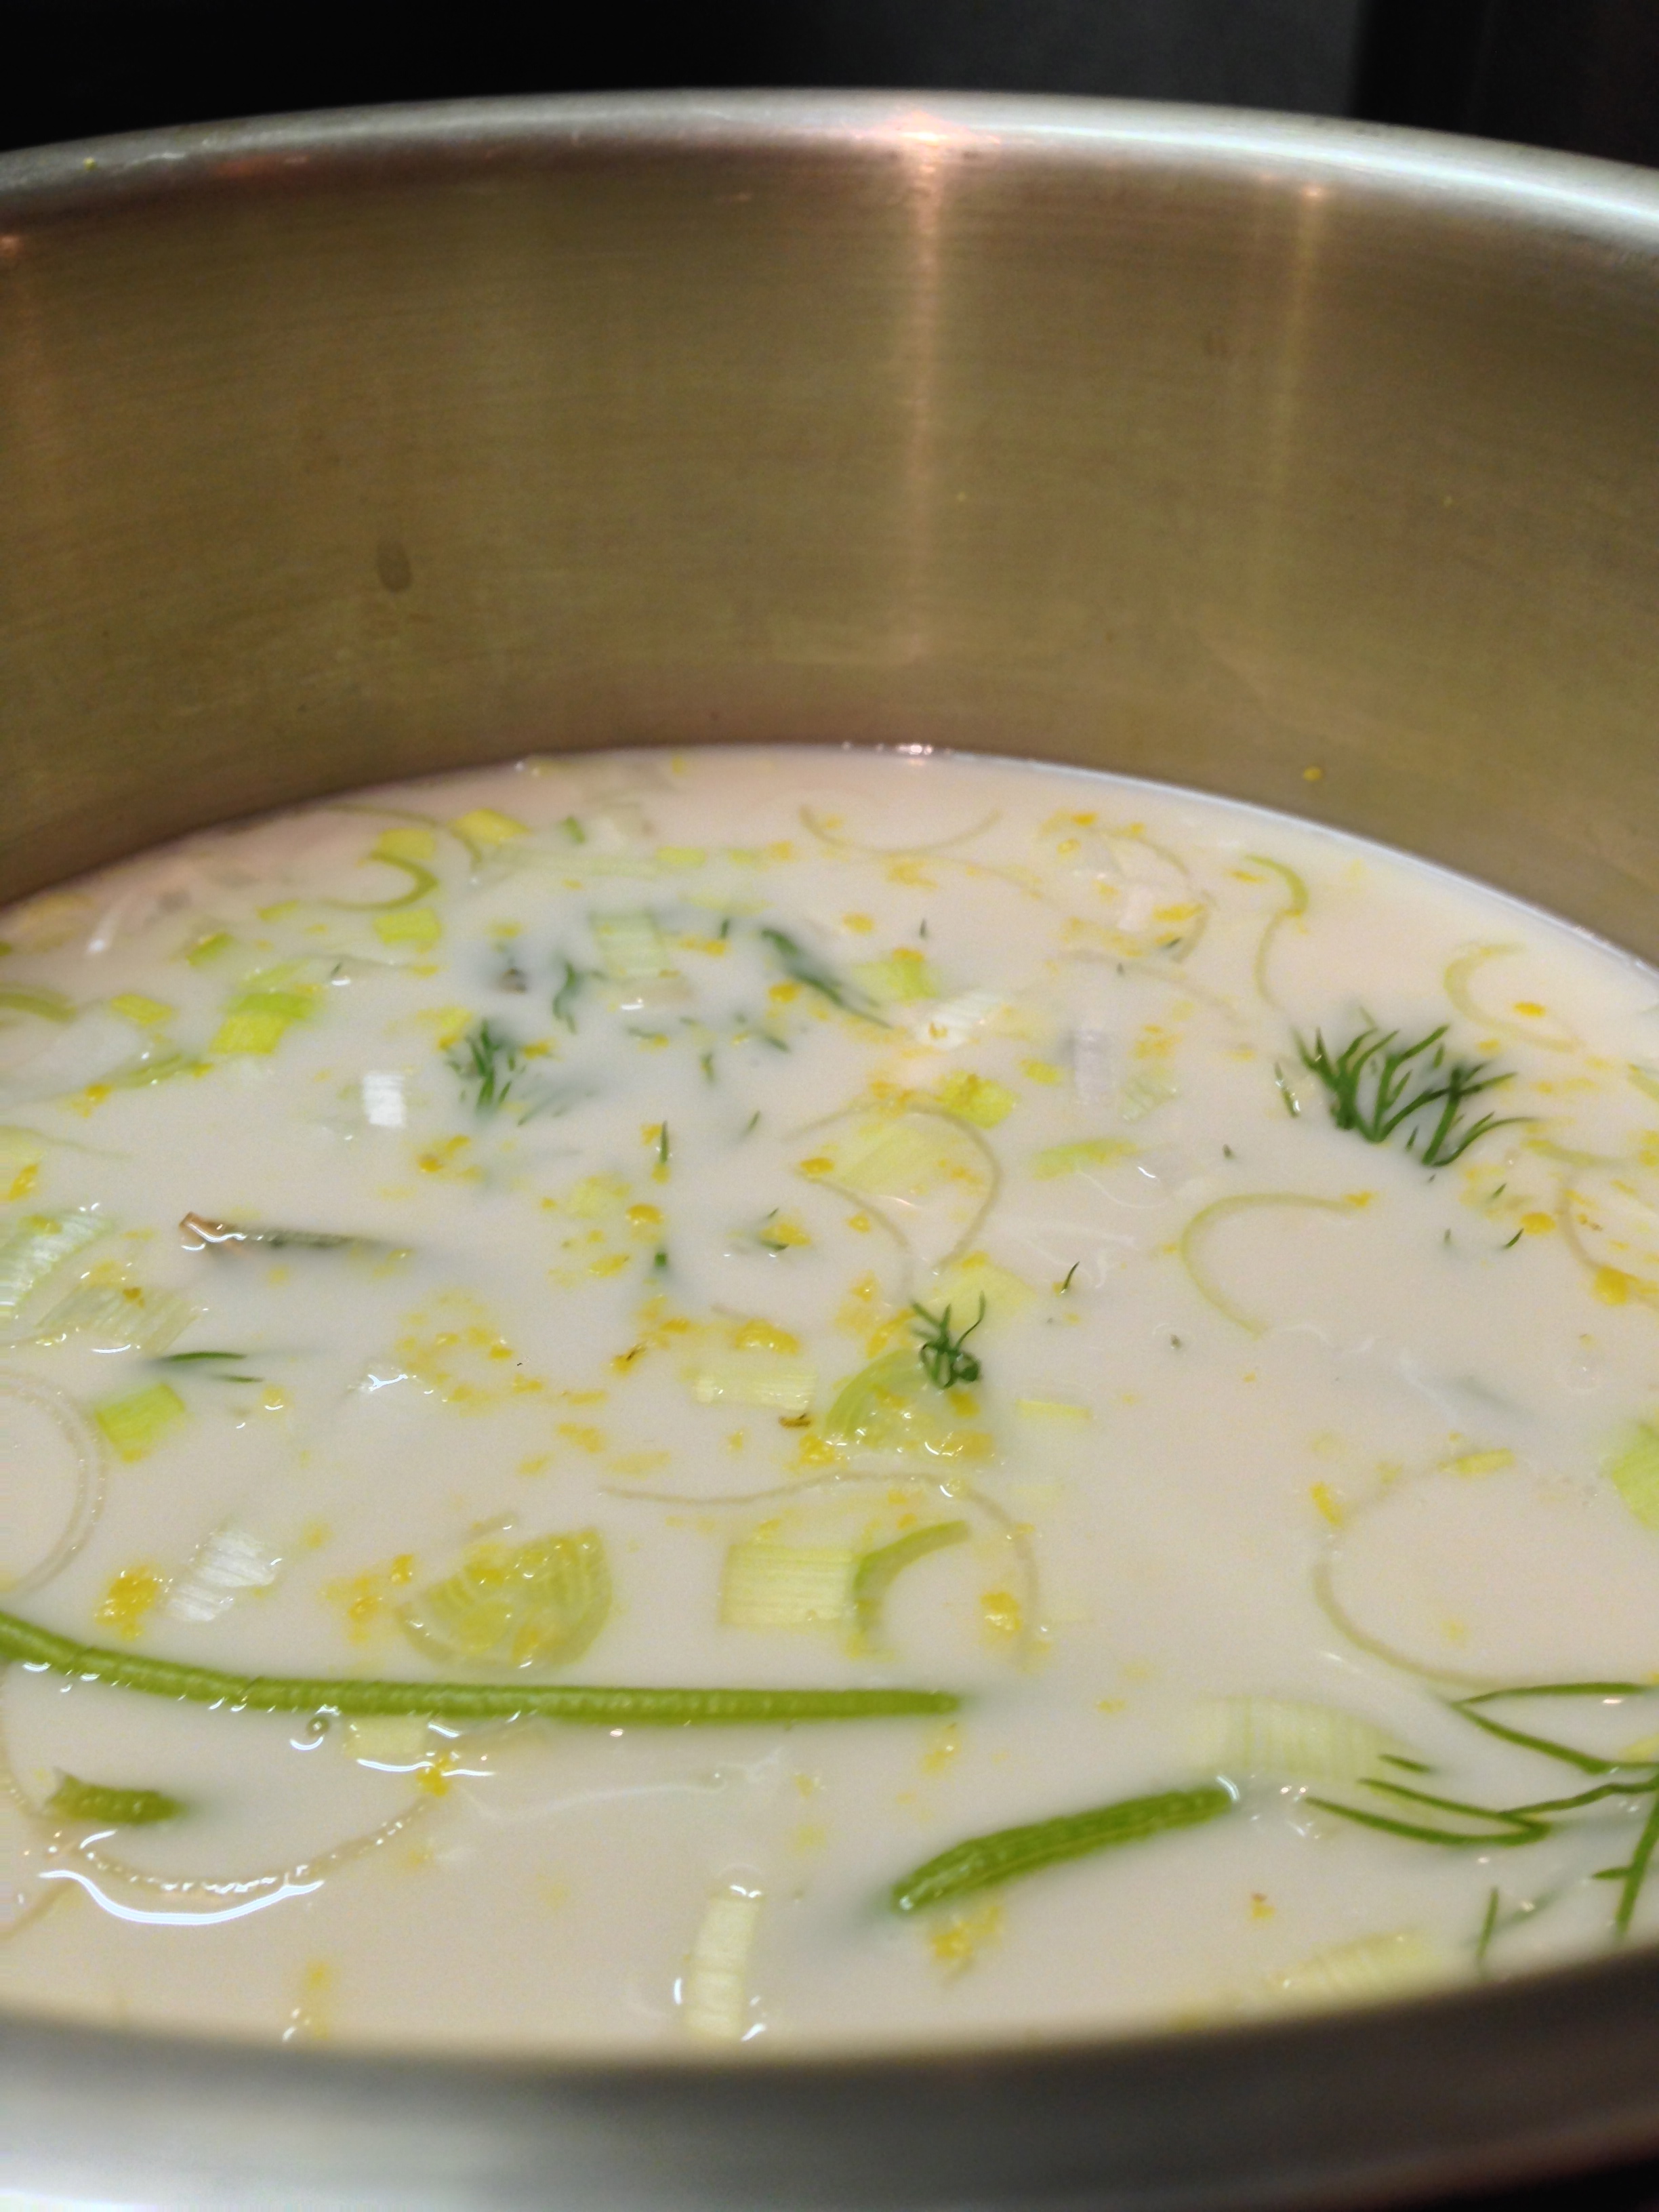
– In 4 quart Sauce pan, start “tempering” and flavouring of almond milk: (this is an important step as cold milk will result in lumpy and grainy sauce)
– Rinse saucepan with cold water (do not wipe dry – this will prevent the fats and protein from scorching the bottom of the saucepan), add unsweetened almond milk, then the aromatics – sprigs of fresh dill, lemon peel, bay leaf.
Flavours are steeping and simmering away!
– Using medium low heat, bring liquid to a simmer (Do not bring to a boil), turn off the heat, cover with lid and let the flavours steep for at least 15 minutes (I did for 20 minutes).
– The hot milk should now be ready; it can now be strained into a measuring cup. Discard all flavouring ingredients.
– Wipe the saucepan clean, over medium low heat, start making the white roux (combining fat and starch together): add olive oil to saucepan, when oil begins to bubble, begin adding flour, keep stirring to form a smooth thin paste. The flour should be incorporated into the olive oil fully, continue to cook the roux by stirring constantly over medium low heat in order to prevent scorching (burning), the process should be no longer than 2 minutes (white roux does not take on colour), you are looking for a smooth and thin consistency (not thick and lumpy).
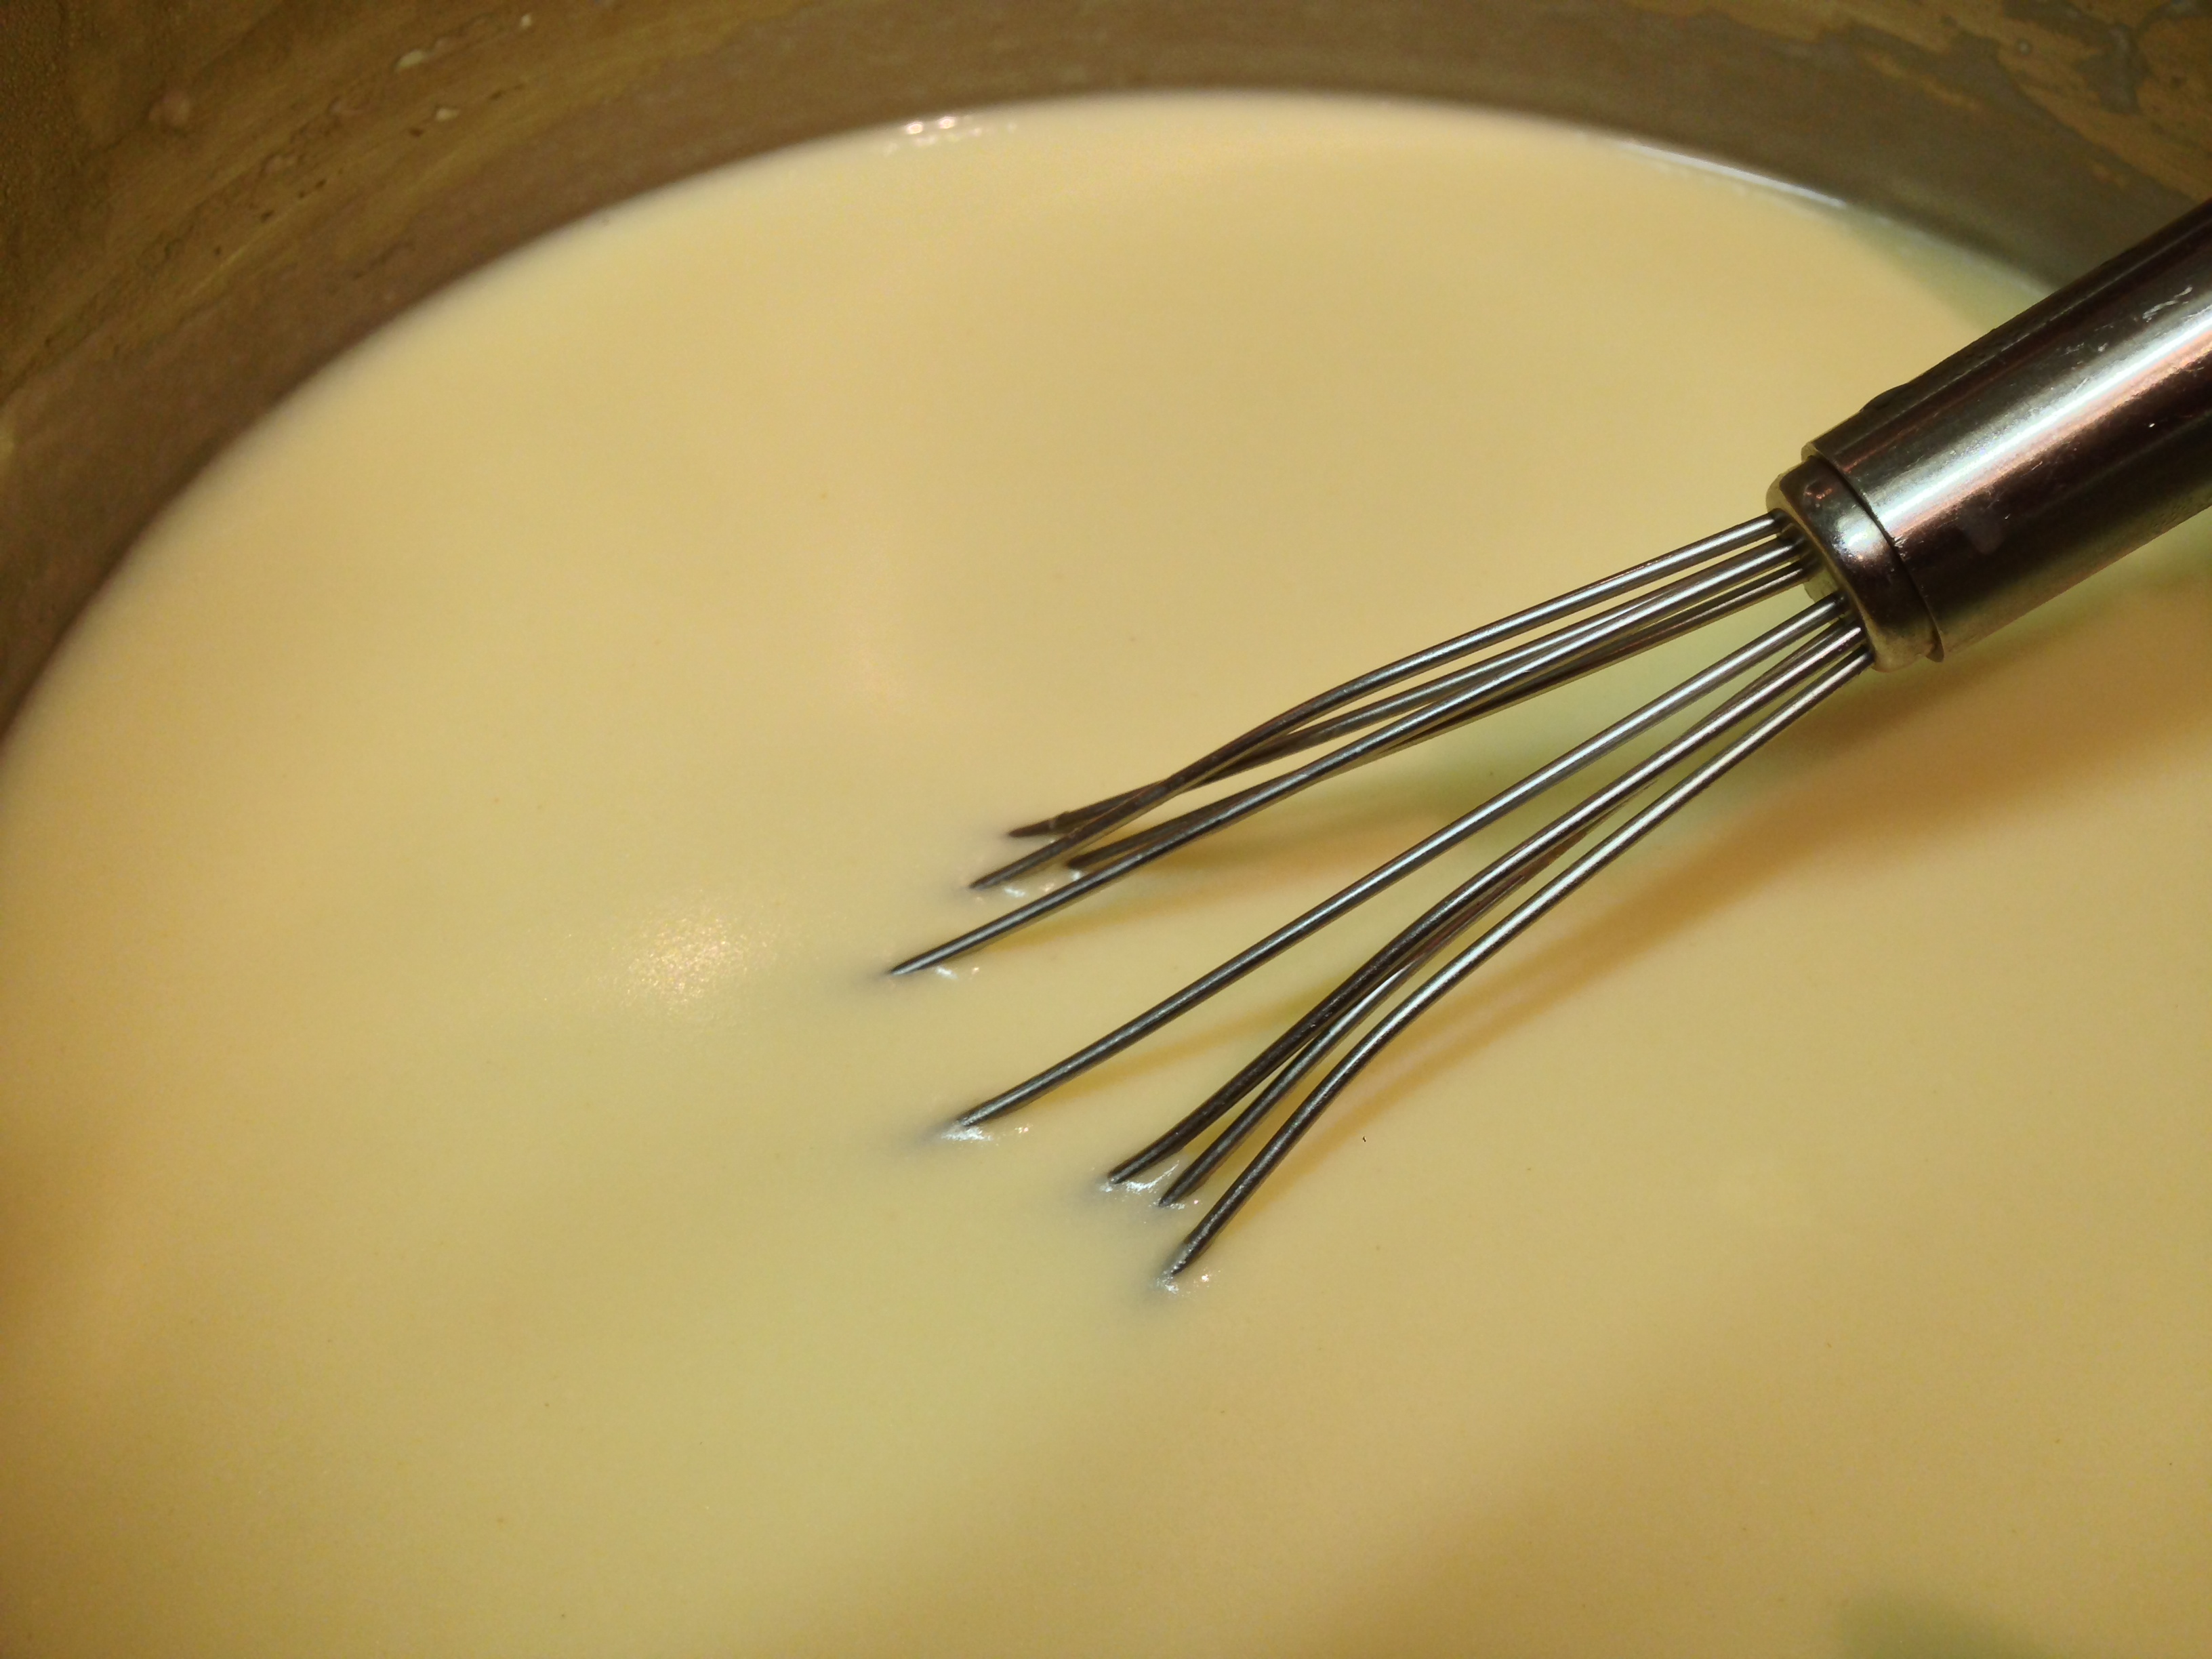
– Once the roux is ready, add hot milk to hot roux a bit a time while constantly whisking (easy to use a flat whisk) or stirring (spatula), let the mixture come back to a simmer each time before adding more hot milk. Once all the milk has been added, bring it to a gentle simmer while stirring. Lower The heat and simmer gently for 10 to 15 minutes, pot uncovered (important), in order to cook out the starch flavour. Be careful not to bring to a boil as sauce will burn or split. Using a whisk, stir occasionally, make sure you scrape the bottom edges of the pot. The sauce should coat the back of a spoon nicely, once it finishes cooking, turn off heat, season to taste with sea salt and white pepper (optional). Strain the sauce into one more time for a silky smooth texture.
Whisking Away!
– To store properly, pour sauce into a glass bowl and place a plastic wrap over the hot bechamel, when cooled completely, refrigerate. The sauce will thicken considerably; to reheat the next day, add a little water (or stock) to the cold bechamel, stir and bring to a simmer.
Preparation on The Day Of:
– Pre heat oven to 350 degrees F (to bake the salmon).
– Clean and pat dry salmon fillet with paper towel, using tweezers (I keep one for cooking) remove pin bones.
– Place salmon fillet (skin side down) in baking tray. Mix 1 Tablespoon grapeseed oil and lemon juice in a small bowl, and drizzle over the salmon. Season by evenly with chopped dill, sea salt and fresh ground pepper (optional) to taste. Bake approximately 20 to 25 minutes in the preheated oven, or until salmon is easily flaked with a fork; the salmon should still be pinkish and moist.
– While salmon is baking, peel and grate (or using a knife to slice) the potatoes into thin strips, place in a sieve, add 1 teaspoon of salt. Squeeze out as much liquid as you can with your hands; leave to drain for 10 to 15 minutes. Repeat the process again with another teaspoon of salt, leave for another 10 minutes and again squeeze hard to remove as much moisture as possible. Pat dry with paper towel, cover and set aside.
– Once salmon is cooled considerably (don’t burn yourself!), start “flaking” the salmon by using a fork, the flakes should come off the skin easily. Flake them in “bite-size” (not large chunks), do not include salmon skin, make sure all bones have been removed. Set aside
– In saucepan reheat the bechamel sauce by adding a little water to the cold sauce, stir and bring to a simmer. Turn off the heat when ready.
– In separate 6 quart pot, add drizzle of grapeseed oil over medium heat. Add the leek and cook, stirring often, for 4 to 5 minutes, or until soft but not browned, then add salmon flakes. Turn off and remove from heat, using a spatula, slowly and gently “fold in” bechamel sauce (a few spoonfuls at a time) with salmon mixture. the filling should not appear runny (Do not stir)
– Pre heat oven to 375 degrees F.
– Mix the grated potato strips with a handful of Japanese panko. Lightly brush the bottom of the 9 1/2 inch pie plate (mine is my Mom’s “vintage” Pyrex) with grapeseed oil, then sprinkle with chopped dill. Then pour the salmon filling, and top with the grated potatoes in an even layer, lightly brush the potatoes with just a little grapeseed oil, the crust should brown nicely.
Depend on your liking, you can put more potatoes. Remember to layer them evenly!
– Place on a baking tray in the oven and cook for 40 to 45 minutes, or until heated through and bubbling, the potato crust should be golden brown and crispy. Serve immediately.
Notes:
– Bechamel sauceand salmon flakes can be made one day ahead; just remember to let all prepared foods cooled down, store in proper containers before refrigerate.
I actually prepared this salmon flakes and the bechamel the day before our family’s Thanksgiving gathering; it’s all about “mise en place” – getting organized and give yourself some breathing room on the day of!
If you choose to make the bechamel sauce at the same time, prepare it while the salmon is baking in the oven. Have to work pretty quickly!
– Bechamel sauce, also known as white sauce, is made from roux (butter/flour) and milk. It is a “mother sauce” in French and Italian cuisines, and used as a base for other sauces (for example French Mornay sauce – add cheese to bechamel), so it’s handy to learn how to make the base properly. The choice of herbs to flavour the milk can be changed according to recipe.
The bechamel sauce cooking method is something I’ve learnt through the online cooking school Rouxbe; I am a life-time registered student/member for amateur programs. Their instructional videos are very informative, the instructions I’ve written are based on the narration. For serious home cooks, it may be worthwhile to register (http://rouxbe.com/); they also have professional programs available.
– Be mindful with the seasoning as salt is used to season all ingredients separately (especially the potatoes, salt was needed to “draw” the water), you don’t want to end up with a very salty pie!
– Always adjust all seasoning according to your taste and dietary needs.
– As I’m only a home cook, I’ve tried my best to record the measurements while I was preparing this dish, please feel free to adjust if necessary.
– Adding cheese (grated cheddar) is optional as it makes the dish “heavier”: I did when I made this pie (see main picture) for Thanksgiving dinner, I skipped when I made our smaller home pot-pies for dinner, which I served with peas for dinner. Enjoy (OO)!
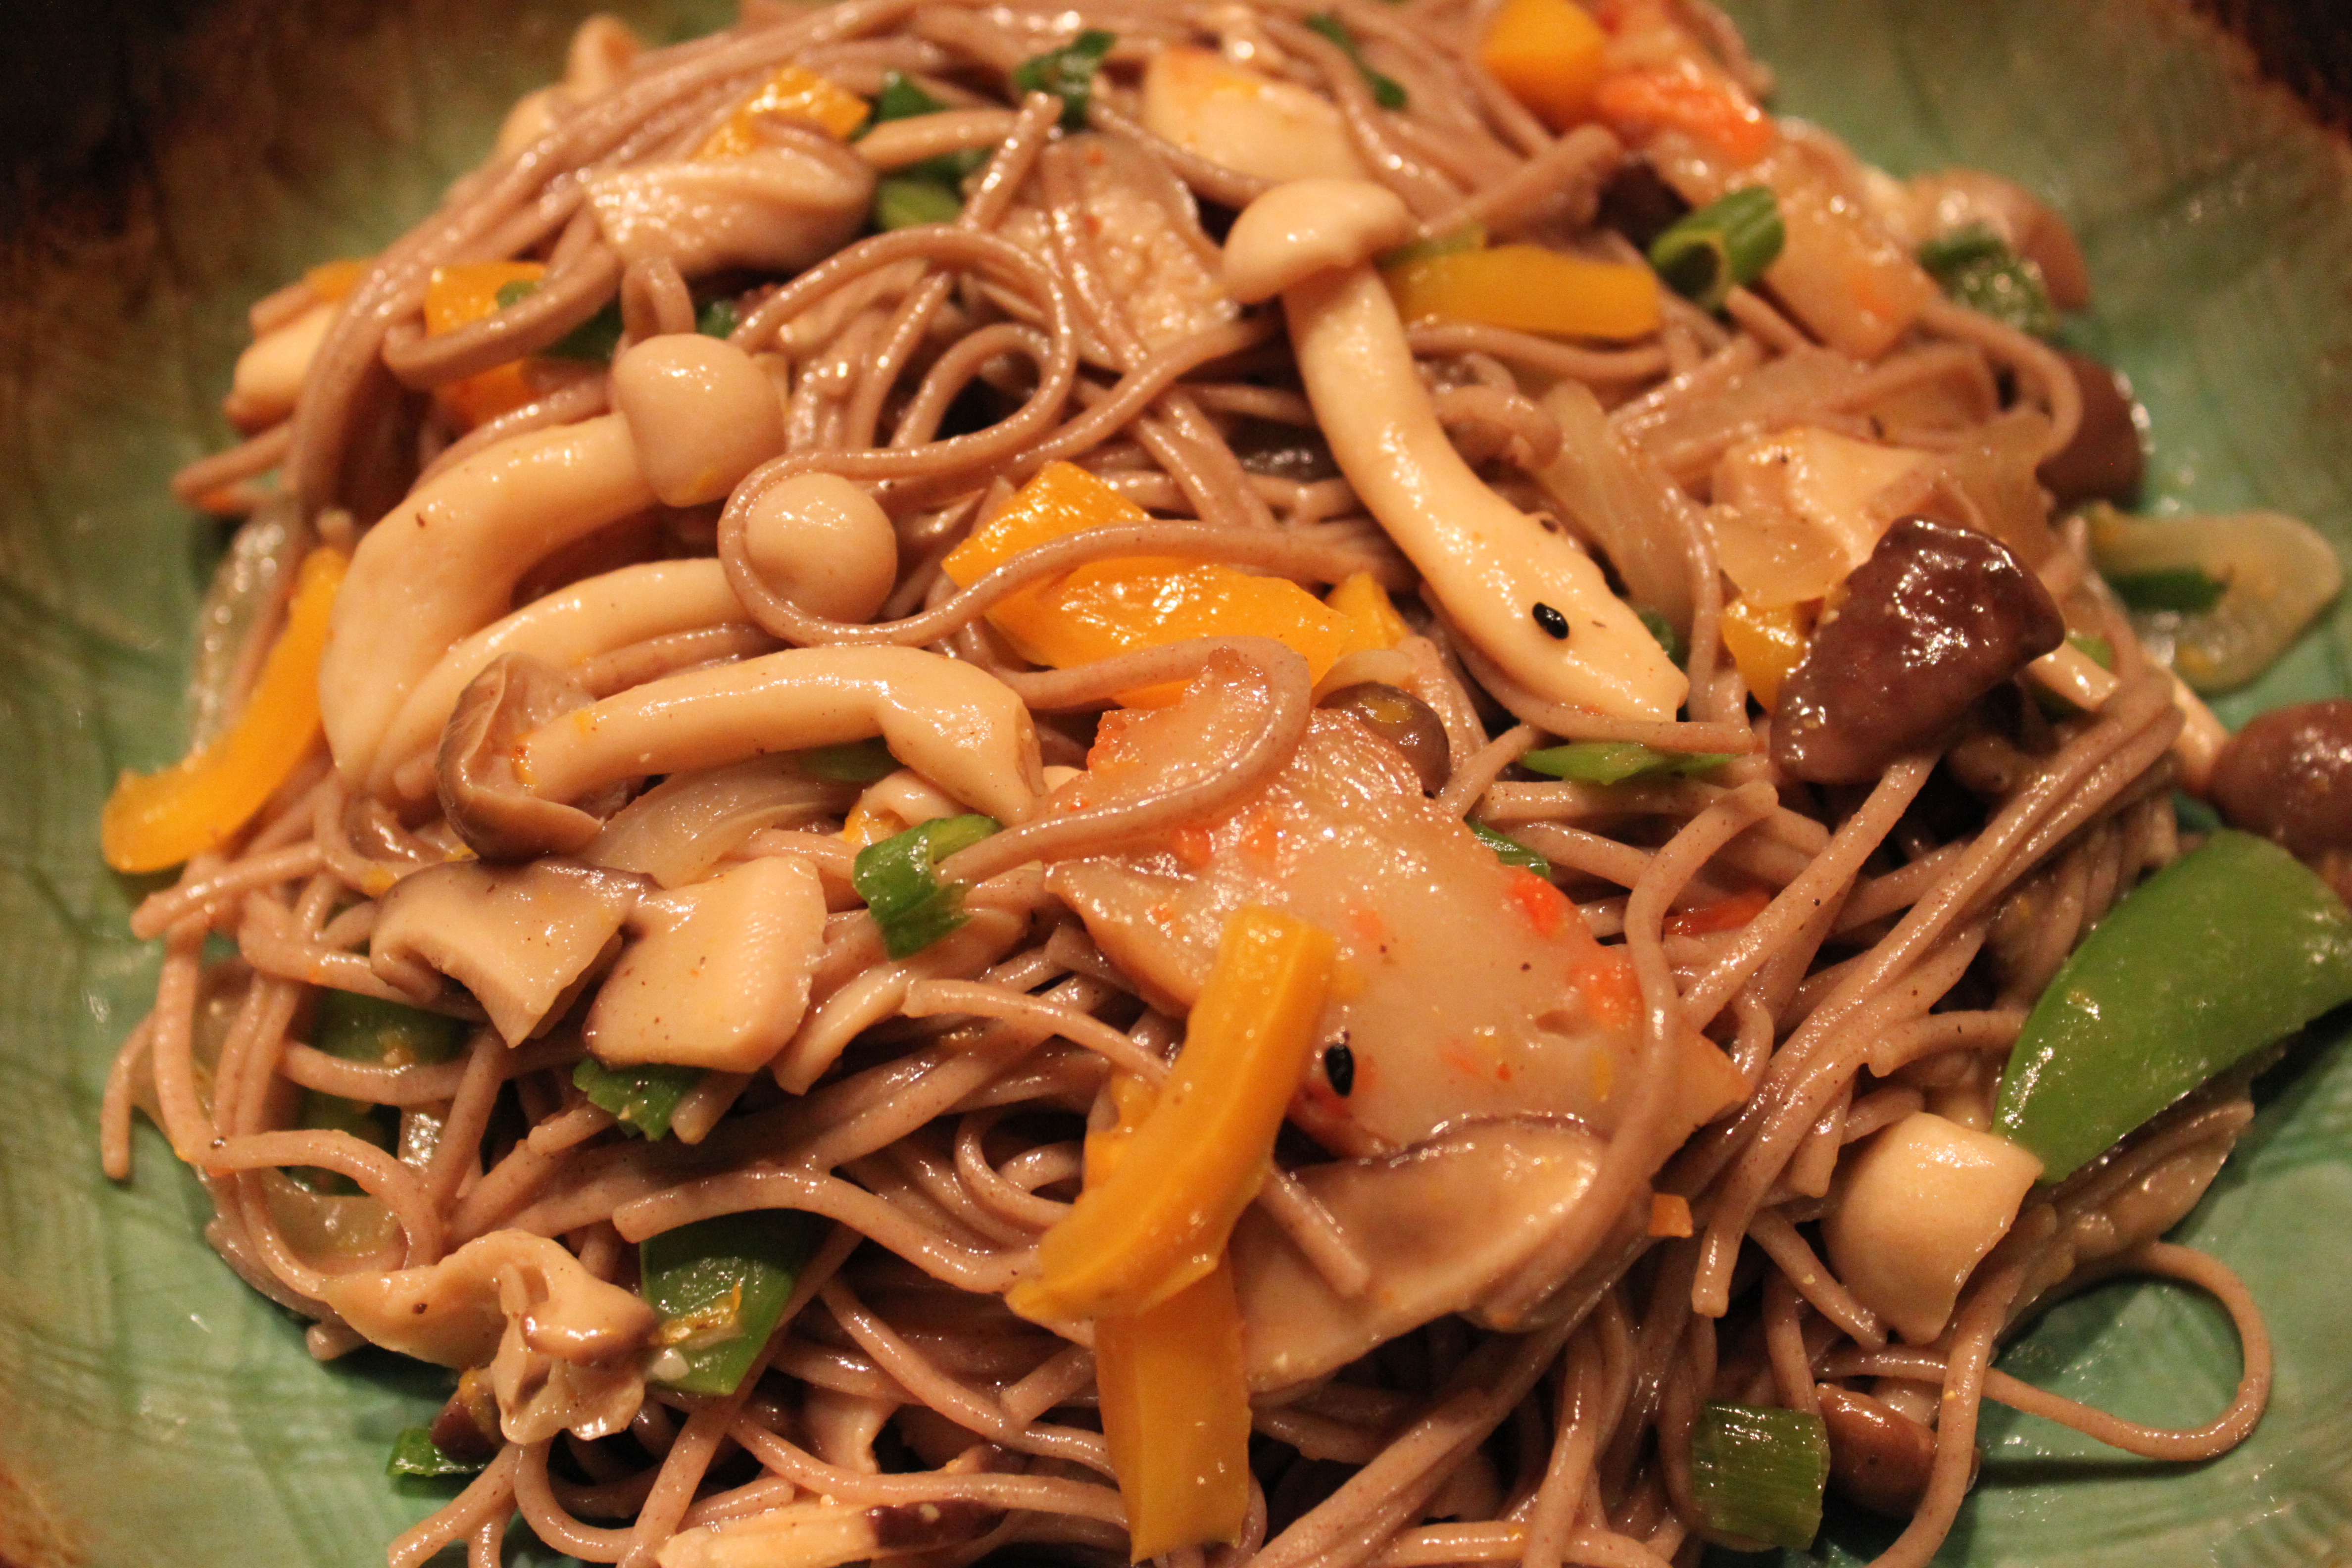
This is my friend’s own recipe, inspired by the different types of soba salads she has had; this light and tasty salad has become a staple on my menu. I also made this for our New Year family gathering, and most recently for my friend’s birthday potluck party.
We made this dish together a few months ago when sea asparagus was in season; it was an excellent addition and added a different texture and taste (“sea-salt”) . As this is a homemade recipe, the quantities and ingredients can be changed according to your taste and dietary needs.
“Poached Pear Queen”, thank you very much for sharing (OO).
Ingredients: (Serves 4 – as light meal)
1 package 100% buckwheat noodles (200g), 1 Tablespoon grape seed oil, 6 to 8 fresh shiitake mushrooms (thinly sliced), 1 package white organic shimeji mushrooms (approx. 100g), 1 package organic buna shimeji (beech) mushrooms (approx. 100g), 1 to 2 cloves of garlic (finely minced), sugar snap peas 250 g (lightly blanched and sliced on the bias), 1 large red (or orange) pepper (thinly sliced), 2 pieces satsuma age (Japanese already cooked fried fish cake) thinly sliced, 1 medium onion (thinly sliced), green scallions (chopped for garnish), 1 Meyer (or regular) lemon zest (for garnish), 1 to 2 teaspoons of Japanese mirin, juice of half a Meyer lemon (or regular lemon), sake (just a dash for mushrooms), kosher salt (a little for seasoning mushrooms), drizzle of sesame oil (optional).
Dressing: 4 to 6 Tablespoon yuzu ponzu sauce, 1 to 2 Tablespoon Japanese soy sauce, 1 small red chilli peppers (thinly sliced), 1 to 2 Tablespoon rice vinegar, black pepper for seasoning to taste.
Preparation:
– Prepare ponzu dressing (Yuzu ponzu to soy sauce – 3 to 1), add sliced red chilli pepper and mix well.
– Lightly blanched sugar snap peas, peel and slice on the bias.
– Separate the white and beech shimeji mushrooms into individual stalks, slice shiitake mushrooms, onion, red pepper and fish cakes, set aside.
– In large saute pan, heat oil over medium high heat.
– Add onions, sautéed until lightly browned, add mushrooms, garlic, Japanese sake, mirin and season with kosher salt (a pinch to lightly season the mushrooms) and black pepper, stirring occasionally until they begin to wilt, approximately 7 to 8 minutes.
– Add red pepper slices, cook for another minute, then fold in snap peas and fish cake, add Meyer lemon juice, mix well and cook for 2 to 3 minutes. Keep in mind you would like to keep the vegetables “crunchy”. Remove from heat and set aside to cool for a few minutes.
– Cook the Soba noodles in boiling water according to package instructions; cook until they are al dente (treat it as pasta). This step requires your full attention as soba noodles can be overcooked easily. When they are done, rinse under cold water (until water is no longer murky), toss and drain the noodles thoroughly.
Soba noodles rinsed, tossed and drained thoroughly.
– In large mixing bowl, (by hand using plastic disposable food prep gloves or tongs) toss mushroom mixture with soba noodles, the lemon zest and green scallions, slowly drizzle dressing and toss well with all ingredients.
– Taste and adjust with your choice of seasonings (soy sauce, yuzu ponzu, black pepper) according to your own preference.
– Lightly drizzle with sesame oil or garnish with toasted sesame seeds (optional).- Served immediately or chill until ready to serve.
Notes:
– Meyer lemon has a very distinctive flavour which is slightly resembles yuzu. It is not as sharp as regular lemons which work just as well and adds a different flavour.
– When adding the dressing, do it slowly; some of you may prefer a even lighter or heavier dressed noodle salad, you may not use all (or you require more) dressing. Be prepared! If you choose to chill the salad before serving, it’s best to have more dressing available as noodles may become a little dry after refrigeration.
– The small red chilli pepper is spicy; so beware! if you want “kick”, add another one (OO).
– You can make this entirely vegetarian by omitting the fish cakes. Back in September 2013, we made this dish with sea asparagus, maitake and crimini mushrooms, be adventurous and change the ingredients!
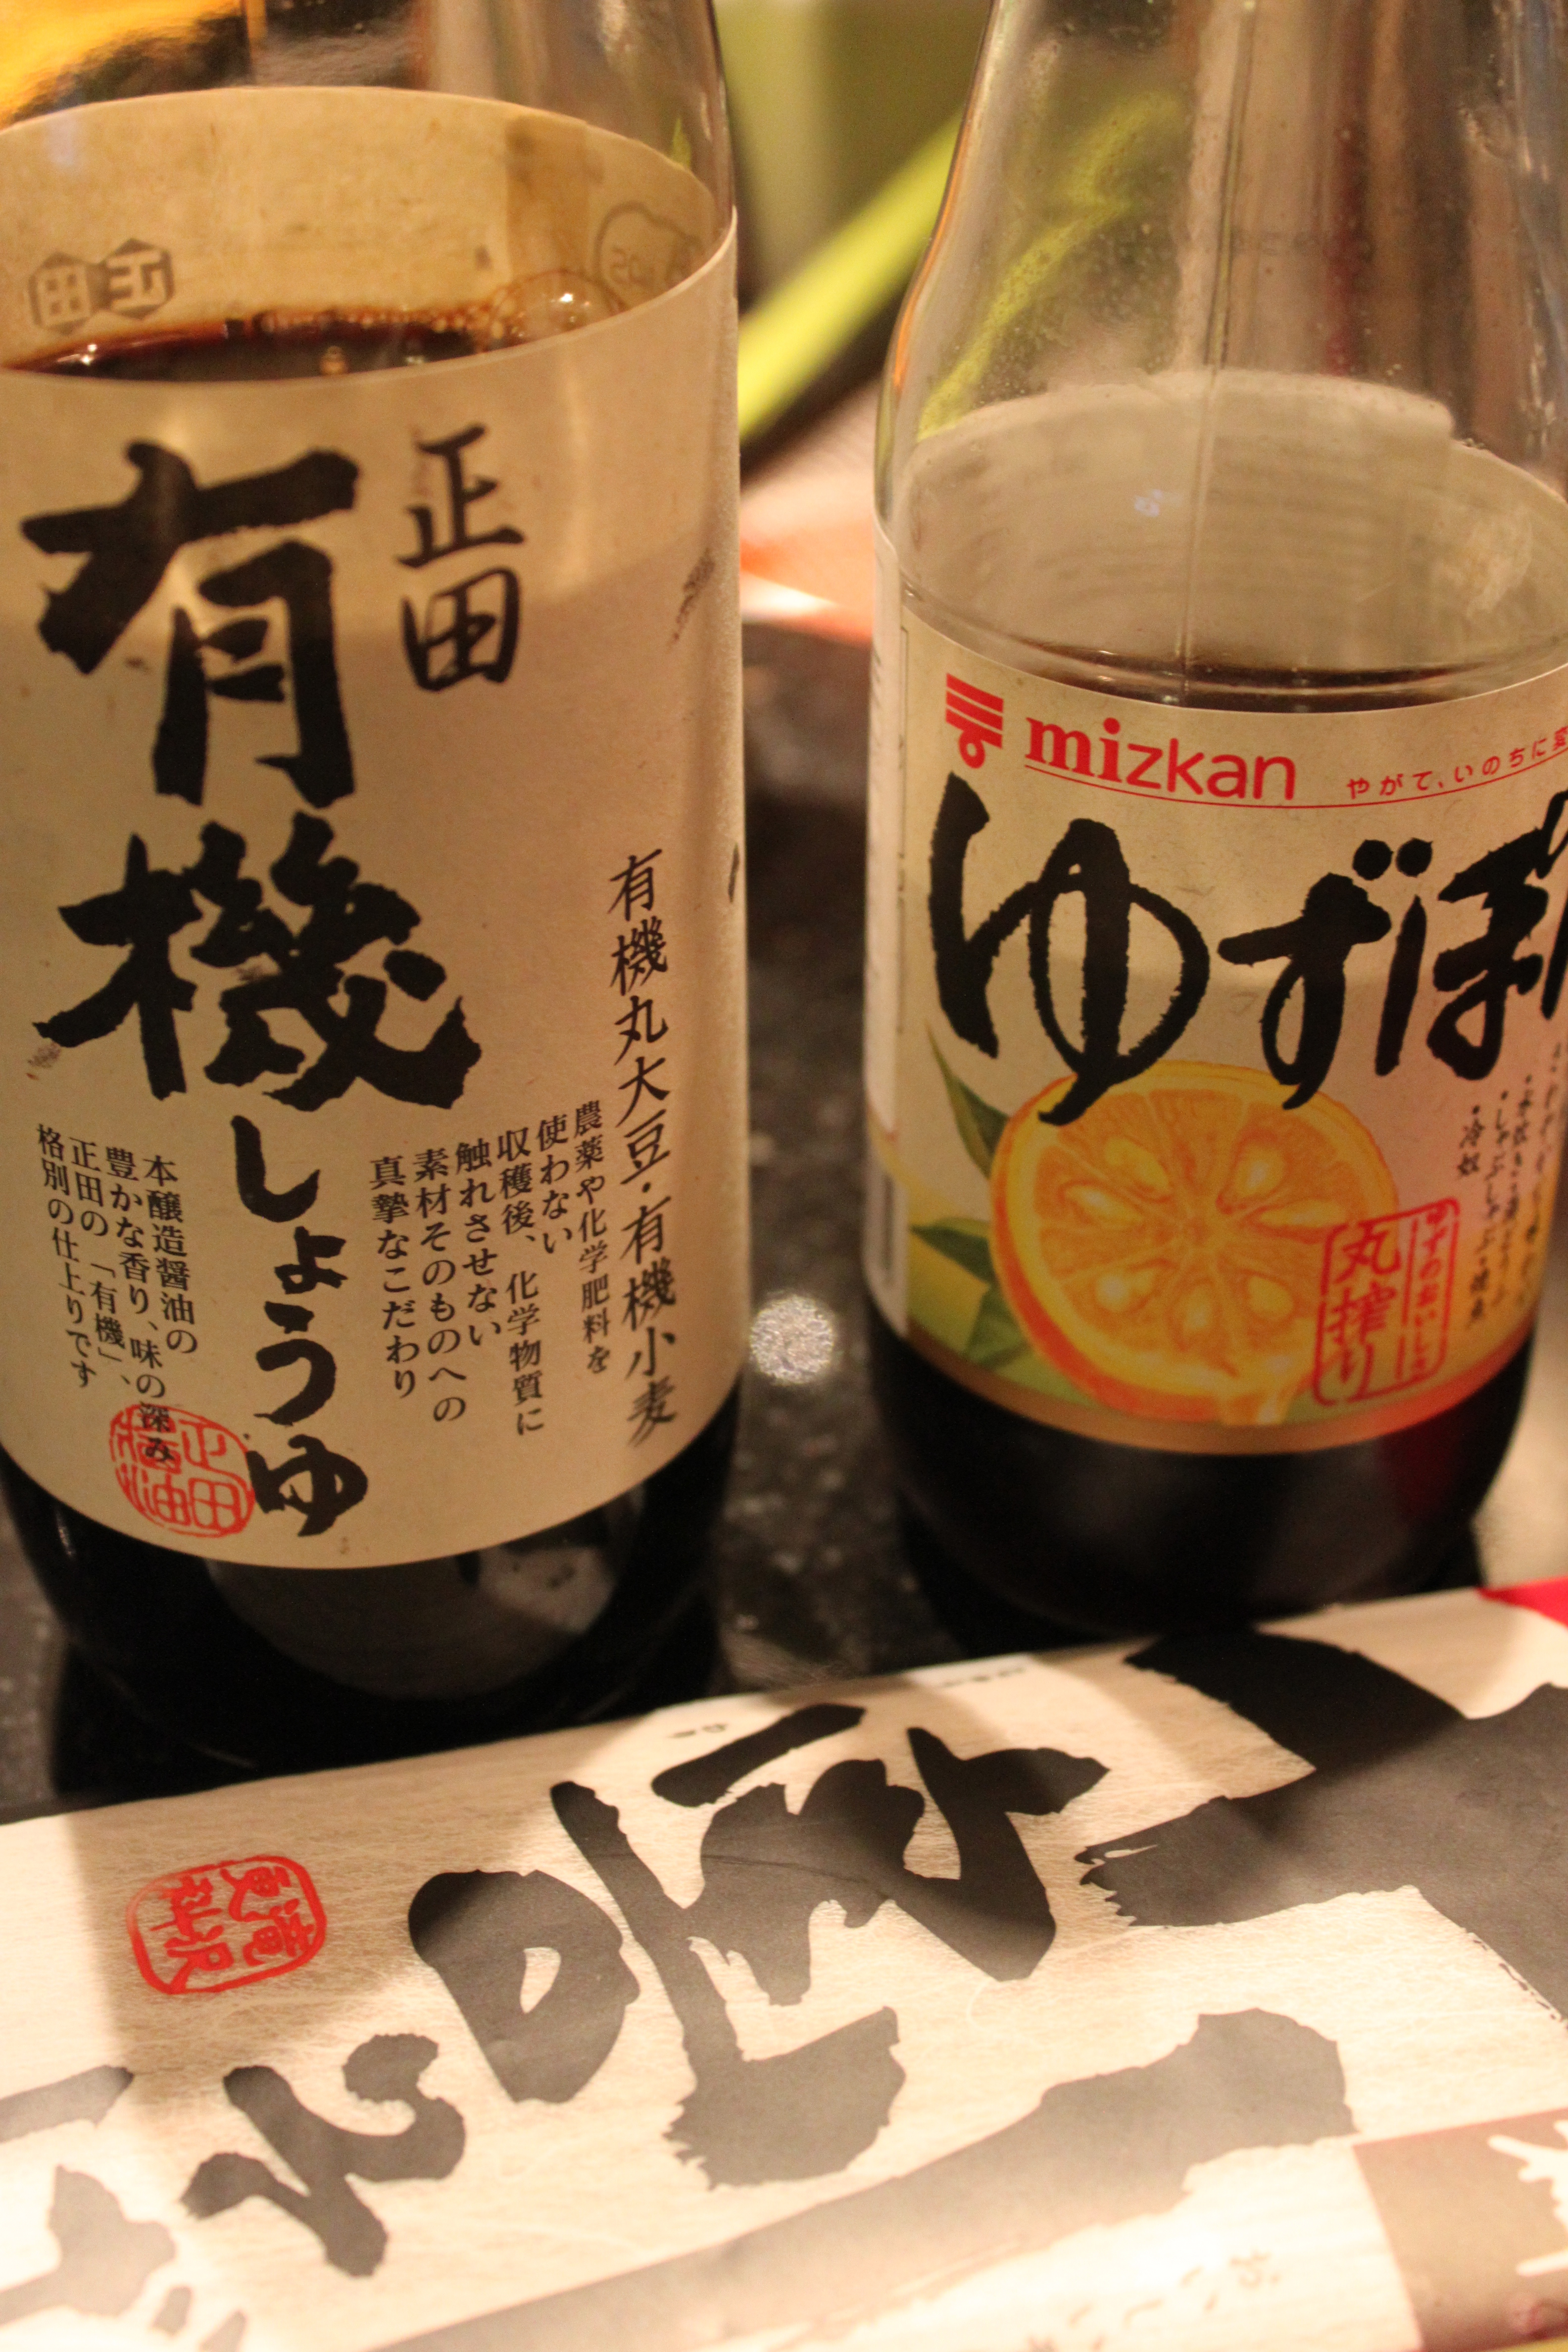
– Here’s a picture of some ingredients: organic soy sauce (top left), Yuzu Ponzu (top right) and 100% buckwheat noodles (bottom). In Vancouver, you can purchased all ingredients at Fujiya Japanese food store (912 Clark Drive, Vancouver, BC). The organic packaged mushrooms are also available at T & T Asian supermarket (various locations).
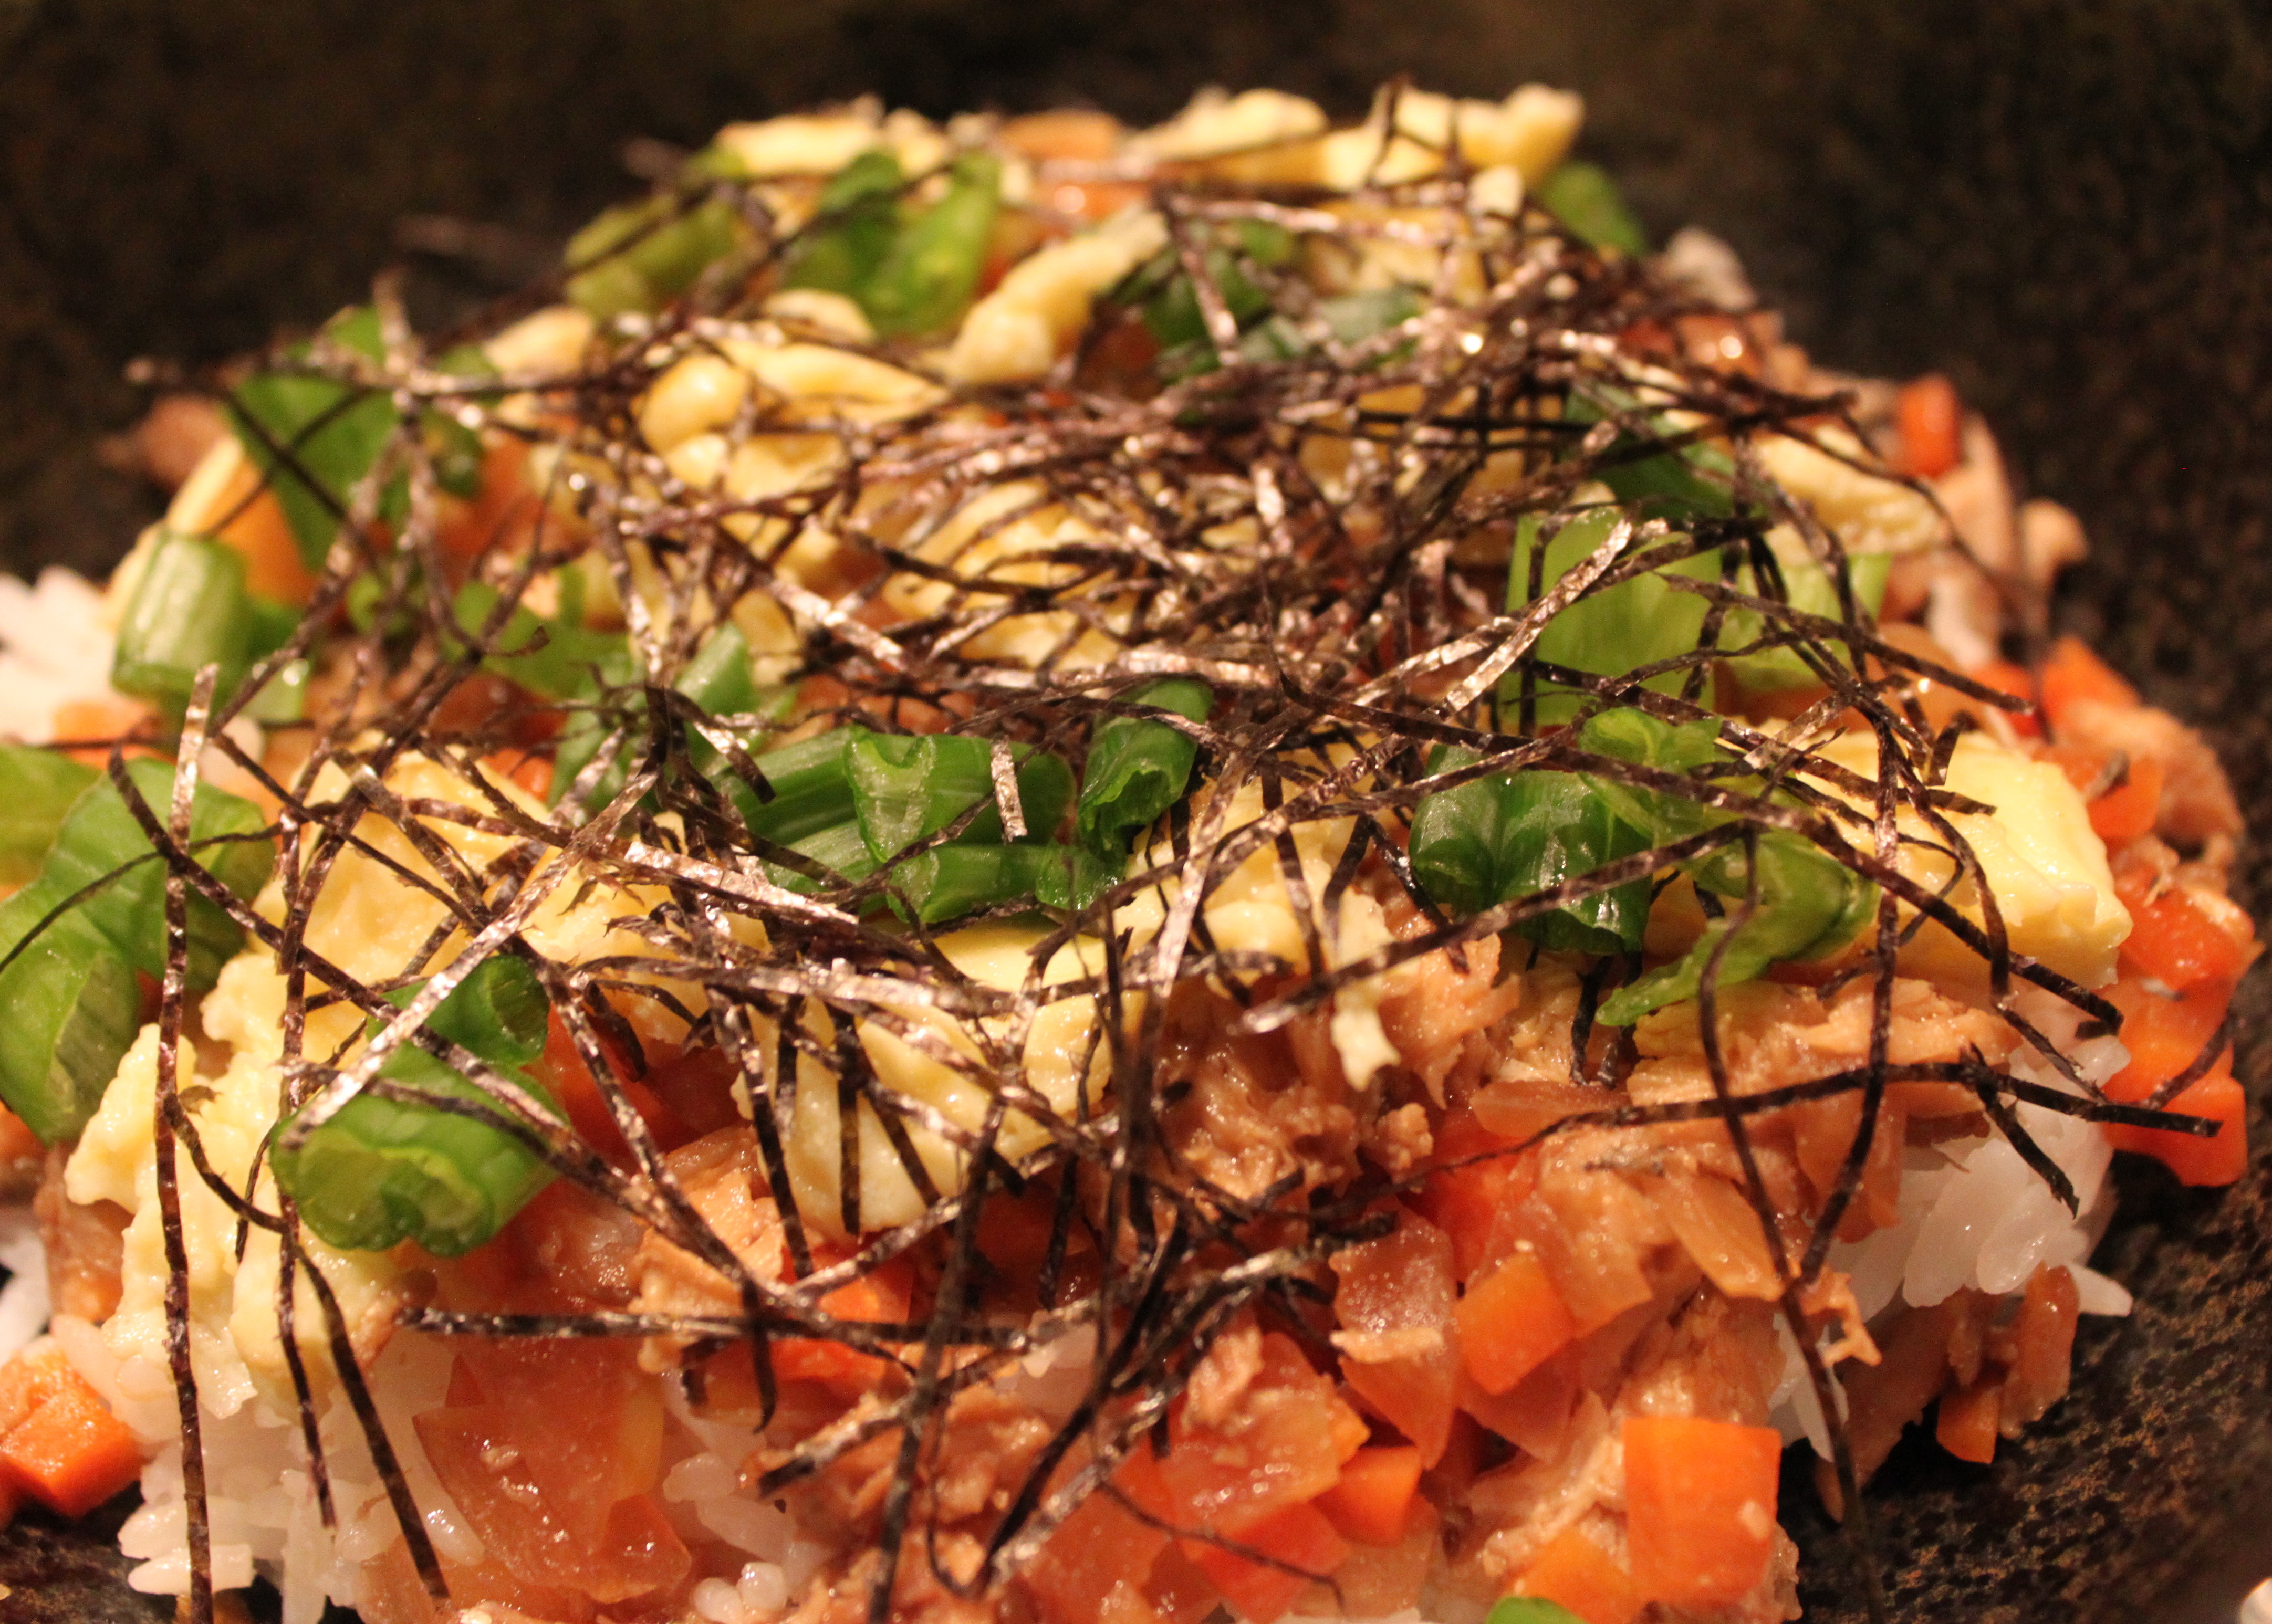
My Saba Soboro Donburi (leftovers next day assembled at home) – Itadakimasu!
I had the most wonderful time cooking with my “Twin” Green Apron and her husband Shin; they welcomed us to their house for a family style dinner and I spent the entire afternoon learning from Shin how to prepare Mackerel three ways.
This simple and delicious Japanese dish is served with rice, scrambled egg, chopped green onion and toasted nori (Japanese dried packaged seaweed); the combination of flavors and texture is perfect! Shin-san adapted this recipe from“Gochisosama ga Kikitakute” by Harumi Kurihara (English version is Harumi’s Japanese home Cooking);she is one of the best known cookery writers in Japan. Enjoy (OO)!
Ingredients: (serves 4)
Saba Fillet (2-3 slices), 1 medium carrot (finely diced), 1 medium onion (finely diced), 1 Tablespoon grapeseed oil (2 if necessary), 4 Tablespoon Japanese soy sauce, 2 Tablespoon Sake, 2 Tablespoon Mirin, 1/2 Tablespoon Miso (brown), 1 Tablespoon brown sugar, 1 Tablespoon finely grated fresh ginger.
For serving: Japanese Rice, 3 eggs, green onions (green part only – thinly sliced) and Japanese dried toasted seaweed (shredded)
Preparation:
– Check and remove any visible bones from the mackerel fillet.
– Using a spoon, scoop the fish meat from the skin from head to tail, pulling away from the skin. Set fish meat aside.
– Peel the carrot and onion, chop into very fine pieces, and grate (or chop) the ginger finely.
– Prepare sauce: Mix soy sauce, sake, mirin, sugar in measuring cup, set aside.
– Heat oil in nonstick skillet over medium heat, add ginger and mackerel, let them brown lightly. When fish meat starts to flake, add onion and carrot, sautéed for 2 to 3 minutes.
Saba, onion, carrot and sauce cooked together until very liquid is left.
– Stir in sauce and mix well with ingredients. At Medium low simmer, slowly cook until there is very little liquid left in the pan. Stir occasionally to keep ingredients from burning.
– While fish is cooking; prepare scramble eggs (seasoning not required), green onion (thinly sliced) and toasted seaweed (cut in small pieces).
Scrambled eggs, Toasted Seaweed and Saba Soboro – ready to assemble!
To serve: On fluffy Japanese rice, add scrambled egg on top, sprinkle with green onion and toasted seaweed then you’re ready to go! It’s best served as family style (see picture on left) and everyone can assemble their own “donburi” to taste.
Notes:
Mackerel are now readily available at Asian supermarkets or local fish store. In Vancouver, you can find mackerel at H-Mart (various locations), or Seafood City (http://www.seafoodcitygi.com/) at Granville Island. All Japanese “staples” can be purchased at Fujiya (912 Clark Drive, Vancouver, BC).
Mackerel usually comes in whole, you can ask fishmonger to fillet them. For the more adventurous home cooks, you can fillet them at home; there are many instructional videos available through Youtube.
– The ratio of mackerel meat to vegetables can be adjusted according to your own preference.
– We had a carrot salad (recipe will be posted) as side dish; when I had my leftovers, I prepared a seaweed and wild greens salad on the side.
I love the combination of tomatoes and saffron; this recipe is adapted from the January 2014 issue of Bon Appetit Magazine which emphasized on healthy eating and offered many new fish recipes. I have made slight modifications: I used sea bass instead of cod, added organic chicken broth and onions for more flavour, and increased the quantity of the poaching liquid. The fish was served with wild rice blend which was so flavourful when eaten together with the sauce; for a moment, it felt as if I was having a “fish only – deconstructed” paella…Enjoy (OO)!
Ingredients: (Serves 4)
1 to 2 Tablespoon olive oil, 3 to 4 garlic cloves, thinly sliced; 1 medium onion, sliced, 1 teaspoon crushed red pepper flakes, 1 28 oz can organic whole peeled tomatoes, drained; 1/2 cup dry white wine, 1/2 cup low sodium organic chicken stock (store-bought or homemade), 2-3 bay leaves, pinch of saffron threads, 4 4 to 5 ounce sea bass (fish size approximate), white pepper, kosher salt and black pepper to taste, chopped parsley as garnish (optional)
Preparation:
– Heat oil in dutch oven (or pot with lid) over medium heat. Add onion, garlic and crushed pepper flakes and cook, stirring often, until fragrant (garlic should not take on any colour), about 3 minutes. Do not burn!
– Add tomatoes, crushing with your hands as you add them, wine, bay leaves, saffron and chicken stock (or water).
– Bring to a boil, reduce heat, and simmer until flavors meld, 25 – 30 minutes, season with kosher salt and pepper.
– Reduce heat to medium low, pat dry the sea bass with paper towel, season with salt and white pepper; place in poaching liquid. Cover and cook at a bare simmer until sea bass is opaque throughout and begin to flake, 8 – 10 minutes (*Note – thicker pieces will take longer to cook).
– Gently transfer sea bass to shallow bowl and spoon poaching liquid over, serve on bed of wild rice.
Notes:
– The original recipe uses cod; other suggestions – black bass or flounder fillets.
– Saffron can be overpowering; adjust accordingly. For Non-meat eaters (pescatarians), omit the low-sodium chicken broth and use water instead. As always, adjust the seasoning according to your dietary needs and taste.
– I cooked the wild rice separately, we prefer either Nuworld Wholesome Wild Rice Blend (Costco or Price Smart) or Lundberg Wild Blend (Choices, East West Market (on Main Street) in Vancouver, BC or Whole Foods (various locations)).
I made this dish for our Christmas Eve Dinner gathering; I adapted the recipe from one of my recent cookbook purchases, Ottolenghi The Cookbook, by Yotam Ottolenghi and Sami Tamimi. I have modified the original recipe slightly according to my own taste and dietary needs (see notes). I love this recipe, the flavours worked wonderfully together!
Ingredients (serves 4)
4 spring (wild/organic) salmon fillets (200 g each), 2 Tablespoon olive oil, kosher salt and freshly ground pepper. For the red pepper and hazelnut salsa: 2 red bell peppers, 6 Tablespoon (90 ml) olive oil, 2 Tablespoon (15g) hazelnuts, 1/2 ounce (15g) chopped chives, 1 clove of garlic (crushed), grated zest and juice of 1 lemon, 2 Tablespoon cider vinegar, agave syrup*, kosher salt and freshly ground pepper. (*syrup not part of original recipe).
Preparation:
– To make the salsa: Pre-heat the oven to 400 F (200 C). Quarter the peppers and remove the seeds. Toss with 2 Tablespoon of olive oil and a generous pinch of salt. Put them on a baking sheet and roast them in the oven for about 20 minutes, until they are cooked through and slightly charred. Transfer to a bowl, cover with plastic wrap and leave to cool. Keep any of the roasting juices.
– Roast the hazelnuts on a separate baking sheet for 10 minutes, until lightly colored (you can do this while the peppers are in the oven). Allow them to cool down, rub with your hands to remove the skins. Chop the coarsely. (Note: Hazelnuts can be toasted on frying pan; if you can find roasted hazelnuts, skip roasting step).
– When the peppers are cool, peel them and cut into 1/4 inch (5 mm) dice. Mix with the hazelnuts, combine with 4 Tablespoon olive oil, and the rest of the salsa ingredients. Add kosher salt, ground pepper and agave syrup (just a little if you find the flavours to be too “tart”) to taste.
– Have a baking sheet lined with parchment paper ready. Brush salmon fillets with olive oil, season with salt and pepper.
– Heat grill pan (one with ridges to get the grill marks; must be pretty hot), put salmon fillets (two at a time, no overcrowding and easier to handle) skin side up on the hot grill and cook for approximately 2 to 3 minutes, then carefully flip over and cook the skin side for approximately 2 minutes. Using a fish slicer (tongs work also), carefully but briskly remove the fillets from the pan and place them, skin side down, on the lined baking sheet. Be careful not to break the fish or scrape off the nice char marks!
– Finish cooking the salmon in the oven, slow bake at 250 F for 10 minutes, or until the fish are just done and very light pink inside. Serve warm, with a generous spoonful of salsa on top.
Notes:
– Salmon fillets: stay with wild salmon! I used wild spring salmon for this recipe. Ask your fish monger to portion them for even cooking (for the adventurous and skilled home chefs, you can prepare yourself!), check fillets and remove bones.
– I used Meyer lemon (a cross between lemon and either mandarin/orange); it has a very tangy flavour and worked just as well. I found the roasted hazelnuts at the Vancouver Farmer’s Market (certified organic from Poplar Grove Arbour, Agassiz). Agave syrup is not one of the ingredients in the original recipe, I used very little to sweeten the salsa; as for the olive oil, I’ve used less oil to cook the peppers and fish.
– If you are serving this for a dinner party, the grilling of salmon fillets can be done an hour ahead (which I did); complete the final step when you are about to serve dinner.
This was a recent weekend experiment based on an older #Fine Cooking’s recipe (http://www.finecooking.com/recipes/braised-pacific-halibut-leeks-mushrooms-clams.aspx); pacific wild cod was used instead of halibut, clams were omitted and shimeji mushrooms were used. The cod is very delicate, be sure not to overcook and handle with the fish with extra care while serving.
Ingredients: (serves 4)
4 oz (1/2 cup) unsalted butter, 4 packages of shimeji mushrooms (can be found in Asian supermarkets), 3 large leeks (white and light green parts only, thinly sliced, about 4 cups), kosher salt and freshly ground pepper, 3 cups low sodium organic chicken broth (or homemade , 4 pieces Pacific wild cod (medium size, 6 ounces), 1 Tablespoon finely chopped fresh flat leaf parsley (for garnish, parsley infused oil will be a good option), black truffle salt**optional
Preparation:
Melt the butter over medium heat in Dutch Oven.
Add leeks to pan, cook for 2 minutes, then add mushrooms; season lightly with kosher salt and pepper. Cook gently, stirring occasionally, until softened but not browned, approximately 7 to 8 minutes.
Add broth, raise the heat to medium high, and bring to a boil.
Pat dry the cod with paper towel; portion the fish (same size to cook evenly) then season both sides with salt and pepper. Gently place (nestle) the fish among the vegetables in the Dutch Oven.
Bring the broth back to a boil, cover tightly, and reduce the heat to low. Cook gently until the fish is just cooked through (approximately 8 minutes, I used a knife to “peek” and check for doneness, colour changes from translucent to opaque).
Serve the fish in shallow soup bowls (preferably warmed), topped with leeks and mushrooms, ladle the broth. For finishing touches, sprinkle a hint of black truffle salt (optional, do not overuse as it’s overpowering) and garnish with chopped parsley*.
*Additional notes:
The black truffle salt is optional – My friend Haruko brought me a jar from Italy as a present (Thank you so much!). We used very little to finish the dish and it was stunning! Since we didn’t use the clams, the truffle salt added more depth and flavour to the broth. Perhaps a few drops of parsley infused oil will round off the dish nicely than the chopped parsley. If you have time and the ingredients (do not throw away the roast chicken caucus), it is worthwhile to make your own chicken stock and have it ready for use in the freezer anytime. We had a salad as a first course and I will post the recipe later (OO).
You can use olive oil instead of butter (1/2 cup butter = 1/4 cup plus 2 Tablespoons olive oil), or combine together to enhance the flavour.
#Fine Cooking offers many excellent basic cooking tips, other than Rouxbe, I use the website and cookbooks/magazines as reference all the time.
This is a simple recipe (Tom Klong Plaa Kra Phong, a nice dish to try other than Tom Yum Goong) from Blue Elephant Cooking School in Bangkok, Thailand; I took a half day class (4 dishes plus visit to local street market) during my short visit in December 2012. Classes are available year-round at two locations, Bangkok and Phuket:http://www.blueelephant.com/cooking-school/.
The portion is for 1 person, please adjust accordingly. Conversion: 1 gram = 0.035274 ounces
Ingredients:
80 grams Sea Bass (Fillet and cut into bite size pieces), 200 Grams Chicken Stock
(I’ve used Pacific Cod and works just as well; fish stock can be used in place of chicken stock)
Vegetables and Herbs:
10 grams shallot (crushed), 4 thin slices galangal, 1 coriander root (crushed), 5 birds eye chili (crushed), 3 stems Thai saw coriander (cut 1 cm in length (can substitute with regular coriander), 1 stem lemongrass (bruised, crushed into pieces), 1 kaffir lime leave (torn, no stem), 2 dried chilies
Seasoning:
1 1/2 Tablespoon Fish Sauce, 1 1/2 Tablespoon Tamarind juice, 1/4 teaspoon sugar and 1/2 teaspoon lime juice
(this is the basic ratio, you can always adjust according to taste)
Preparation:
– Prepare the vegetables and herbs (sliced, diced, grind – always have everything ready!)
– Using medium heat, dry roast lemon grass, galangal, shallot and dried chillies until their aromas develop (don’t burn them)
– Add stock, bring to boil, add coriander root and kaffir lime
– Add fish, cook well and do not stir (our instructor emphasized this as stirring will break the fish into small pieces); when bubbling, add seasoning and gently mix well, taste and adjust if necessary.
– Once boiled, remove from heat and add crushed birds eye chillies, coriander and lime juice
– Remove coriander root prior to serving, enjoy!
Spicy and Sour Soup with Sea Bass, Thai Green Curry (in background) – we enjoyed the dishes at the dining room after class completed. Will go again for sure when I visit Bangkok next time.
Here’s the picture of the dish I made at the school:
**Galangal is not the same as ginger and is commonly used in Thai cooking. The cooking process for this root is the same as cooking ginger, it has a peppery flavour and commonly used in soups, curries and stir fried dishes. I found the vacuumed packed galangal here in Vancouver at Gourmet Warehouse (imported from Blue Elephant). Since Thai food is so popular everywhere, this ingredient may be available at your local Asian grocery stores.
The instructions are based on my notes; I made this dish for Father’s Day Dinner and my family loved it! Due to “cheek shortage” at the market, I had to improvise and use halibut fillet; it worked just as well.
Ingredients: (serves 3-4 PPL)
Halibut Cheeks (2-3 per person; Vancouverites, cheeks can be purchased at Granville Island (http://granvilleisland.com/)
15 pc nugget (different varieties) potatoes, 3 bay leaves, 1 tbs salt, 1 liter of water, 3 sprigs of thyme, 2 Tbs Butter
Mixed Mushroom Puree: 2 cups Mixed (button, brown) mushrooms, rough chopped, 1 pc chopped shallot and 1 clove chopped garlic, 1/2 thumb ginger (grated), 1/2 cup cream, white wine
Shaved Vegetable salad: Asparagus, Beets (boiled), Baby Lettuce, Carrots and Radish with Citrus Vinaigrette (1/4 tsp lemon juice, 1tsp Extra Virgin olive oil, salt and pepper to taste)
Preparation:
Boil potatoes in cold water and salt (use enough water to cover potatoes), cook through, drain and set aside
In hot pan add shallot, garlic and ginger (cook until translucent), add mushroom and “sweat” the vegetables, when all liquid evaporated, add wine to deglaze, then cream and cook until fork tender. Puree in blender set aside.
Prepare vegetable salad:
Vegetables all prepared, later toss in citrus vinaigrette
Beets (boiled, use rag to remove skin, slice with mandoline (be extra careful when using one), Asparagus (can be eaten raw or parboiled quickly in hot water and “shock” in ice bath in order to retain the crispness) then thinly sliced using vegetable peeler, Carrots (peeled, thinly sliced using peeler) and Radish (thinly sliced easier with mandoline). Prepare vinaigrette and set aside. Can soak vegetables in cold water to retain the colour (it will lose some flavour). Be careful when using mandoline to shave the vegetables!
To finish the dish:
Strain the vegetables, lightly toss in vinaigrette, reheat potatoes in separate frying pan using butter, bay leave and thyme, season accordingly; reheat mushroom sauce (there’s cream, low heat)
Halibut cheeks – pat dry, season with salt and pepper, add to Hot pan (use low smoking point oil) and seared (2-3 minutes per side,cooking time depends on thickness of cheek, translucent appearance turns opaque when done).
To assemble: Spoon mushroom sauce on serving plate, then potatoes (remove bay leave/thyme), place halibut cheeks, then garnish with shaved vegetable salad. Enjoy!