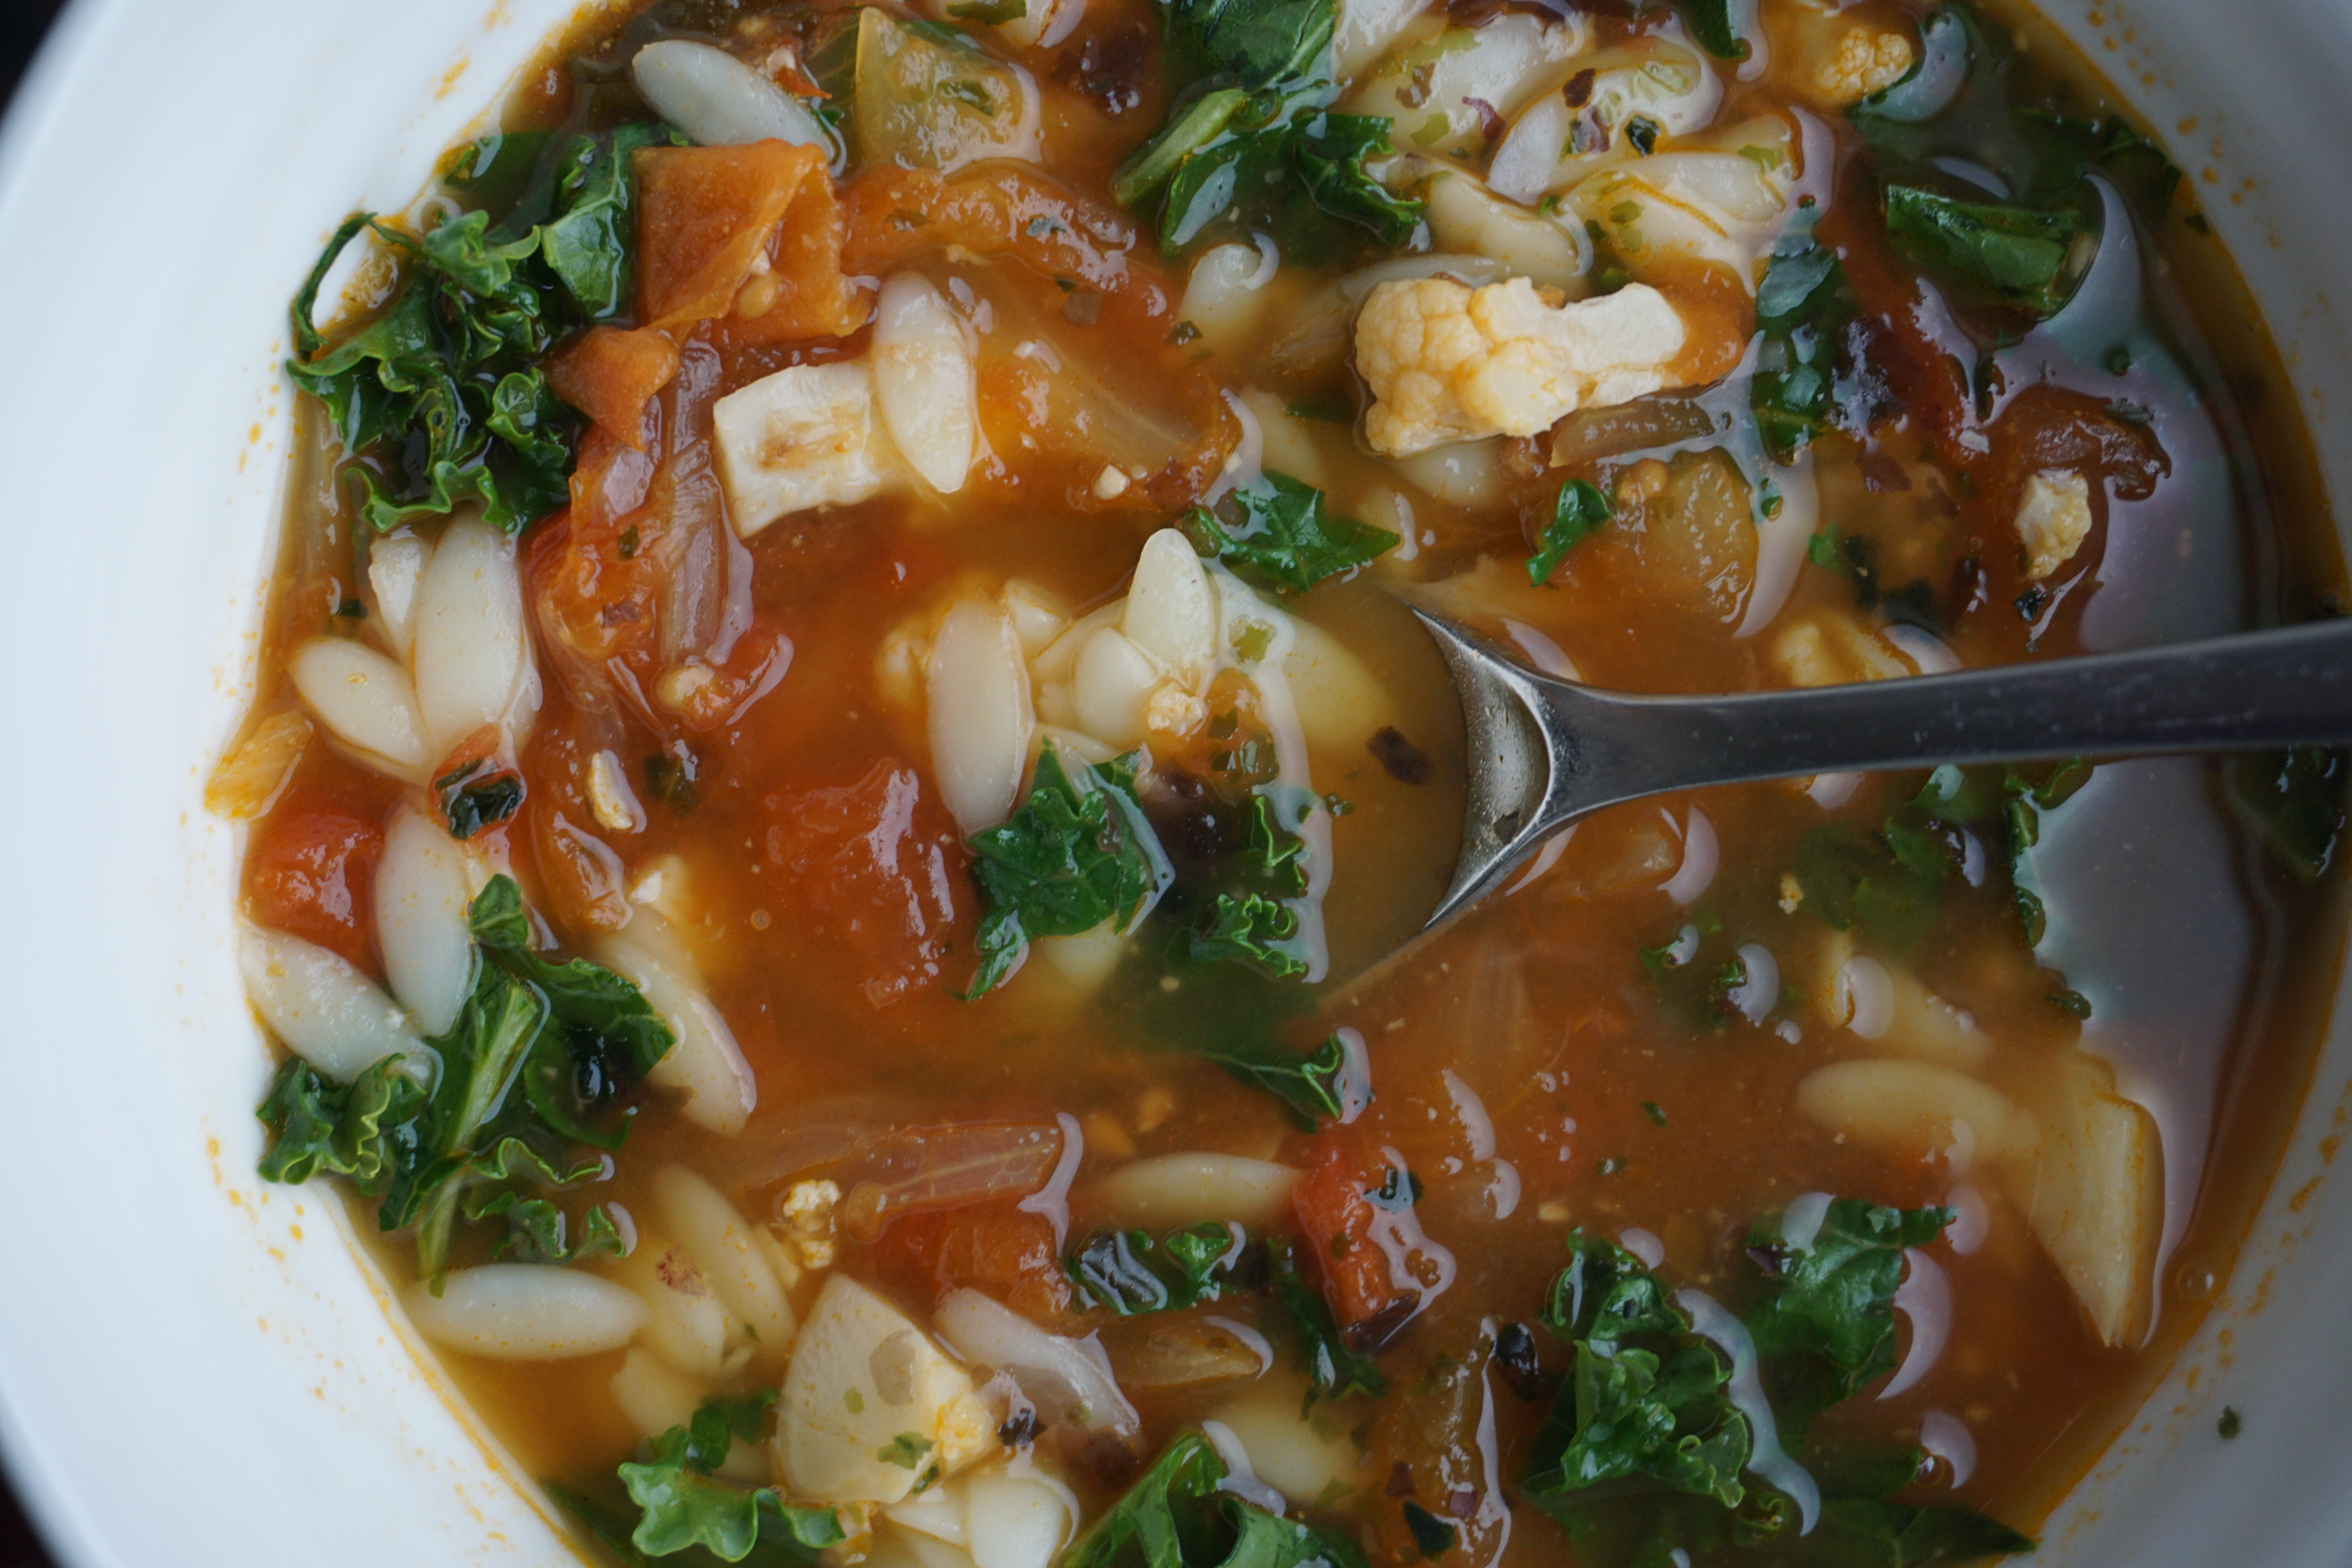
Post holiday season “cleanse” at home with lots of soup and vegetables….I have used this tomato soup base for different dishes (seafood pot, hot-pot base, just to name a couple); today I add orzo and kale, it turns into a healthy wholesome meal… Enjoy (OO)!
Serves 2-4
Ingredients: 8 medium tomatoes (vine tomatoes for this recipe), 1 clove of garlic (peeled and finely minced), 1 large onion (thinly sliced), 2 Tablespoon Extra virgin olive oil, 4 cups of katsuobushi dashi, 1/2 cup of orzo (or pasta of your choice), 1-2 Tablespoon white miso, 2 Tablespoons of kaeshi (see recipe under “Vegetable Curry Udon), kosher salt (to season tomatoes for roasting), kale (handful, stalks removed and finely chopped), savoury seaweed flakes (for garnish).
Preparation:
Pre-heat oven to 350 degrees F.
Prepare the tomatoes: wash, core and cut them into halves, toss in 1 Tablespoon of extra virgin olive oil, lightly seasoned with kosher salt, lay them evenly on baking tray, roast them for 25 to 35 minutes, or until caramelized. Remove from oven, set aside and let them cool.
Prepare the onions (thinly sliced) and garlic (peeled and finely minced).
Prepare katsuobushi dashi broth (can be done 1 to 2 days ahead, reheat refrigerated broth and keep it warm for later use, use kombu broth only to make it entirely vegetarian).
In large pot, using medium high heat, heat remaining Tablespoon of extra virgin olive oil, saute onions, stirring constantly, until onions become soft and turn translucent. Add the 1 Tablespoon of miso to the onions, continue to cook, stirring constantly and mix well, do not burn the miso.
Add the roasted tomatoes to mixture, stir and cook for 2 to 3 minutes.
Add warm dashi broth and 2 Tablespoons of kaeshi to the pot, scrape the bottom, cook for 2 to 3 minutes and bring to a boil. Skim off any fat or scum from the mixture, reduce heat to medium low and simmer for 25 – 30 minutes.
Prepare the kale for garnish.
When soup is almost ready, boil water in a different pot to cook the pasta (usually 100 grams of pasta to 1 litre of water), add kosher salt to boiling water, then add the orzo and cook according to instructions.
Taste and adjust the seasoning of the soup (if necessary), put orzo pasta into bowl, ladle the soup, garnish with chopped kale and seaweed flakes, now ready to serve and enjoy!
Note:
I have used the Rustichella d’Abruzzo’s orzo pasta for my recipe (available at Gourmet Warehouse on East Hastings, Vancouver, BC), the savory seaweed flakes is from Cornish Sea Salt Co (also available at Gourmet Warehouse).
See “Vegetable curry udon” for kaeshi recipe – I have used the kaeshi (instead of just soy sauce and mirin) which I made for the curry udon as seasoning; you can even add a dash of sake when cooking the onions and tomatoes, add red chili pepper flakes to make it spicy, be creative!
Katsuobushi dashi broth – made with kelp and dried bonito flakes
I added leftover cauliflower to the soup and use less orzo, it is always a great idea to have more vegetables.
Cooking requires tremendous focus and patience; some dishes require more patience than others to prepare and japchae is definitely one of them. The most time-consuming part is the food preparation and final assembly.
Preparing this dish certainly presents a perfect opportunity to work on your own knife skills; all ingredients must be cut finely, cook and seasoned separately, and in the end mix together by hand.
Yes you heard it right, it is by hand and this is exactly what I’ve learnt at the Korean cooking school in Seoul back in 2007. The final assembly requires the cook to mix, taste and adjust seasoning at the same time. The dish is not supposed to be oily, too sweet or heavily “doused” with sesame oil.
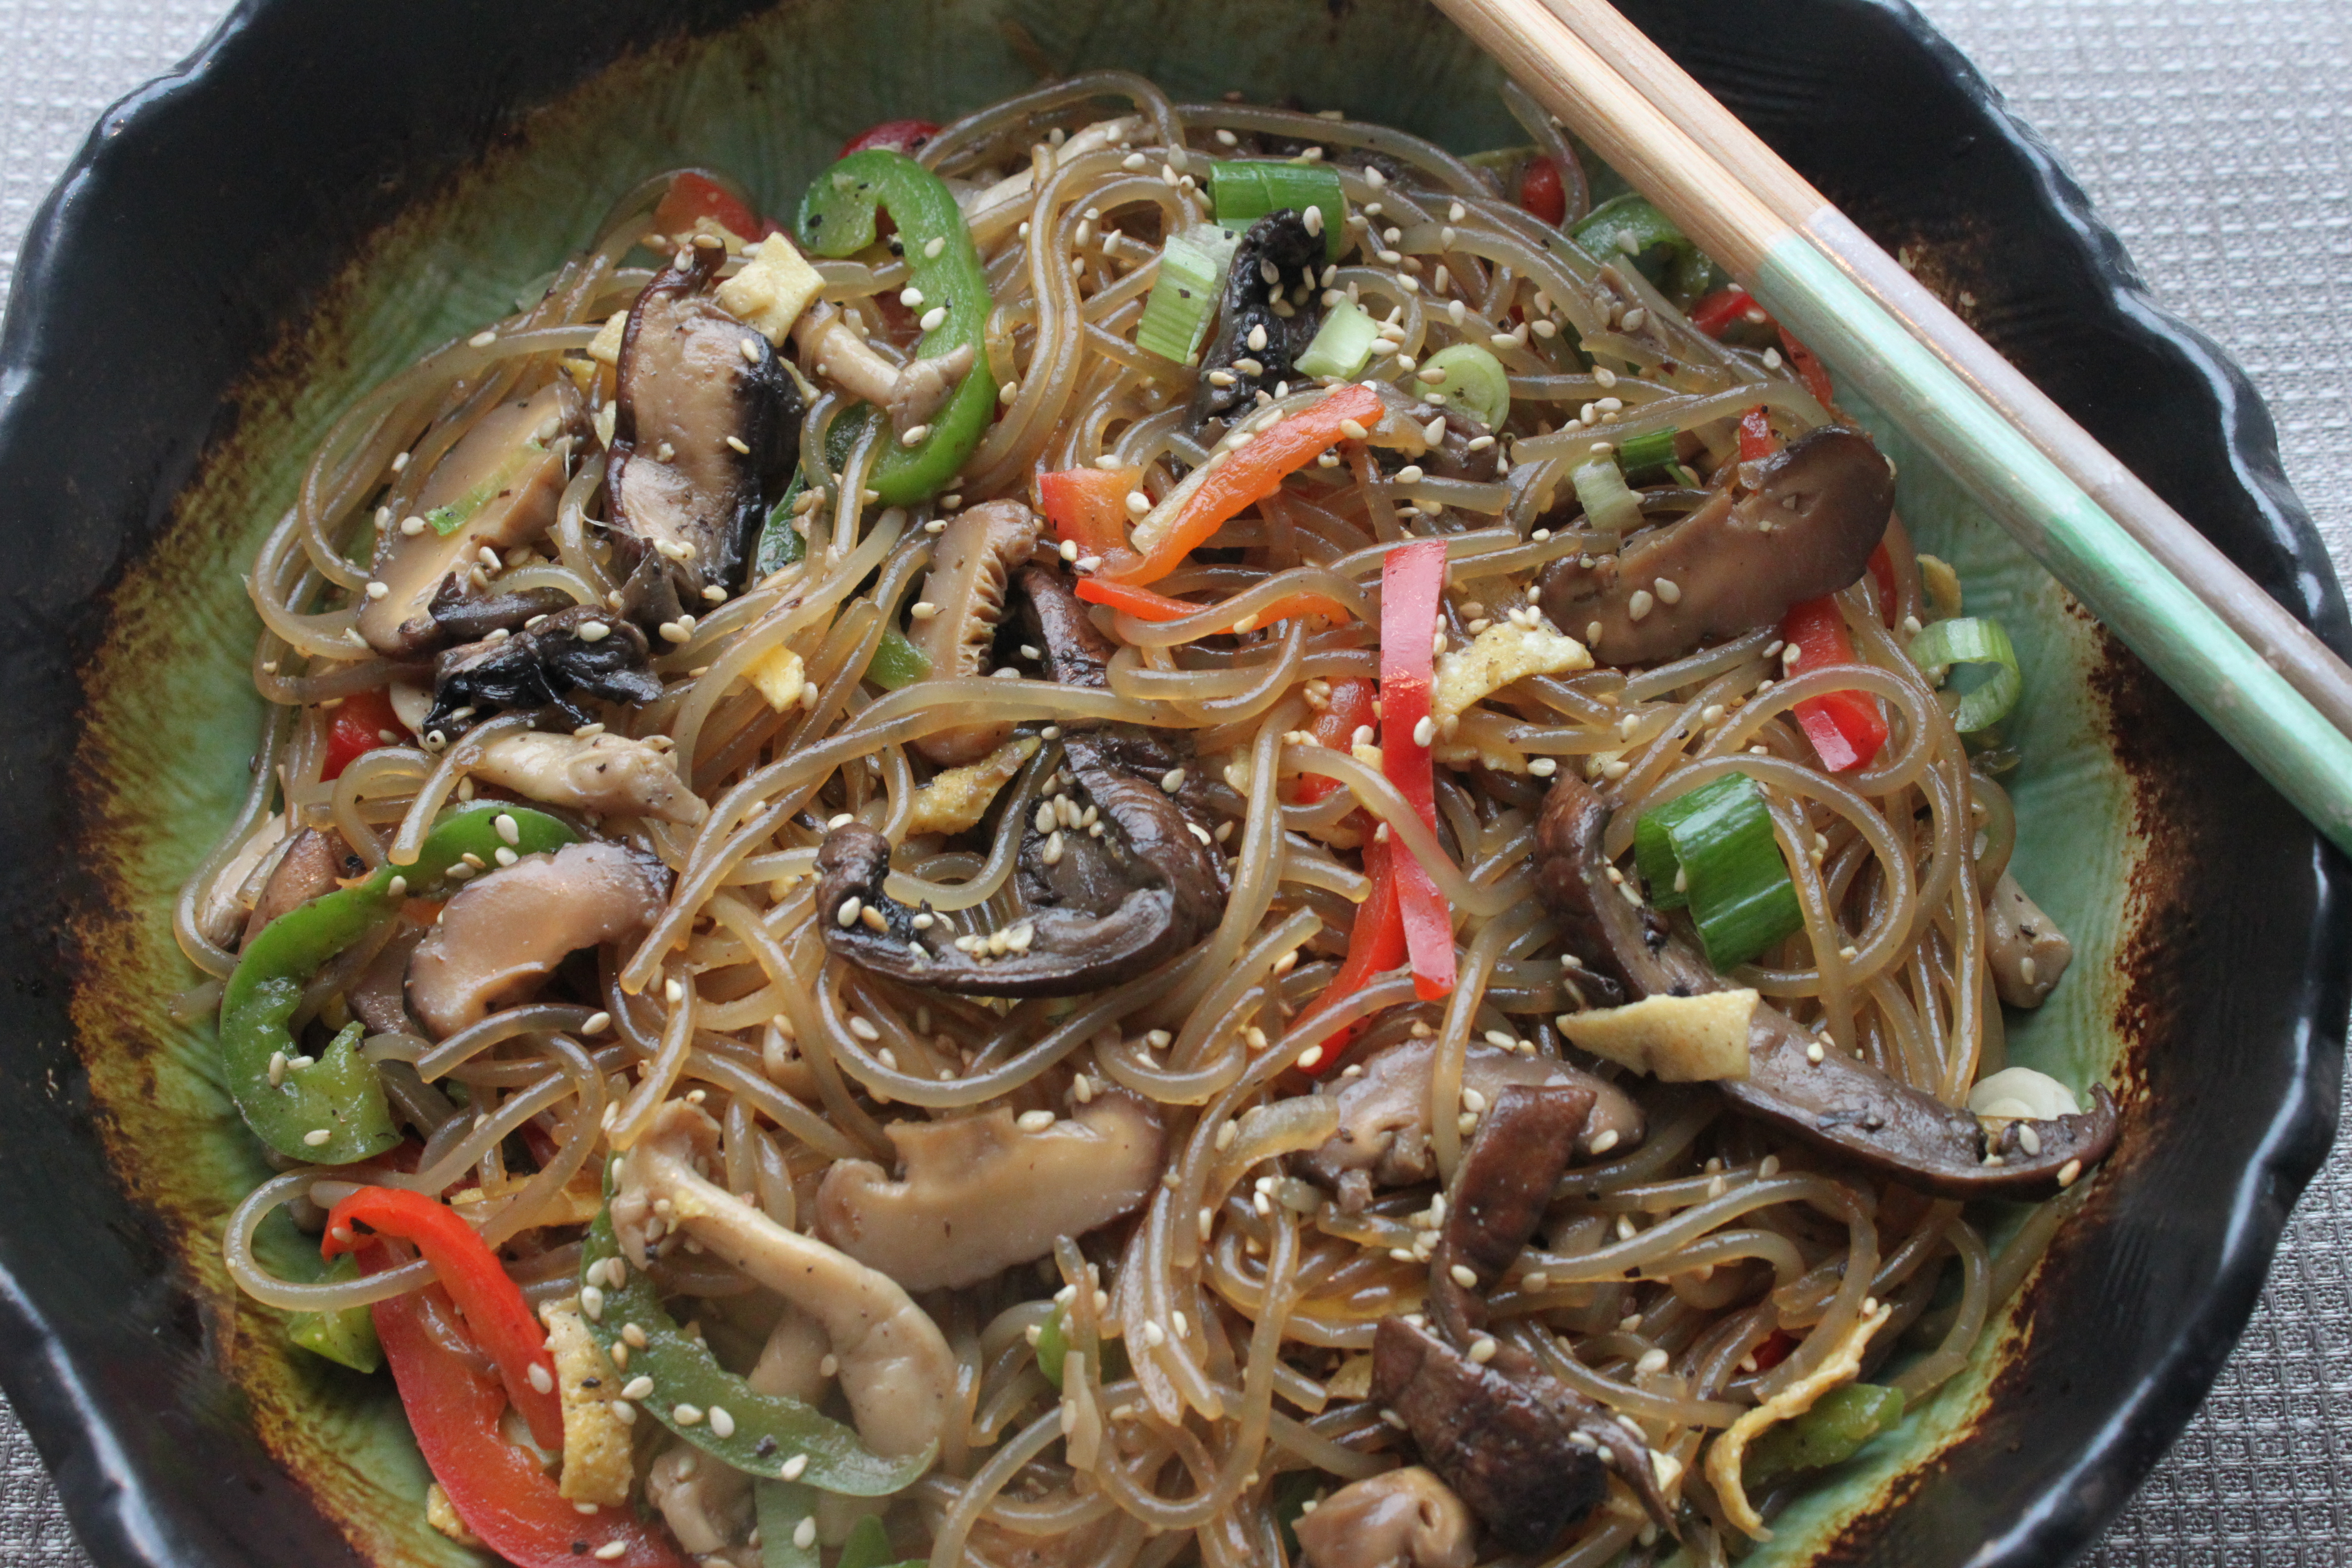
Most of the traditional recipes consist of shiitake mushrooms, onions, carrots (cut into matchstick strips), cucumber peel (skin only finely sliced), egg, scallions and sometimes beef, garnish with sesame seeds and slivers of chilli. Seasonal vegetables are added and the colours are chosen very carefully to make the dish pleasing to the eye.
My vegetarian version uses less noodles, three different kinds of mushrooms, red pepper, green pepper (Thanks Sofei for your own organic produce), yellow onion and green scallions.
So what is your combination then? (OO)
Ingredients: (Serves 2 to 4)
4 ounces of korean sweet potato noodle (dangmyeon), 1 large Portobello mushroom (gills removed, thinly sliced), 1 package of white shimeji mushrooms (ends cut off, separate each stem), 10 dried shiitake mushrooms (rehydrated, thinly sliced), 2 garlic cloves (finely minced), 1/2 red bell pepper (cut into thin strips), 1/2 green bell pepper (cut into thin strips), 1 small yellow onion (thinly sliced), 1 egg (egg yolk only), 1 to 2 green onions (cut crosswise into 1 inch long pieces), grapeseed oil, roasted white sesame seeds, organic Japanese (or Korean) soy sauce, sesame oil, salt, maple syrup, fresh ground black pepper for season to taste.
**Note: quantity of oil used is provided below, keep in mind it’s not supposed to be greasy! As for the sweetener, as I do not use refined sugar at home, maple syrup is my preference. As it has a different flavour, please use sparingly or you can substitute with brown sugar. You can always adjust the quantity of vegetables used according to your own preference.
Preparation:
– In large bowl filled with hot boiling water, completely submerge sweet potato noodles, cover and soak until they soften; stir a little to keep them from sticking together, drain thoroughly. This process takes less than 10 minutes, do not over soaked the noodles as they must remain firm and chewy. The noodles are quite long; using scissors cut them a few times, set aside.
– In small frying pan, add 1 teaspoon of vegetable oil, swirl it around and wipe off the excess with paper towel (not over the stove!) so you can see a very thin layer of oil on the pan. Return pan to heat, add beaten egg yolk mixture into the pan. Tilt it around so it spreads thinly, let it cook using residual heat in the pan for 1 minutes, then flip it over and cook for another minute. Let it cook and slice into thin strips.
– Using a skillet, heat 1 teaspoon of grapeseed oil over medium high heat, add onions and scallions and pinch of kosher salt. Saute until onions become translucent, it takes approximately 2 to 3 minutes. Remove from skillet and set aside.
– Using the same skillet, heat another teaspoon of grapeseed oil, add red pepper strips and saute for 30 seconds, then add green pepper strips, mix well and saute for another minute, remove from skillet and set aside. The pepper strips should remain crunchy.
– Using medium high heat, heat the same skillet with another 1 to 2 teaspoons (mushrooms absorb oil) grapeseed oil, add Portobello, shiitake and shimeji mushroom mixture, add minced garlic, saute for a few minutes until the mushrooms are softened and lightly browned (You will also hear a squeaky sound when cooking the mushroom). Remove from skillet and set aside.
– In a big mixing bowl, prepare the seasoning mix: add 1 to 2 Tablespoon soy sauce, 1 Tablespoon maple syrup, 1 teaspoon of sesame oil, and fresh ground pepper (a couple of grinds). Add all the ingredients to bowl and mix together by hand (please wear disposable gloves). Taste and adjust the seasoning accordingly.
– Add the egg strips and toasted sesame seeds, mix all ingredients thoroughly; garnish with more scallions if desired. Transfer to plate and serve.
As soon as I saw Hong Kong food blogger “Foods Sensei”‘s (also on Facebook) Wafu Tomato rice posting, I wanted to make it immediately! Apparently the original Japanese Whole Tomato Rice recipe by “Ochikeron” is a huge internet sensation on YouTube (her page also on Facebook).
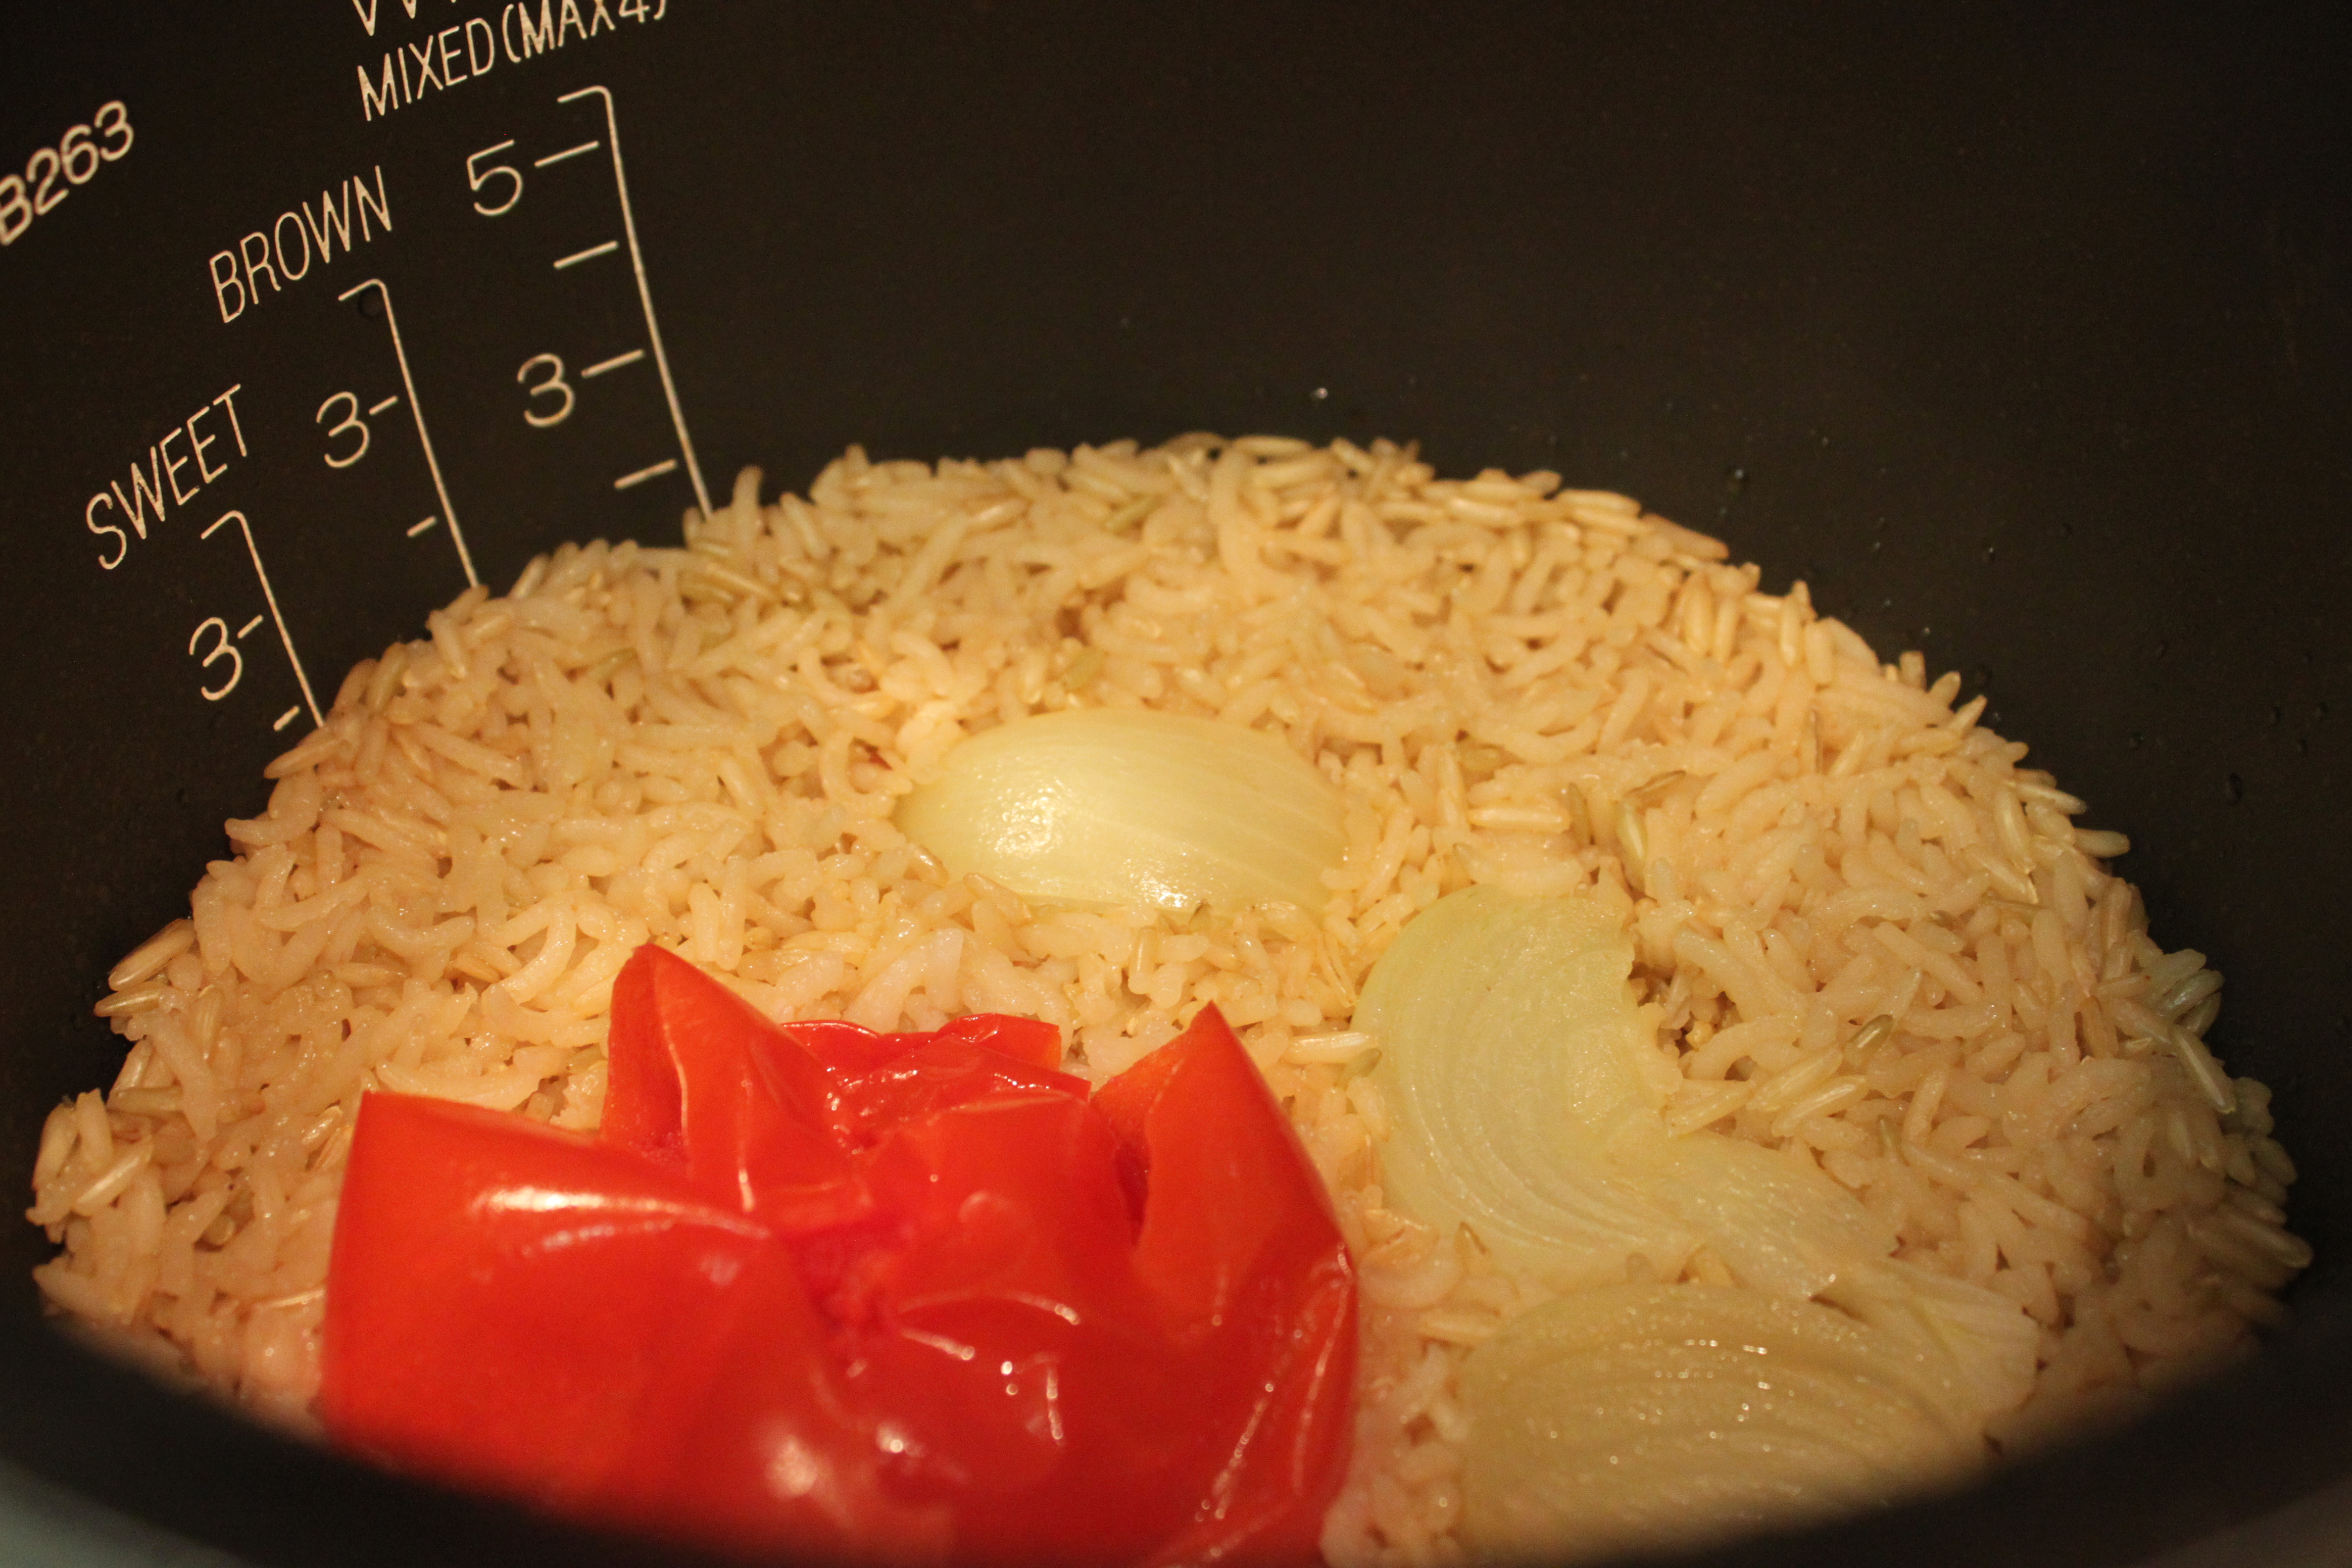
It is nutritious and easy to make: using only the rice cooker, this is the Japanese version of rice pilaf. There’s only one catch: you must account for the water content from the tomato and reduce the quantity of cooking liquid (whether you are using water or dashi) by approximately 20% (it all depends on what type of rice or tomato variety you use, there are no set rules). I have used even less liquid because I added an onion.
My version is a combination of both recipes; I have used a white+brown rice mix and added the onion; my garnishes are green scallions and seaweed. I had the rice for lunch with a sunny side up fried egg, the egg yolk oozed and blended so well with the rice, it was a very satisfying and delicious meal.
Thank you very much to Foods Sensei and Ochikeron for your wonderful original recipes! (OO)
Ingredients: (serves 2)
1 large tomato, 1/2 small yellow onion, 1/2 cup long grain jasmine rice, 1/2 cup long grain brown rice, 1 Tablespoon olive oil, 1 cup Japanese dashi broth, 2 teaspoons organic soy sauce, 2 teaspoons Japanese mirin, 1 fried egg (optional), nori and chopped green scallions for garnish.
*As usual I used my own homemade dashi, you can get dashi powder at Japanese food stores.
Preparation:
– Wash the jasmine rice grains and brown rice grains thoroughly
– Using the pot from your rice cooker, measure the dashi up to the mixed rice setting level (in this case it’s for 1 cup mixed rice); I then poured the dashi broth into a measuring cup and remove approximately 25% (or up to 30%) of the liquid; then pour the rest back into the rice pot.
– Add the rice grains, stir in olive oil, soy sauce, mirin and black pepper, mix very well.
– Wash the tomato and remove the stem; peel and slice the onion, then place them into the pot
Place the ingredients!
– Put the pot back into the rice cooker, you must choose the right setting (mixed rice) and start to cook
– When rice is ready, using the rice paddle, “slice” through the tomato and onions, toss and mix the ingredients with the rice lightly.
Rice is ready!
– When rice is almost done, prepared the sunny side up fried egg **this is optional.
– Serve the rice in dish or bowl, garnish with nori and chopped green scallions.
Notes:
Here are the links to the original recipes; Foods Sensei is a Chinese food blog. Enjoy (OO)
RRRRRR…It’s only mid-November yet it feels like we are already “deep” into the winter season; it might be chilly but I am not complaining as we have enjoyed some fine sunny days, which is quite unusual here in Vancouver…
So out come the Dutch oven and my Blender as Hearty Soup season is in full swing!
We don’t have kabocha very often in our household as it is not Andy’s favorite, I cooked it only once in a while for my own enjoyment, prepared either in Japanese (simmered in dashi and soy) or Chinese way (stewed with pork and soy).
I was so inspired by my friend Haruko’s creation; she made the most delicious and elegant version by keeping things simple, using fresh in-season ingredients (kabocha, onion, homemade chicken stock, milk) and let them shine; I feel this is always the best way to cook.
I decided to incorporate my favourite “Wafu” style (yes again) into this recipe; the idea of the toasted nori came from Canadian food blogger “The First Mess”; she adapted the kabocha + chestnut soup recipe from Amy Chaplin’s cookbook ” At Home In the Whole Food Kitchen”, this cookbook is on my Christmas wishlist…any takers?? (OO)
Ingredients: (serves 2 – 4)
1 medium size kabocha, seeded, peeled, chopped into small cubes, 1 large yellow onion (thinly sliced), 2 garlic cloves (thinly sliced), 1 Tablespoon sake kasu (optional), 2 Tablespoon olive oil, 3 1/2 cups Japanese dashi broth*, 1 to 1 1/2 cups regular almond milk, 2 teaspoons Japanese mirin, 1-2 Tablespoons organic soy sauce, sea salt and freshly ground pepper for seasoning to taste, nori seaweed (**optional, toasted for garnish).
Preparation:
– Prepare the kabocha squash: sliced it open into two halves. Remove the seeds, then cut into thin wedges; remove the skin then cut them into small even pieces
– Prepare the onion: peel and slice thinly
– In a 4 quart pot reheat the dashi broth, bring to a boil, lower heat and keep it simmering (if you are using pre-packaged dashi powder, prepare the stock according to instructions on package)
– Using a different heavy pot, heat the olive oil using medium high heat. Add the onions and saute until they become soft and golden (6-8 minutes), add the sliced garlic and saute until it becomes fragrant.
– Add the kabocha to the same pot, add 1 teaspoon mirin and gently mix all ingredients; add reheated dashi broth, 1 Tablespoon of sake kasu and bring mixture to a boil. Once boiling, lower the heat (medium low) and simmer until kabocha is tender (you can use a fork to test the texture), approximately 20 minutes. Using a slotted spoon, skim off any scums.
– While soup is simmering, prepare the nori – remove from package, lightly brush them with olive oil/mirin (1:1 ratio) mixture. Using medium low heat, place seaweed on small fry pan and toast them lightly using dry heat. The seaweed should be toasted on both sides, be very careful not to overheat and burn them. Set aside.
– Using an upright blender, working in small batches, process and puree the soup until smooth (be mindful to fill blender jar less than half way). To prevent the liquid from splattering, remember to allow heat to escape by removing the blender’s lid centre insert (cap), hold a kitchen towel over the top when blending.
– Return puree soup to stock pot, over low heat, stir in the almond milk slowly till mixture is combined, do not let the soup boil.
– Season with sea salt and pepper to taste.
– To serve: ladle soup in bowls and garnish with toasted nori.
*Notes:
Dashi is a fundamental ingredient to many Japanese dishes; it is used in miso soups, noodle soup, stews (oden) and sauces.
For your convenience, you can purchase the instant bonito stock packages which are readily available at Japanese food stores, and follow the instructions.
I choose to make my own awase dashi (basic stock) on a regular basis as I used it quite often as a substitute in many recipes. It is a combination of kombu (kelp) and katsuobushi (bonito flakes) and I have been using the recipe from Practical Japanese Cooking (by Shizuo Tsuji and Koichiro Hata) ; you can also find recipes available online.
You can substitute dashi broth with either vegetable stock or kombu stock (without the bonito flakes) to make the soup a completely vegetarian dish, or use chicken stock.
Sake kasu is optional, it adds lots of flavour to soups and stocks. In Vancouver you can purchase at Fujiya Japanese Food Store or Artisan Sake Maker (Osake) in Granville Island.
Always taste and change the ingredients according to your liking and dietary needs.
You must wonder what’s with the faux “Omurice” and Tomato Caramelized Onion “Jam-chup” (see other posting)?
Last month’s cauliflower “fried rice” was a food “jackpot”; I decided to continue to run with the idea and see what other variations I can come up with…
Over a dinner gathering with friends, we were talking about childhood comfort foods and our favours we love..my hubby Andy mentioned “Omelet Rice”….and voila!
I must give him full credit for coming up with this idea; It’s not a surprise at all as the Japanese “yoshoku” omelet is one of his all time favourite comfort foods! As an adult his tastes may have evolved in many ways but some things just never change – wonderful food memories and tastes just stay with us forever, we all have our own short list of “go-to” comfort foods.
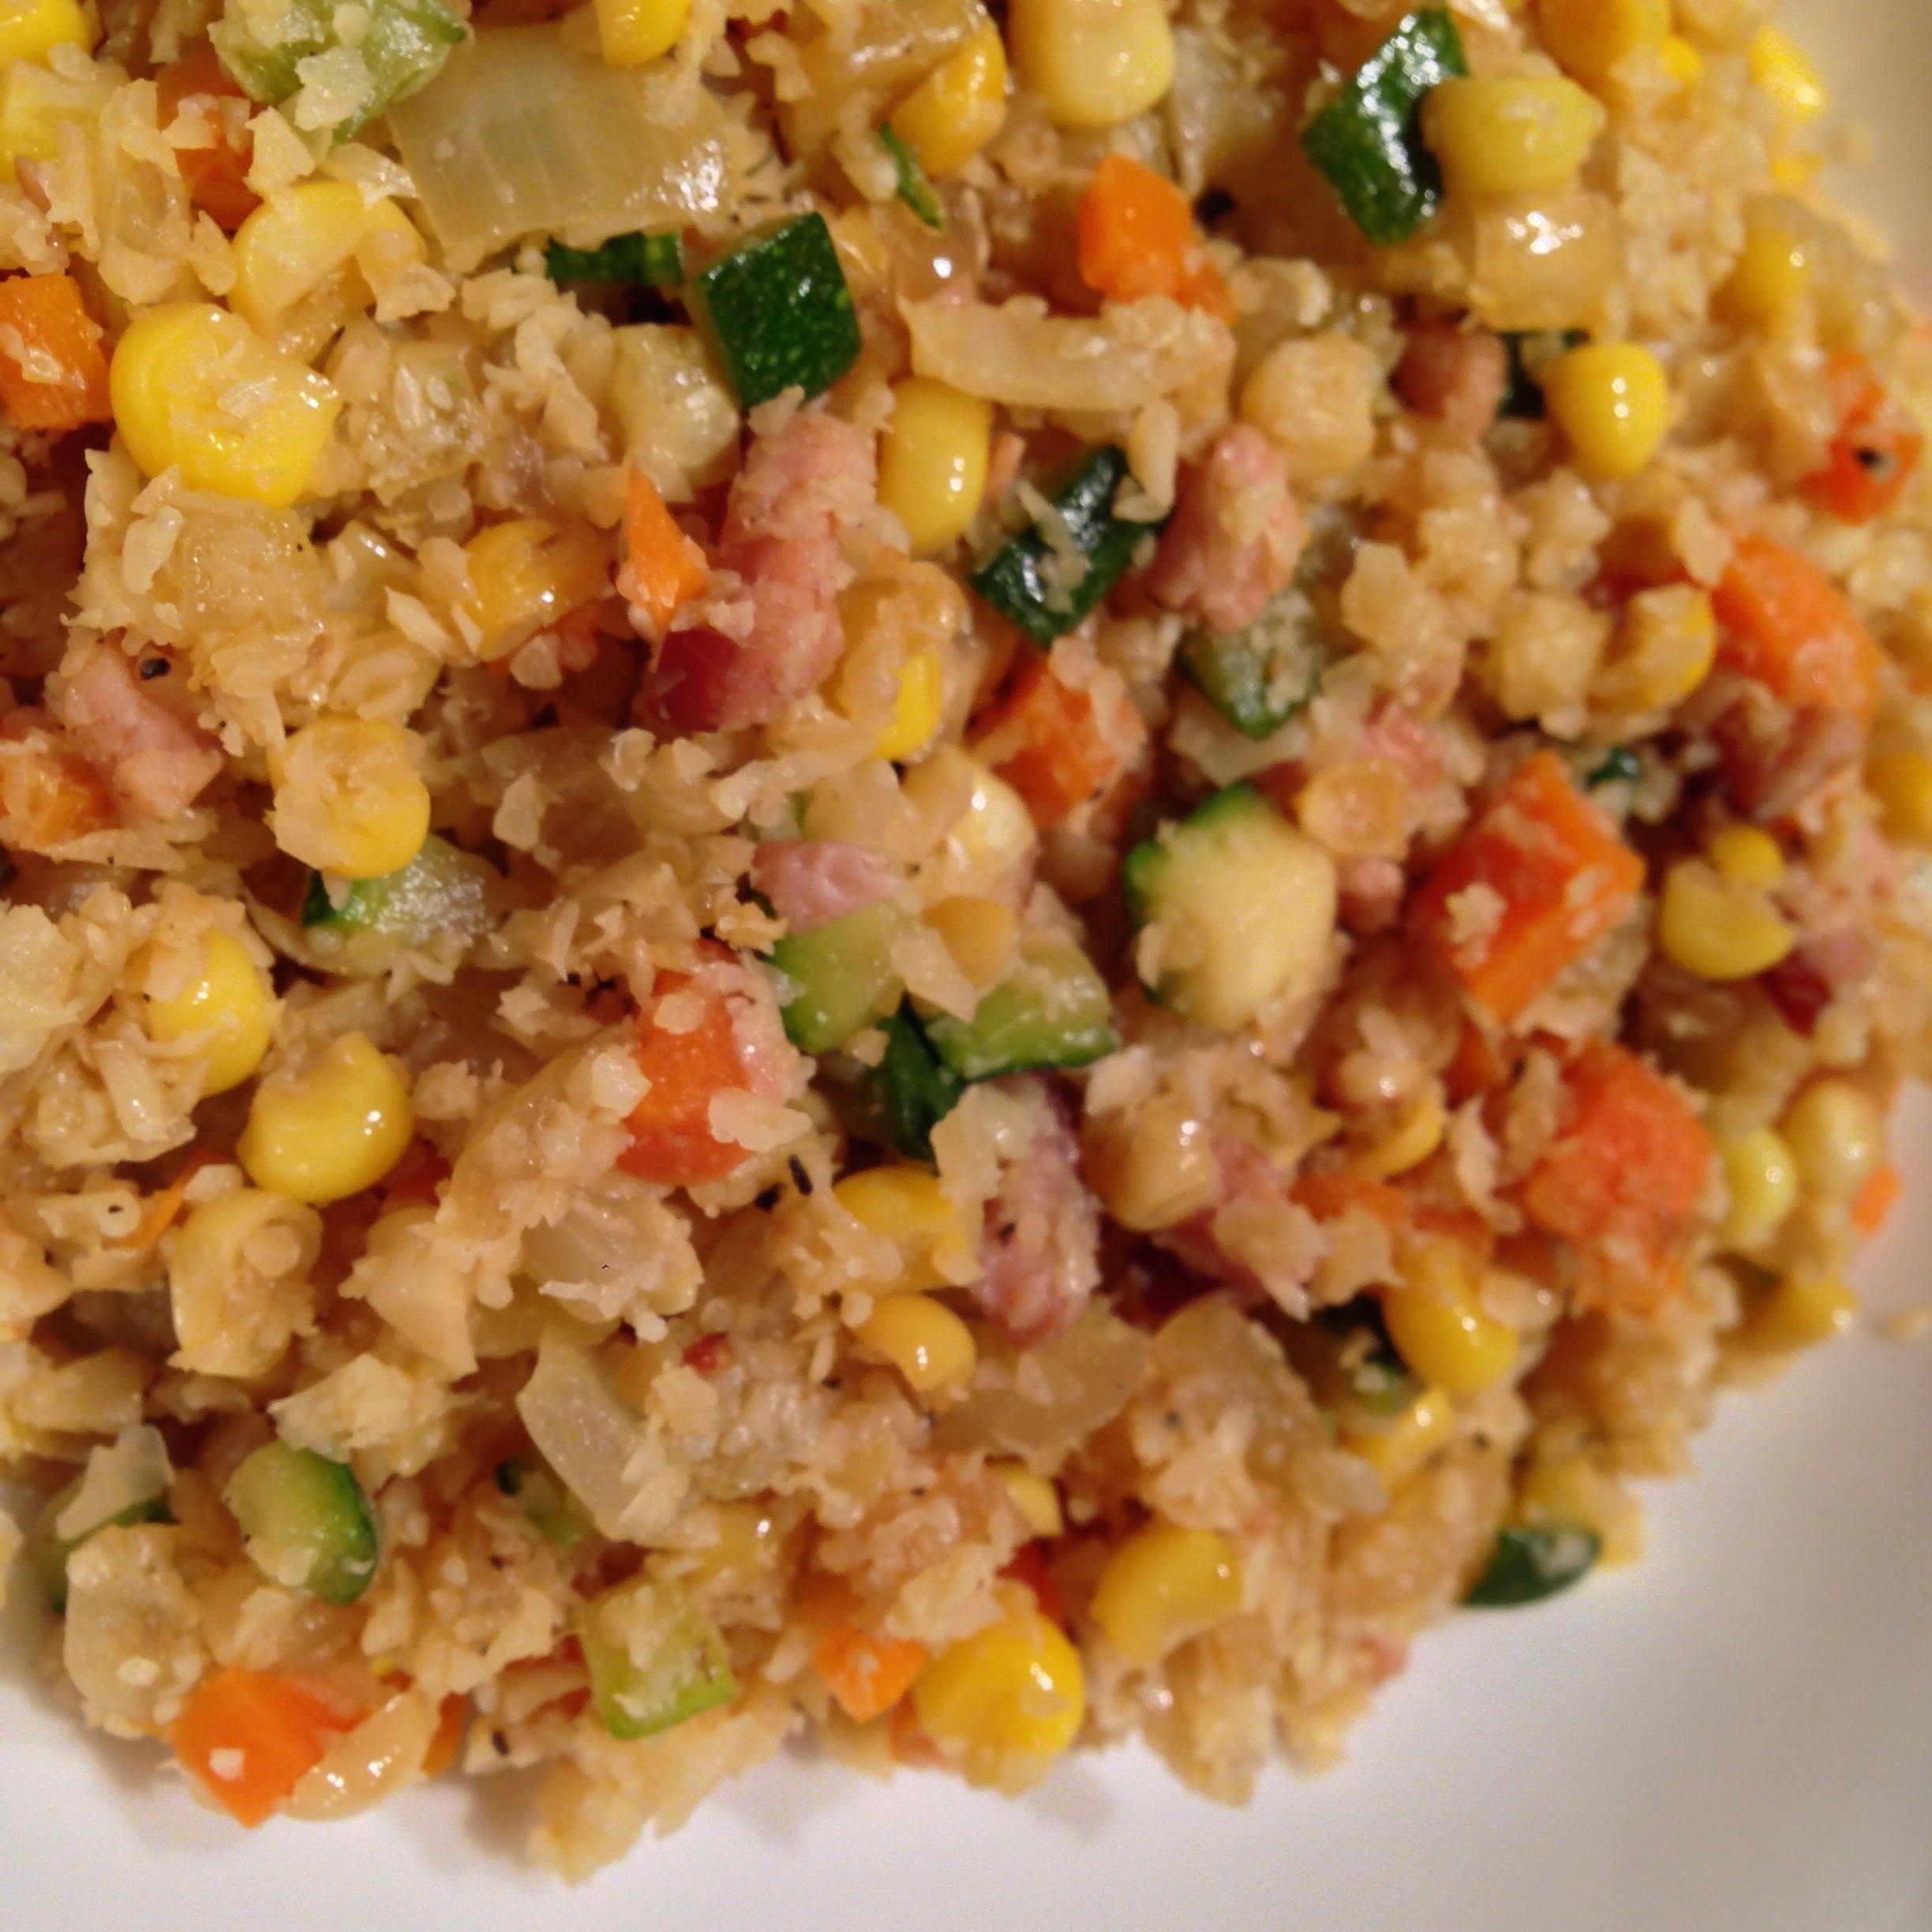
As for the choice of vegetables: I picked carrots, corn and zucchini for their crunchy texture! Although we are treating the cauliflower as “fried rice”, overall the texture is still a bit soft, it needs the “crunch” to add textural interest. The onions adds a sweet flavour and the Canadian back bacon lends a subtle smoky flavor, it is also leaner and I added just enough to satisfy a meat lover’s (like my husband) craving.
Canadian back bacon is also one of Andy’s favourites; this dish actually celebrates who he is, and pays homage to both his Japanese and Canadian roots.
The Tomato caramelized onion jam “jam-chup” (Andy calls it as it’s a replacement for ketchup, just a play on words) is a very lucky find (Serious Eats), I’m so happy and proud that I “tweaked” the original recipe and made it work for my dish.
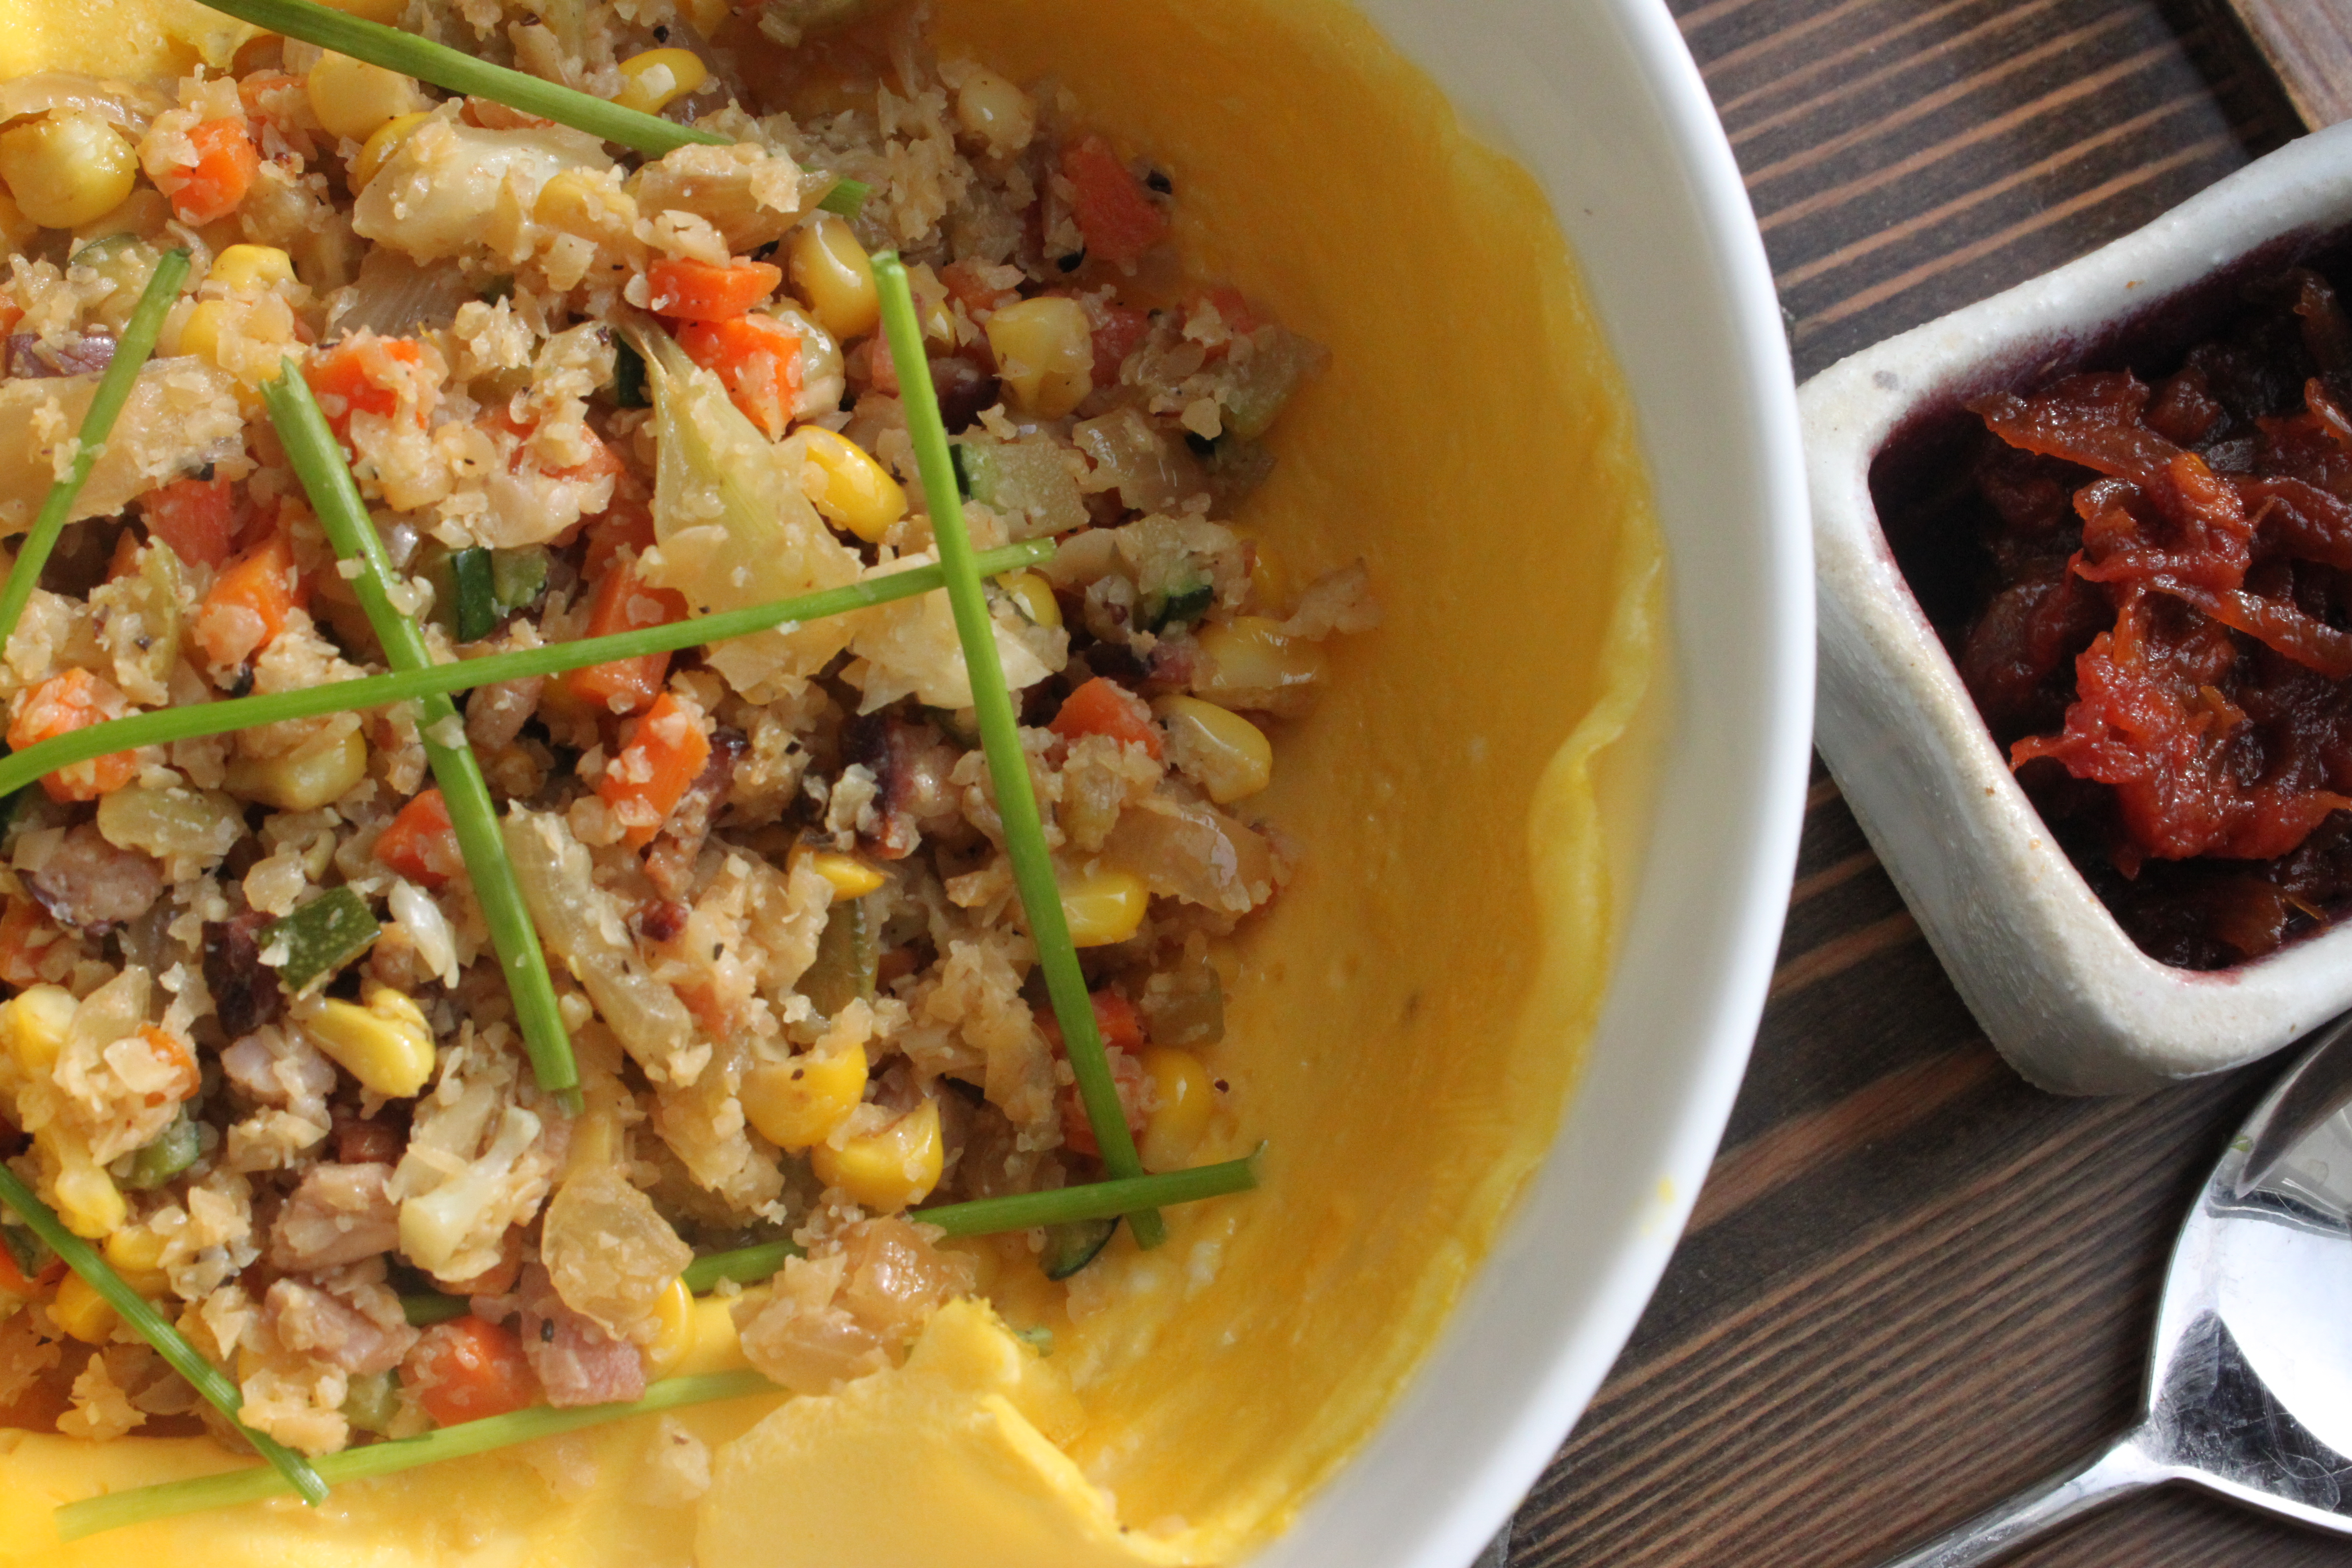
You may wonder how I came up with this Deconstructed version in a bowl? Aesthetically this works beautifully; it’s practical and easy to serve. The cauliflower “rice” is actually quite filling and since it’s in small bits, you need to put a lot to “stuff’ the omelet to make it “full”, I think the serving will become too big.
Besides…It’s time for me to practice flipping omelets!! Enjoy (OO)
Ingredients: (serves 2-4)
1 small head of organic cauliflower, 3-4 teaspoons grapeseed oil, 1 medium yellow onion (finely diced), 1 large carrot (peeled and finely diced), 2 ears of fresh corn (husked and kernels removed), 1 large zucchini (finely diced), 2 slices of Canadian back bacon (diced), organic eggs (1 for each serving), unsweetened almond milk (1 Tablespoon for each portion), 2 Tablespoons of stock (I’ve used homemade Japanese dashi stock, you can substitute with chicken broth or vegetable broth), organic Japanese soy sauce (season to taste), sea salt and ground black pepper, chives for garnish (optional).
**For a vegetarian version – omit the Canadian bacon, substitute the Japanese dashi stock (from kelp and bonito flakes) vegetable broth. I find the dashi adds a very nice flavor to this dish.
Preparation:
– Clean the cauliflower,core and trim the florets off the stems, cut off any blemishes (sometimes there are brown spots!). Process florets in the food processor until they resemble the texture and size of rice grains.
– Chop the onion finely, dice carrot and zucchini finely, husked and removed corn kernels, set aside.
– Slice and dice the Canadian back bacon into small bits separately, set aside.
– In a large pot (I used a 5 quart pot with lid) or wok/saute pan, using high heat, heat 2 teaspoons of grape seed oil; add 1/2 the diced onion and cook until they become soft and translucent. Add carrots, saute for 2 minutes; add corn and saute for another 2 minutes; add zucchini and 1 Tablespoon of dashi stock (you will hear a “sizzling” sound), saute and mix the vegetables well (takes approximately 2-3 minutes). The entire process takes less than 10 minutes; vegetables should be cooked yet crunchy in texture. Remove from pan and set aside.
– Using the same pot, adjust to medium low heat, add another teaspoon of oil, add the remaining diced onion, again cook until they become soft and translucent. Add cauliflower, stirring gently for 5 minutes until the oil is evenly distributed and each “grain” is coated.
– Add 1 Tablespoon of dashi stock, put the lid on, adjust to low heat (to avoid burning) and “steam” the cauliflower for 3 to 4 minutes. If you like it softer, cook a little longer.
– Remove the lid, readjust to medium high heat, add Canadian back bacon bits, saute for 2 minutes; return carrot/corn/zucchini mixture to pot. Using spatula, gently fold and stir fry ingredients until mixture is slightly browned, taste and season with soy sauce and black ground pepper, Turn off heat and set cooked mixture aside.
Filling ready to go!
– Whisk the egg, add a pinch of sea salt and almond milk (1 Tablespoon to 1 egg) together in small bowl, you are preparing each portion individually.
– Lightly greased a small frying pan (I’ve used an 8 inch), coat the surface with a thin coat of grape seed oil.
– Heat the pan over medium high heat, when pan gets hot, pour the egg mixture and tilt to cover the pan evenly; once the egg has set, turn off and remove from heat.
– Gently remove “omelet” from frying pan and lay in a round bowl (find one that fits the omelet perfectly!), ladle the filling on top of “omelet”. (At this time you can decide whether you would like to make this version or a real omelet**).
– Garnish with chives (optional) and serve immediately with tomato caramelized onion jam “jam-up” (see separate recipe).
Notes:
– Namiko Chen’s website “Just One Cookbook”has an excellent “traditional” Japanese Omelet Rice Recipe with very clear instructions and excellent demonstration on how to assemble the omelet.
– I always try to keep oil usage to minimum; you can always add a little more to adjust.
– In a regular omelet rice recipe, ketchup is added to rice directly. It’s my humble opinion that it will not work and make the cauliflower soggy and taste funny, besides we don’t use ketchup much these days and decided to look for a healthier option.
– This is an anything goes recipe; You can choose whatever vegetables you have or to your liking to substitute the corn, zucchini or carrots. I chose them because they add a crunchy texture. Feel free to use chicken (in regular recipe) instead of back bacon. Be creative!
– To all Moms: this may be a great option to encourage (or “fool”) your kids into eating more vegetables (OO). It makes a great bento box lunch and a wonderful one-dish dinner.
– I choose Canadian back bacon as it is leaner. If you are using regular bacon, render the fat and use it to saute the vegetables to add more flavor. As bacon is salty, adjust the seasoning as required.
– As always, remember to taste and season according to your liking and dietary needs!
Korean Food Wave Revisited: Two weeks ago on the Thanksgiving long weekend, I went “work-clothes shopping” with my friend “Mui Mui”, a fairly level-headed “youngster” who recently got a new job and need a little assistance with wardrobe selections.
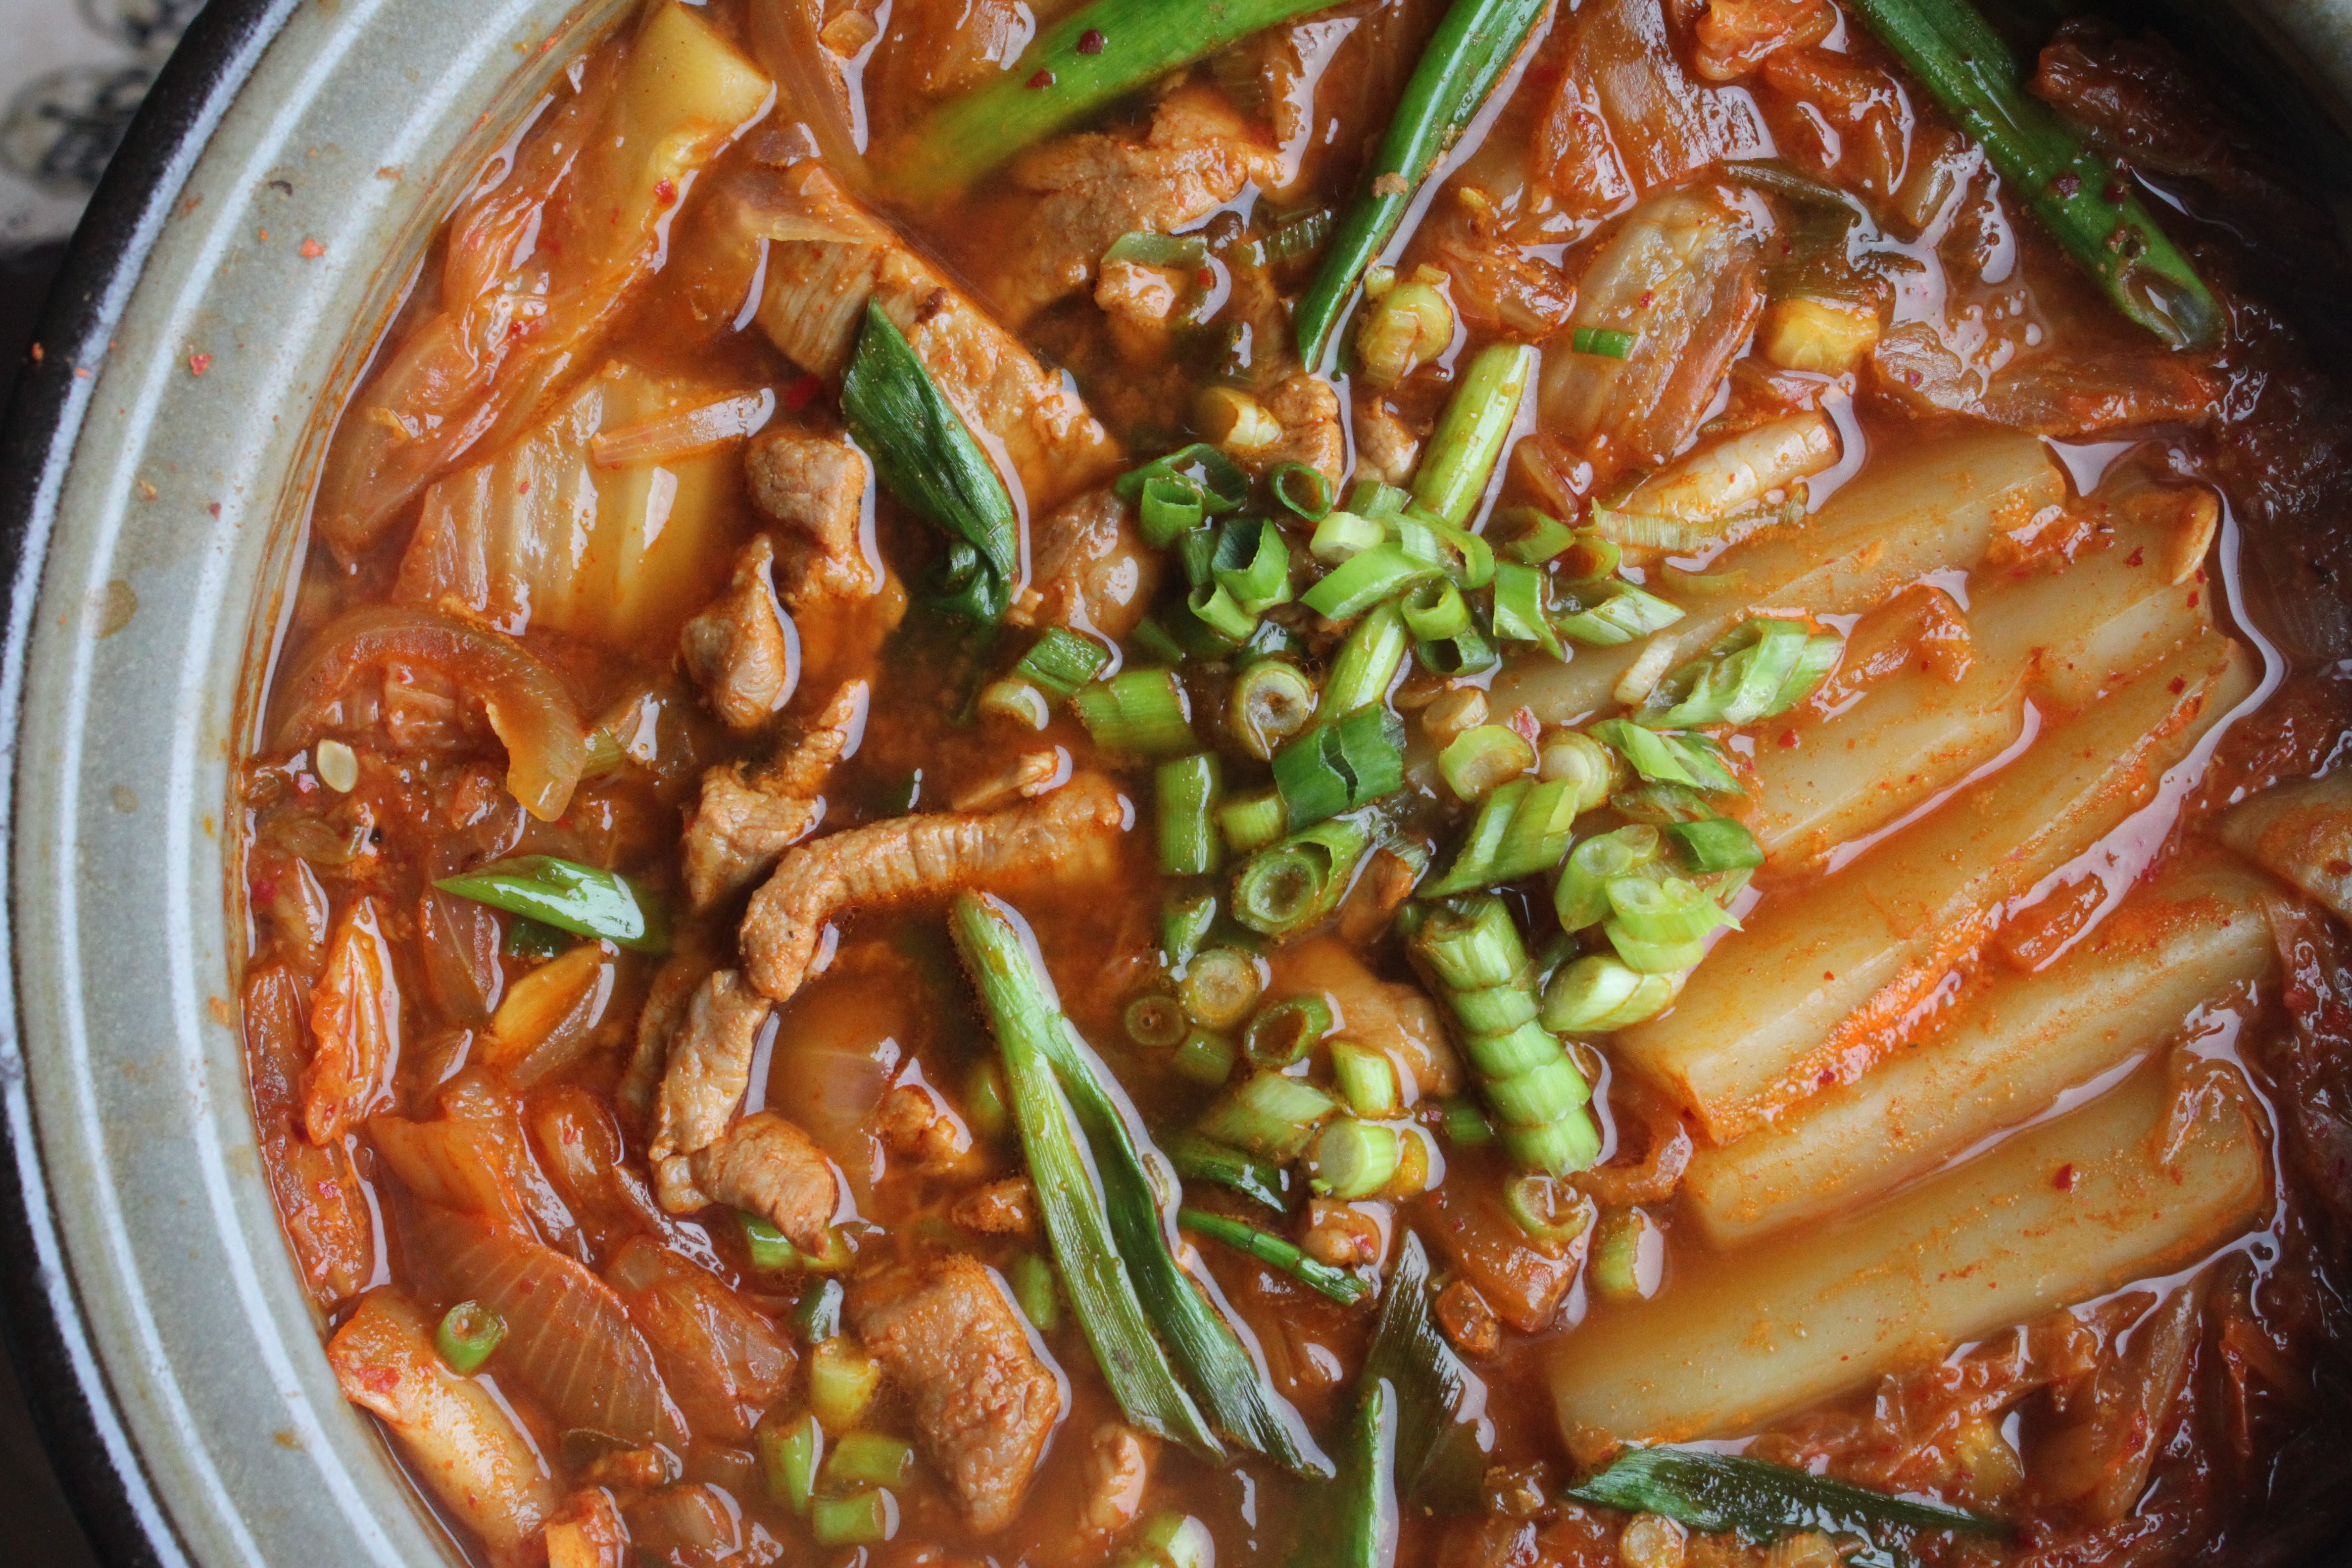
She can only have soup or congee (braces!!); we popped into H-Martfood court (on Robson Street) for a casual dinner (shopping is just about the only time I’m willing to forgo a proper “sit down” meal, taste is important still); it was great to revisit Wang Ga Ma food stand, where I had one of my all time favourite Korean dish, Kimchi jjigae. It was absolutely delicious, just “hit the spot”, perfect dinner on a rainy Friday night.
I like Jjigae for its simplicity and heartiness, it is what it is. Unlike SoonDuBu (Tofu soup), this dish is not readily available anywhere. Whenever I have a sudden craving, I must make my own at home. It’s my “go-to” dish during the gloomy Vancouver winter months.
The taste brought back many fond memories, the years (since 2005) of my absolute fascination with my third “adopted” culture (behind Japanese/French)…Korean language classes (at SFU Continuing Education)…My three trips to Seoul, especially travelling with my language class schoolmates (who remained in touch as good friends until this day)…dinner outings to different establishments with our wonderful teacher Anne…Korean cooking classes…
Upon returning home, I “dug out” an old cookbook – “Korean cooking” by Han Chung Hae; In 2005 and 2007, I was very fortunate to have had the opportunities (yes twice!) to attend her cooking school while I travelled to Seoul for leisure! I’ve learnt some interesting basic dishes – kimchi jjigae (by special request), Japchae, Bulgoogi (secret marinade), seafood pancake, just to name a few! The cookbook and a few copies of recipes written in Korean (yay have not forgotten everything entirely!) are prized souvenirs, I treasured most the experiences and friendships, they will always remain very dear to my heart.
Last night on the way home we made a quick stop at T & T (Asian supermarket) to pick up the pork and konnyaku (kimchi is always in our fridge!)…Here you go!
2 cups (packed) kimchi (readily available at most supermarkets, chopped in bite size), 150 grams organic pork shoulder (thinly sliced or bite size, trim excess fat), 1 small onion (thinly sliced), 3 teaspoons grated ginger, 1 teaspoon finely minced garlic (can always add a little more), 1/2 cup kimchi juice (squeezed from kimchi), 2 to 2 1/2 cups of anchovy stock (*similar to Japanese dashi made of dried kelp and dry anchovies boiled in water), 2-3 teaspoons of gochujang (Korean chili paste), 150 grams konnyaku, 2 scallions (thinly sliced for garnish), 2 teaspoon grapeseed oil, 1-2 teaspoon of soy sauce (preferably Korean, Japanese soy will work also) for marinade and season to taste; 2 teaspoon Japanese sake (rice wine).
*You can use water if you do not have any stock handy, the anchovy stock adds more depth and flavour to the soup. I always have Japanese dashi stock (kelp/bonito) ready at home and it works just as well.
It’s my personal preference to use mostly organic products, the pork shoulder (it’s less fatty) and konnyaku (a Japanese zero calorie product made of plant from taro family) instead of the usual tofu (OO). For other versions, skip the meat and add other vegetables for vegetarian, or use canned tuna for chamchi jjigae.
Preparation:
– Slice onions, grate ginger, mince garlic and chop scallions, set aside.
– Trim excess fat off pork shoulder, slice thinly or bite size; marinade with 1 teaspoon of soy sauce, 1 teaspoon rice wine, 1 teaspoon of Korean chilli paste (gochujang), 1 teaspoon grated ginger and a smidgen of garlic at least for 30 minutes.
– Prepare the kimchi juice: Remove 2 cups (fully packed) kimchi from jar, squeezed hard into a bowl to obtain “juice” (approximately 1/2 cup), set aside.
– Bring a small pot of water to boil, add the whole block of konnyaku to parboil for approximately 10 minutes. This will get rid of the “smell”, slice konnyaku into 1/2 inch thick.
– Using medium high heat, heat a hot-pot (nabe – remember to follow instructions if you using one) or 5 quart heavy bottom stock pot, heat 1 teaspoon of grapeseed oil, when hot add the pork slices. Saute for approximately 2 to 3 minutes (do not cook pork entirely) and allow the fat to render. Remove pork from pot.
– Using the same pot (add a little more oil only if necessary) over medium high heat, add the onions, saute for 2 to 3 minutes until translucent, add remaining ginger and garlic and 1 teaspoon of gochujang, saute until the mixture is very fragrant. Add the kimchi juice and a splash of Japanese sake to “deglaze” (you will hear it sizzling) and scrape off the little brown bits (don’t burn) from the bottom.
– Add kimchi, konnyaku and soup stock (or water) to the pot, stirring everything together to combine.
– Bring to a boil and taste for spiciness, adjust with gochujang (Korean chilli paste) if you want to increase the spiciness, season to taste with soy only if necessary.
– Turn the heat down to a low simmer and let the soup cook for at least 15 minutes. Let the flavours develop further.
– Return the half-cooked pork slices to the mixture, cook until meat is tender.
– Add the scallions and quickly stir to incorporate. Turn off and remove from heat, serve immediately straight out of the pot with rice. Enjoy!
More than two weeks ago, my friend “PPQ” was over at our place for mid-Autumn Festival Dinner and she made her simple version of cauliflower fried “rice” which paired surprisingly well with our semi traditional (Chinese steamed fish, roast pork belly, sautéed pea sprouts, sake steamed clams, duck breast lettuce wrap) dinner. She actually has modified the recipe based on the original posted on the award-winning site Nom Nom Paleo!
We added garlic stems (I’ve seen them at our local Farmer’s market during early Fall season and readily available at most Asian Supermarkets); it adds a very delicate flavour and a nice crunch to the fried “rice”.
I made this again the other day and added shallots to the recipe. “PPQ”, thank you very much for your garlic stem idea! I’ve served the “rice” with Thai Green Curry, we didn’t miss the jasmine rice at all! Basically anything goes with this excellent low carb option, same as any other recipes, feel free to modify and make it your own, Enjoy (OO)!
Ingredients:
1 small head of organic cauliflower, 1-2 Tablespoons olive oil, 1 small yellow onion (finely diced), 2 small shallots (finely diced), bunch of garlic stems – 1/2 to 1 cup (finely chopped), kosher salt and fresh ground pepper.
Preparation:
– Clean the cauliflower, core and trim the florets off the stems, cut off any blemishes (sometimes you see little brown spots). Place florets in the food processor and process until they resemble the texture and size of rice grains.
– Prepare garlic stems: wash thoroughly in cold water, pat dry, cut off end of stems and chop them finely
– In a large skillet, heat 1/2 Tablespoon of olive oil over medium high heat, add onions and cook until they become soft and translucent, add shallots and garlic stems; mix ingredients well and cook for another 3-4 minutes to bring out the flavours and aroma. Remove mixture from skillet and set aside.
– Adjust to medium low heat, using the same pan heat remaining olive oil, add cauliflower, season lightly with salt and pepper, stirring gently for approximately 5 to 10 minutes until the oil is evenly distributed and each “grain” is coated.
– Put the lid on the skillet, adjust to low heat (to avoid burning) and cook the cauliflower “covered” for another 5 minutes (to 10 minutes) until they become tender.
– Remove the lid, readjust to medium high heat, return onion/garlic stem/shallot mixture to skillet, using a spatula, gently stir fry all ingredients until mixture is slightly browned.
– Taste and season with salt and pepper as required.
I recently made this refreshing and nutritious Japanese soup for a light Sunday night supper; the recipe is adapted from a Japanese soup cookbook which focuses on using fresh simple ingredients and features different combination of Japanese flavours.
Ingredients: (serves 2)
1 cup chopped napa cabbage, 4 fresh shiitake mushroom, 8 cherry tomatoes, 1 cup water, 1 cup dashi, 1-2 teaspoon organic soy sauce, pinch of salt and pepper to taste, dried shrimp (optional).
Notes on preparing the dashi:
Dashi is a fundamental ingredient to many Japanese dishes; it is used in miso soups, noodle soup, stews (oden) and sauces.
For your convenience, you can purchase the instant bonito stock packages which are readily available at Japanese food stores, and follow the instructions.
I actually made my own awase dashi (basic stock), it is a combination of kombu (kelp) and katsuobushi (bonito flakes) and I have been using this recipe from Practical Japanese Cooking (by Shizuo Tsuji and Koichiro Hata) ; you can also find recipes available online.
Preparation:
– Cut cabbage into bite size pieces, remove the stems from shiitake mushrooms and sliced them into quarters; remove the skin from the cherry tomatoes
– In large saucepan, add water, dashi, Napa cabbage, shiitake mushroom and cherry tomatoes, cover with lid.
– Bring to boil, reduce heat to medium-low and simmer for 15 to 20 minutes
– Add soy sauce, salt and pepper to taste, garnish with dried shrimp (optional).
Caesar salad has always been my father’s favourite; I researched and came up with a lighter version and definitely will try to make this for him on my next visit back home. You can always add a protein (grilled chicken or salmon) to turn this first course into a substantial main course; the recipe is inspired by Canadian Living Magazine and Epicurious.
Ingredients: (serves 2-4)
Caesar Dressing – 1/2 cup 2% plain Greek yogurt, 2 Tablespoon olive oil, 2 Tablespoon freshly squeezed lemon juice, 2 cloves of garlic (pressed), 1/4 cup freshly grated parmigiano-reggiano cheese, 6 anchovies (drained and mashed), 1 Tablespoon Dijon mustard, 1 Tablespoon Worcestershire sauce, finely grated lemon zest (1 lemon), pinch of salt and cracked black pepper, season to taste.
3 cups Tuscan kale (tough stems removed, cut into ribbons), 3 cups Green kale (tough stems removed, quickly blanched in boiling water, cut into ribbons), half loaf day old sourdough bread (cut into 3/4 inch cubes), 1-2 Tablespoon olive oil.
2 hard-boiled egg, peeled and grated
To prepare croutons:
– Pre heat the oven to 350 degrees F.
– Hand tear (or cut) the bread into 3/4 inch cubes and put them in a bowl. Add olive oil, lightly sprinkle some parmigiano-reggiano, season with salt and pepper. Toss well and make sure the pieces are coated evenly. Spread the cubes out evenly on a baking sheet and bake until golden brown, about 15-20 minutes. Let them cool down before tossing into the salad.
To prepare dressing:
In bowl, whisk the yogurt, with the anchovies, garlic, Dijon mustard, Worcestershire sauce and lemon juice. Slowly whisk in the olive oil until combined; then add half the cheese, season with salt (if necessary) and pepper.
To assemble the salad:
In large bowl, combine the Tuscan kale and green kale with enough salad dressing to your liking, add the grated egg, croutons and some extra parmigiano-reggiano and toss salad well. Serve immediately, the remaining dressing can be passed around the table.
Notes:
I used very little salt for this recipe as we are using anchovies and parmigiano-reggiano cheese, do not over dress the salad. Remember always adjust the flavors according to your taste and dietary needs (OO).
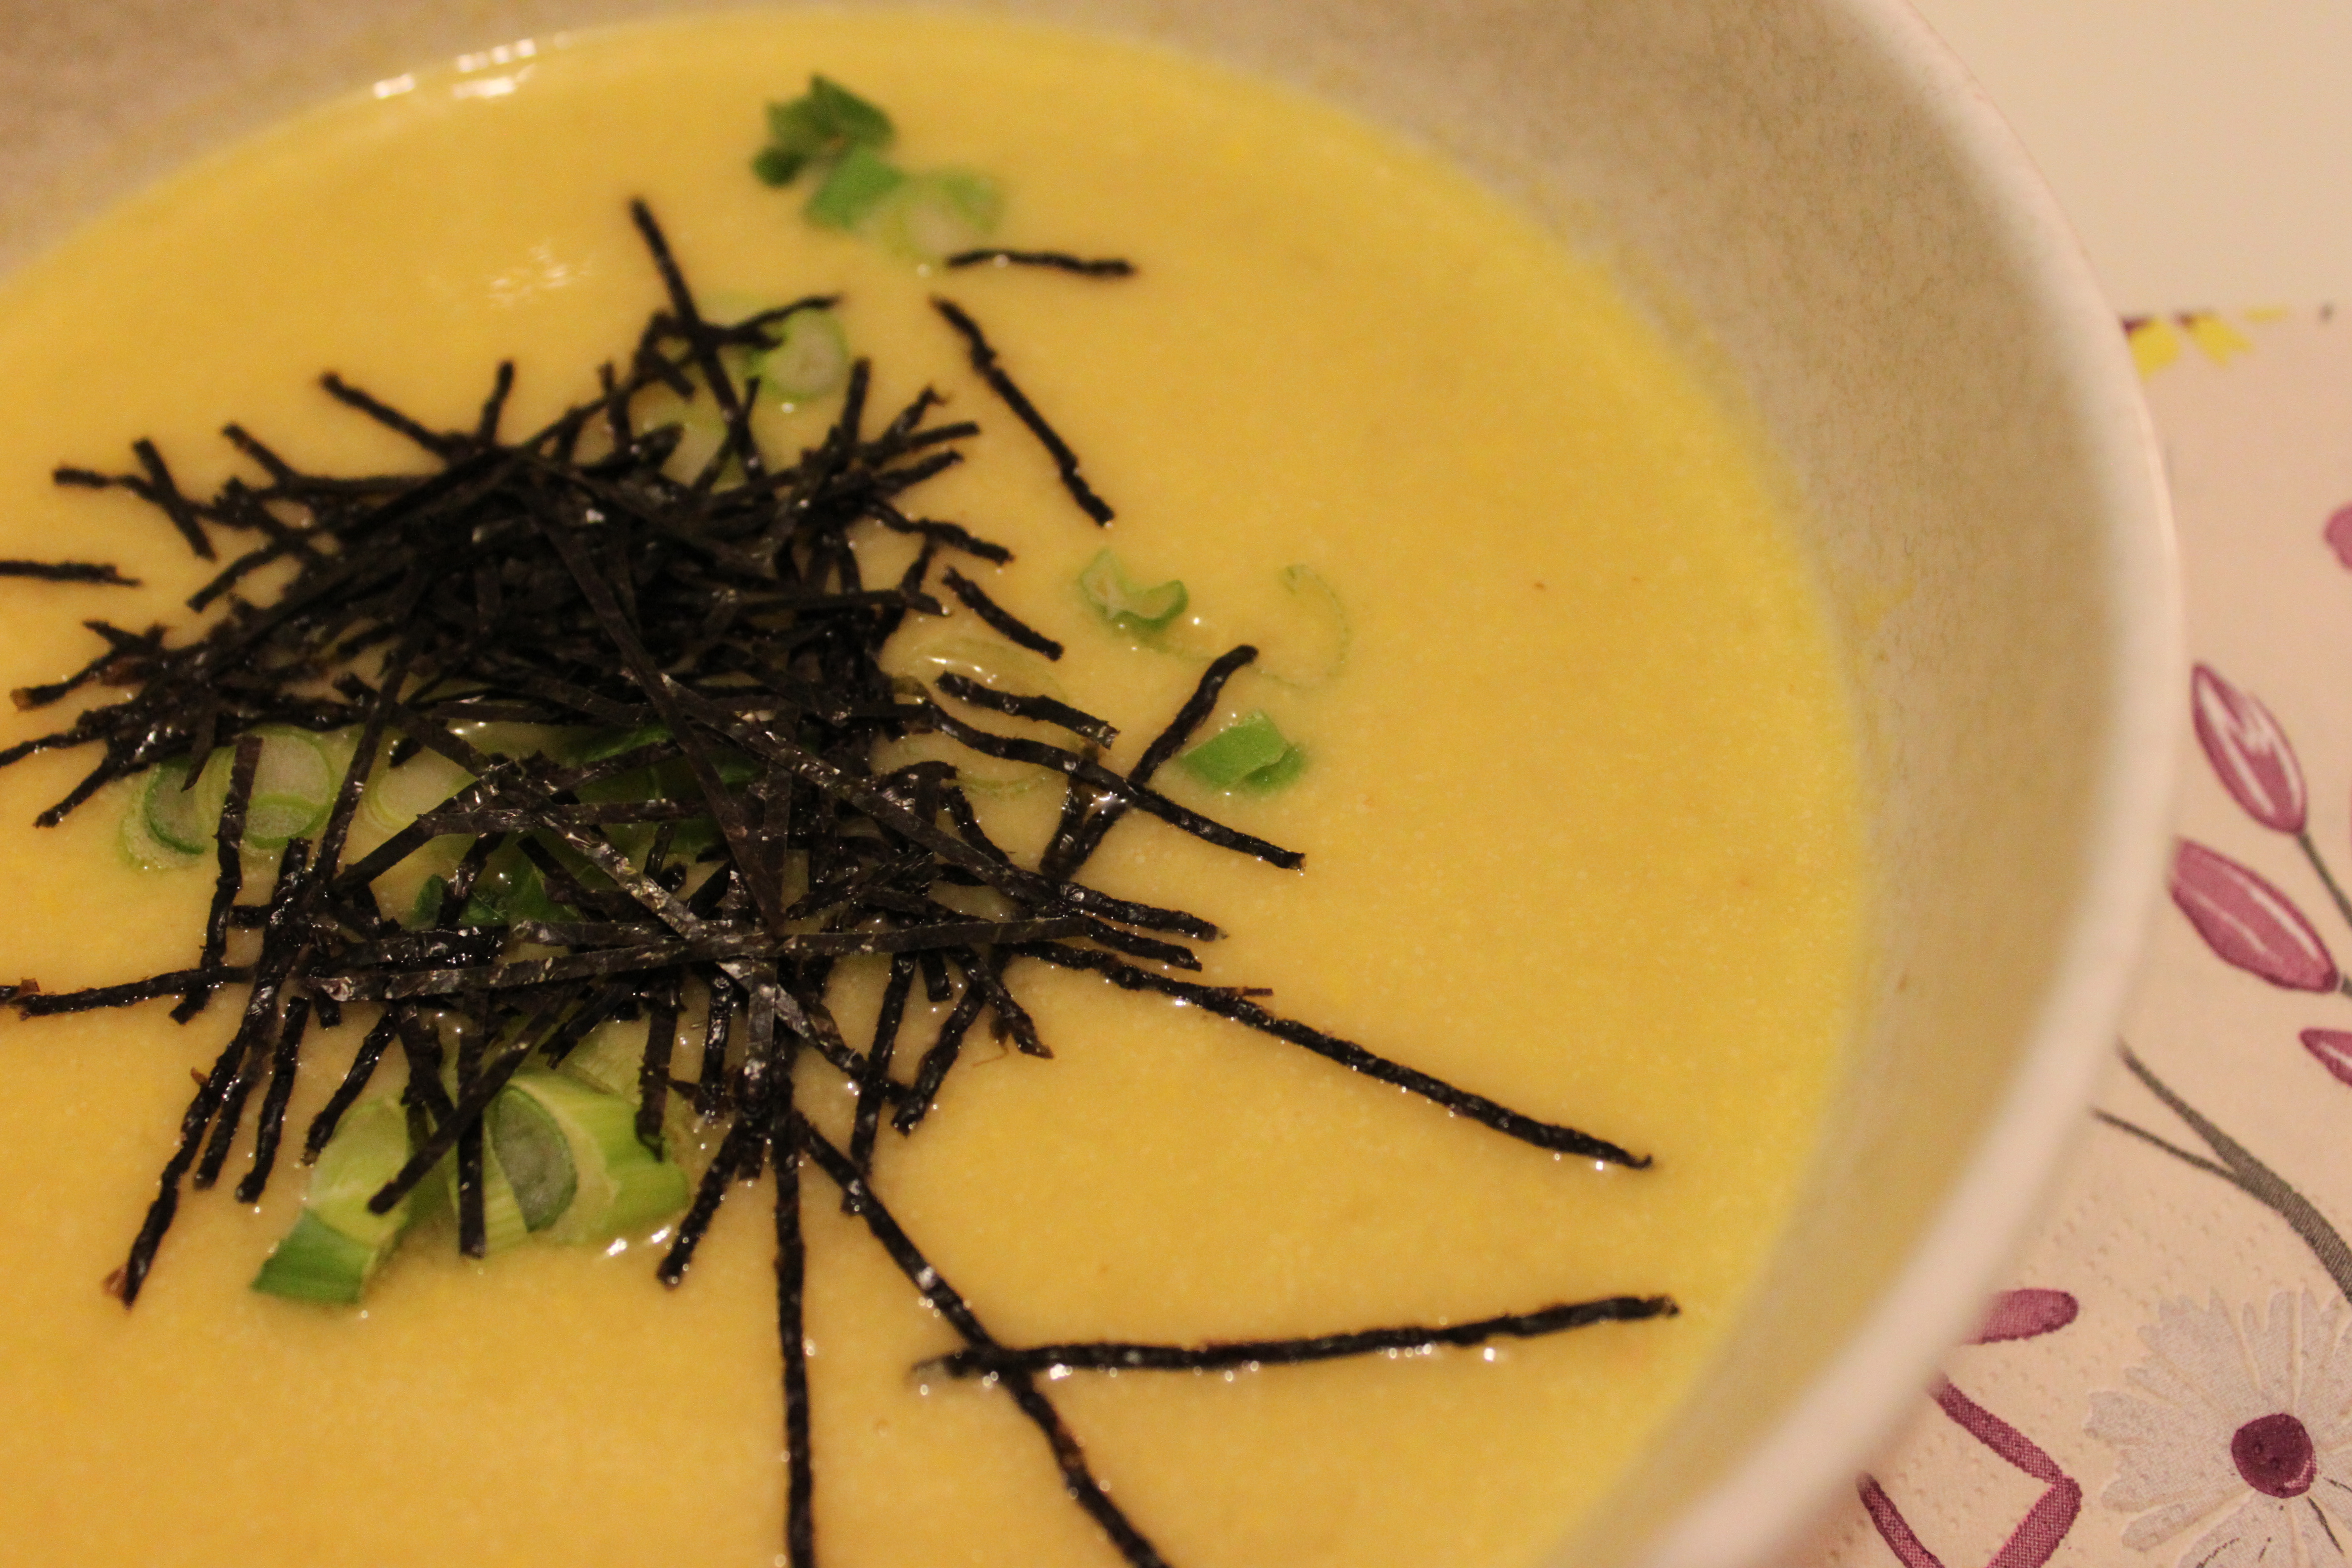
Over the weekend I hosted a bridal shower for my dear friend Virginia (Congrats!) and she specifically requested to have corn soup on the menu! I choose to make my favourite recipe, adapted from Jane Lawson’s Yoshoku – Japanese food western style with slight modifications (added chicken stock, omitted sesame oil). This is very easy to make; it’s great as a starter or a meal on its own, Enjoy (OO).
Ingredients: (Serves 2 – 4 (as small starter)
4 cups kombu stock, 1 cup organic low sodium chicken stock (optional), 4 cobs fresh sweet corn (peaches and cream); 1 oz organic unsalted butter, 1 teaspoon grape seed oil, 1 medium leek (white portion only, thinly sliced), 1 celery stalk (finely chopped), 1 to 2 garlic clove (crushed), 1 teaspoon finely grated ginger, 1/4 (60 ml) cup mirin, 1/2 cup (125 ml) cream, salt and pepper to taste, nori flakes and thinly slice green scallions (optional for garnish).
Preparation:
– Cut the kernels from the corn cobs, set kernels and cobs aside.
– Prepare the kombu stock; in a separate saucepan, bring chicken broth to boil, turn off heat and set aside.
Kombu stock: (1 piece of kombu (around 20 g – gently cleaned and wiped with damp cloth), 4 cups of cold water
– Put the kombu and 4 cups of cold water in a large saucepan. Heat up the water slowly on medium low heat; just before it starts boiling, remove the kombu.
– When kombu stock is ready, add corn cobs and hot chicken stock to the pan and return to the boil. Reduce to simmer and cook for 15 to 20 minutes, remove from the heat, discard the corn cobs and set aside.
– In a separate 8 quart stock pot, add butter and grape seed oil, melt over medium heat.
– Add leek, stirring regularly, cook for approximately 5 minutes or until lightly golden. Add celery, garlic and ginger, cook until fragrant (approximately 1 minute); stir in corn kernels, mix well with other ingredients and cook another 1 to 2 minutes.
– Add stock and mirin to corn and leek mixture, and bring to boil over high heat, then reduce to simmer and cook for 20 minutes.
– Using an upright blender, process and puree the soup in small batches (be mindful to fill blender jar less than half way).To prevent the liquid from splattering, remember to allow heat to escape; remove the blender’s lid centre insert (cap), hold a kitchen towel over the top when blending.
– Return puree soup to stock pot, stir in the cream and heat gently over low heat, do not bring to boil.
– Season to taste with salt and pepper; to serve, sprinkle with nori flakes and green scallions (optional).
Notes:
– I added the organic chicken broth (optional) for more flavour; the original recipe calls for 4 cups of kombu stock only, because I’ve added the additional cup of chicken broth, the soup is not as thick. If you want a thinner soup, add more cream.
– For a smoother and more refined texture, push the puree soup mixture through a fine sieve before stirring in the cream.
– I opted to use a light cream and seasoned the soup with sea salt from Okinawa (a precious gift from my friend “FanFan”, thank you very much!!).
Corn Soup in “Pink Striped” Icecream paper bowls for the bridal shower
– For the bridal shower, I served them in little “ice-cream” cups:)