RECIPE: Vegetarian Soba Salad with Lemon Miso Vinaigrette


IMG_0849

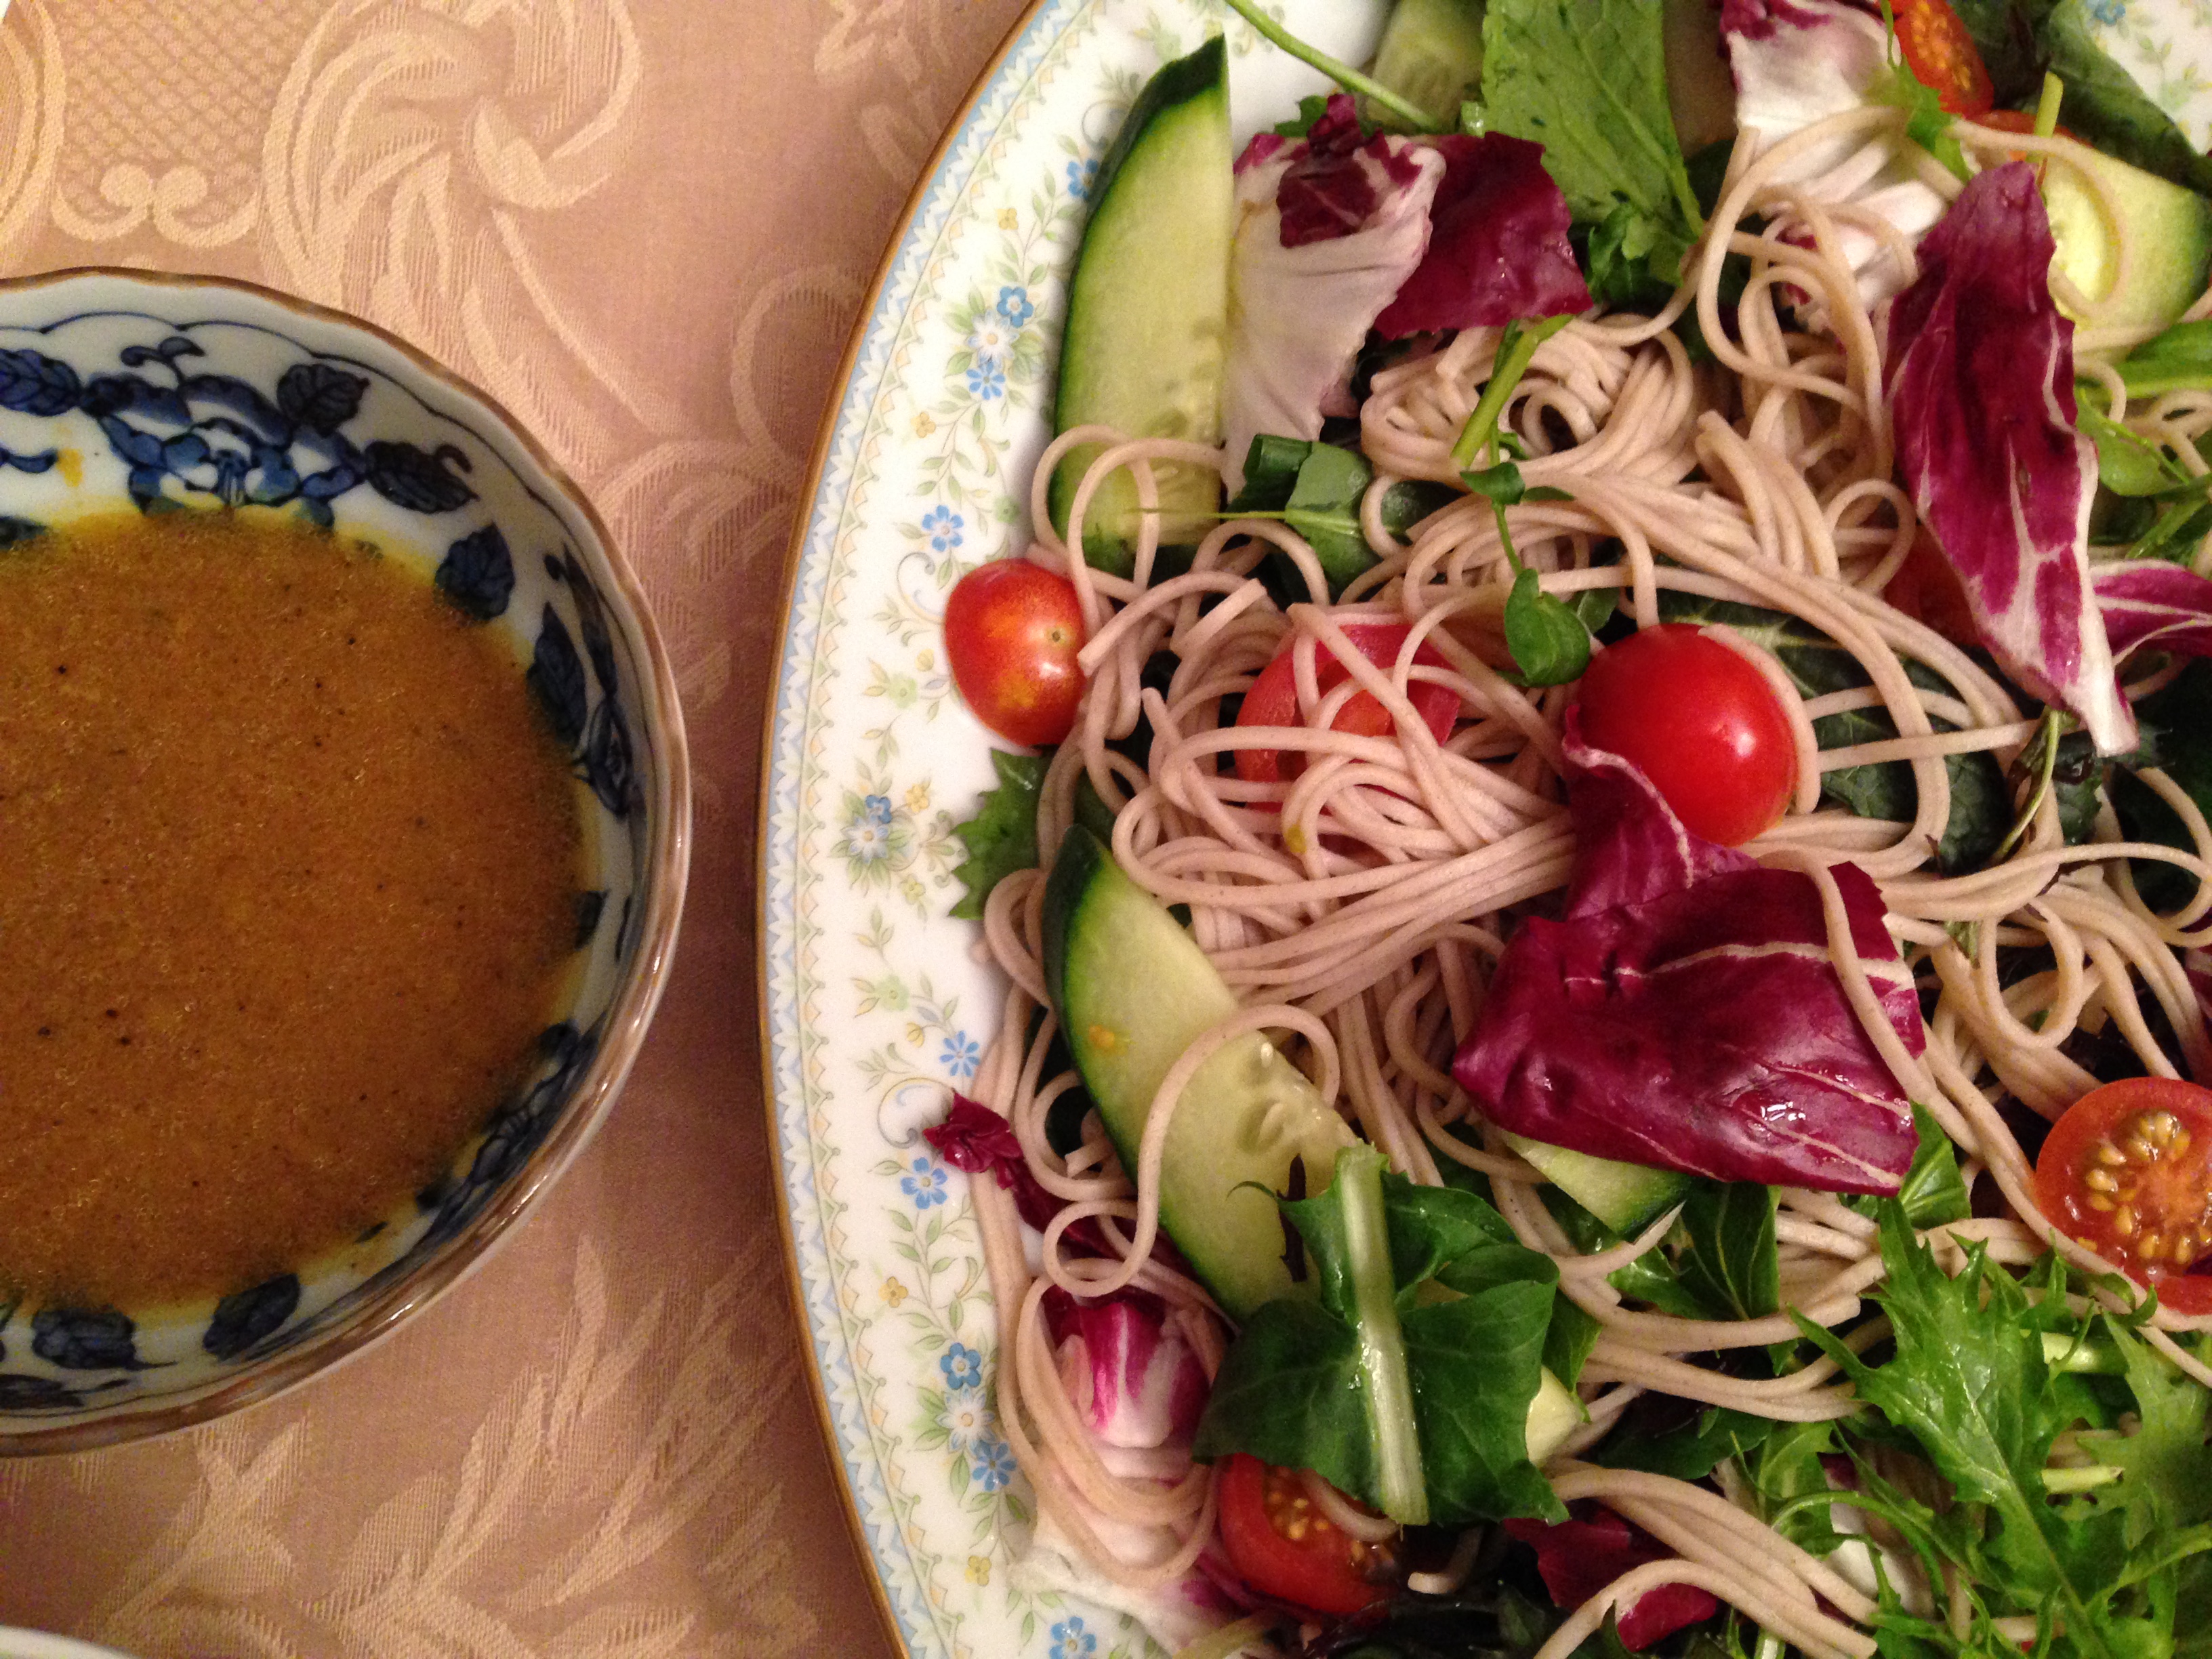
I have been following Ms. Sonoko Sakai the last while on Instagram since I came across photos of her soba making workshops; it is on my “bucket list” to make it to LA one day to attend her classes and learn how to make soba  You can imagine how ecstatic I was when I read Francis Lam’s article “Sonoko Dreams of Soba” in March edition of Saveur; there is was..a beautiful photo of her soba salad with lemon-miso vinaigrette, and it has all the flavors which we love: lemon, miso and ginger! Since I don’t know how to make the noodles, I used packaged organic soba;  it is still a little chilly here in Vancouver, at this time I prefer to have a warm salad so I lightly sautéed some of the vegetables, and added different ingredients to our liking and dietary needs. Ms. Sakai, thank you very much for the inspiration; I just have to fly to LA to take your soba workshop sometime soon.

Ingredients (serves 4):

For the salad: Small Radicchio leaves (about 6 to 8 pieces), 3 to 4 stalks of kale rabe*, 16 small variety of cherry tomatoes (roasted)*, 2 small carrot (peeled), 1 medium English cucumber (thinly sliced crosswise), 50 g (about 1/4 package) of sugar snap peas, green onion (1 stalk, finely chopped), a package of organic buckwheat noodle (200g, you can use less noodle), drizzle of olive oil

For the dressing: 1/3 cup extra virgin olive oil, 3 Tablespoon freshly squeezed lemon juice, 1 1/2 Tablespoon rice vinegar, 1 1/2 Tablespoon soy sauce, 1 Tablespoon white miso paste, 1 teaspoon toasted sesame oil*, 1-2 teaspoon maple syrup*, juice of one inch piece ginger (peeled), kosher salt and freshly ground black pepper

*these are my substitutions and additions: kale raab is actually very delicious and sweet

Here’s the link for the original recipe:

http://www.saveur.com/cold-soba-salad-miso-vinaigrette-recipe

Preparation:

  • Preheat oven to 400 degrees F.
  • Wash the vegetables, strain and dry thoroughly
  • Cut the cherry tomatoes into halves, toss lightly in drizzle of olive oil on shallow baking dish.  Spread them out into one layer and season lightly with kosher salt. Roast for 15 to 20 minutes, until tomatoes are soft.  Set aside.
  • Tear the radicchio leaves and chop the kale rabe into medium bite size pieces; set aside
  • Using a simple vegetable peeler and cut the carrot into ribbons (they will be curly); slice the cucumber thinly; set aside
  • In a large bowl, prepare an ice bath. Remove and discard the stem end and string from each sugar snap pea pod.  Place them in boiling water for approximately 2 minutes,  transfer them into the ice bath to stop the cooking process.  Drain the peas thoroughly, toss together with cucumber and carrot ribbons. 
  • Using a microplane set over a fine sieve (or tea leaf strainer) set in a bowl, grate the ginger into the sieve, then using a small spoon, press on the ginger solids to drain as much as juice as possible.
  • In a small bowl, whisk the olive oil with lemon juice, rice vinegar, soy sauce, miso paste, sesame oil and maple syrup.  Pour 1 teaspoon of ginger juice (I used more actually) and mix well with the dressing.  Season with salt and freshly ground pepper, whisk until emulsified.
  • In large pot of boiling water, cook the soba noodles according to package instructions; treat it like pasta and cook until they are al dente.  This step requires your full attention as soba noodles can be overcooked easily.  When they are done, rinse under cold water (until water is no longer murky), toss and drain the noodles thoroughly, set aside.
  • In large saute pan, heat a teaspoon of the dressing over medium high heat; add the kale raab, cook for 2 to 3 minutes (until it is wilted), add radicchio and cook for another minute; use a pair of tongs to toss the vegetables together.  Keep in mind you would like to keep the vegetables “cooked” yet crunchy.
  • Using a large bowl, mix the vegetables and soba noodle; assemble the salad onto a large platter or divide into 4 serving plates with dressing on the side.  Garnish with chopped green onions and roasted cherry tomatoes. Enjoy!
IMG_0699
I made the dish and served family style at my father-in-law’s birthday party.

Note: If you like soba noodle salad, go to my blog archives and check out my Mushroom Soba Salad with Yuzu Ponzu dressing, published in February 2014. Store leftover dressing in a mason jar (I just love them!), should be good for 1 to 2 days.  I used it the next day with sauteed kale rabe and granny smith apple bits, it was absolutely delicious.

Duck Breast Lettuce Wrap

IMG_2173
My lettuce wrap platter – “Pinkish” tone achieved!

The idea for this recipe spawned from three years ago when my friend “VG” brought back a bag of really delicious perilla flavored tea plums from her hometown (Kaohsiung); the moment I tasted the plums I immediately thought of using them for cooking and pair with duck, green tea and lychee to create an entree.

This was a work in progress and went through a few different versions, the idea of serving as lettuce wrap came this summer when I had a “Asian Food Fest ” gathering with some of my friends! I think by far it’s the best way to serve this duck breast and let it be the star with the perfect “supporting casts”. As I am  only an amateur home chef, the measurements are approximate and cooking methods are based on the knowledge I acquired through my home cooking experiments and the few cooking classes which I’ve attended.  Feel free to “tweak” it any way you think works best, and let me know if you have other suggestions.  Enjoy (OO)!

Ingredients: (Serves two as main course)

2 duck breast (small to medium size), 1 English cucumber, Bunch of green scallions, Head of butter lettuce 

Ingredients for the brine (which will be used to braise the duck breast and create the dipping sauce): 8 cups of cold water, 8 Tablespoons Organic Soy Sauce, 1 small knob of ginger (grated), 2 green scallions (roughly chopped), 1 green tea bag, 1 Tablespoon brown sugar (I’ve used rock sugar),I  8-10 lychee (fresh or canned, roughly chopped), 10-12 Taiwanese tea plums (remove seed, roughly chopped), 1-2 Tablespoons whole black peppercorn, juice and zest (grated) of 1 lemon,1-2 Tablespoons Japanese rice wine (sake), sea salt (for seasoning as required), 1-2 Tablespoons Taiwanese plum juice (optional)

IMG_1821
Left: Taiwanese Tea Plums (I found this at the Taiwanese supermarket in Richmond BC); Right: Taiwanese Tea Plum Concentrate (optional as it is difficult to find)

Preparation:

The day before: 

– Prepare the brine: With the exception of the green tea bag, put all brining ingredients into a 6 quart sauce pan. Using medium high heat, bring mixture to a boil.  Reduce to medium low heat, let the mixture simmer and reduce for at least 45 minutes to an hour, it will become more concentrated.

– Turn off the heat, add the green tea bag and let it steep for 10 to 15 minutes.  Remove from heat, remove tea bag, stir the mixture and let it cool down completely.

– Prepare the duck breast for brining: Place the duck breast on the chopping board skin side up, using a sharp knife, score the skin in a diagonal direction (45 degree angle), be careful not to cut into the flesh. Turn the duck breast around and score in the opposite direction.  Pat skin and flesh side dry and set aside.

This is a very important step as scoring the duck breast for cooking helps to render out the fat from the skin more effectively. It is best to score the skin of the duck breast when cold, as it becomes more difficult once the skin warms up.

– Pour cooled down liquid (including all ingredients) into a non-reactive container (BPA free plastic or glass with lid). Submerge the duck breasts into brining liquid, cover with lid and refrigerate overnight.

 Cooking Day:

In the morning:

– Remove the duck breasts from brining liquid, pat dry thoroughly (It must be completely dry) with paper towel, cover and refrigerate.

– Strain the liquid through a fine strainer, press hard on the solids to ensure you get every bit of the liquid.  Run it through a few times to remove any small bits.

– Sauce preparation: Pour liquid into 4 quart sauce pan, using medium high heat, bring liquid to a boil, reduce to medium low heat, and let it simmer and further reduce to approximately 2 cups, the consistency should only be a little “syrupy”.

When ready to cook and serve:

– Take the duck breasts from the refrigerator and let them come towards room temperature prior to searing.

– Wash all vegetables thoroughly: Pull of pieces of butter lettuce gently, wash thoroughly and pat dry with paper towel. Julienne the cucumbers (cut in thin slices) and shred the green scallions.

– Reheat the sauce, keep in low simmer (don’t let it burn).

– On different stove top, place duck breasts skin side down on cold dry skillet, do not add any cooking oil. Place the pan over medium to medium low heat, and slowly render down the fat, it will take approximately 6 to 8 minutes, using a spatula (be careful not to burn yourself), gently flip over and check if skin is browned evenly. Using a spoon, remove the duck fat.

IMG_2143
Duck breast skin side down on cold dry pan

– When duck breast is ready, flip over (skin side up) and remove from skillet, finish cooking by “braising” in the sauce (as shown in picture below), skin side up.  Adjust to medium low heat, Using a spoon, “spoon” the sauce constantly over the breast (this will help to cook the breast evenly), the liquid should be gently boiling (you can see bubbles).

IMG_2146

– Let them cook for approximately 5 to 6 minutes (depends on the thickness of the duck breasts), flip them over skin side down and cook for another 2 to 3 minutes. To test its doneness, the breasts should feel firm but tender, or you can should a

– Remove from heat, set aside and let them “rest” for at least 10 minutes prior to slicing.

– To finish the sauce, add a little duck fat (which you rendered earlier when browning the skin), Japanese sake and lemon juice, stir and mix well, taste and adjust the seasoning if required, finish off with a few grinds of black pepper. Strain the sauce one more time for a smoother texture.

– Slice the duck breasts thinly, it should be “pinkish” in colour.

– Assemble the platter and serve immediately.

Notes:

– I purchased the duck breasts from Armando’s at Granville Island.  The smaller ones are not as thick and easier to cook.

– This website has lots of good duck recipes and references:

http://www.greatbritishchefs.com/