RECIPE: Salmon and Leek Potato Crusted Pie

IMG_3281
The pie I made for Thanksgiving Dinner – this picture was selected and made it to this week’s Vancouver Sun Gastropost.

My sister-in-law Marcia is a pescatarian/vegetarian and a serious dessert/chocolate connoisseur; for almost every Festive family dinner gatherings when a “meat” dish is usually the main event, our mother-in-law would happily make our family’s favourite “Not real sushi – California rolls” (recipe already posted) or baked a salmon fillet for her, changing the sauce (Teriyaki, beurre blanc) each time.  Although she enjoyed them always, it became a routine…

I decided to change things up just a bit after revisiting the classic recipe: I know it’s not major or “life defining” culinary moment, the thought process behind the thinner crispy potato crust (instead of usual mashed potatoes) was very simple; the “pie’ idea was inspired by Marcia’s past lovely desserts and believe my entire extended family will find this more enjoyable, it’s less carbs (haha) and less fat (from the sauce to the filling). Over time, I find myself putting even more consideration and thought into the food which I cooked for family and friends, a lot of times it is for health reasons and their preference; this is my way to express my love to those close and dear to me.

This dish, along with the juiciest turkey I’ve ever cooked together with my mother-in-law, and the sides and salads (Thanks Barb and Gina) and desserts (thanks Marcia! The chocolate truffle cake and apple galette were divine) prepared by my sisters-in-law were devoured in no time.

That was another happy busy day in the kitchen, happy meal, happy gathering, happy family moment together…I have so much to be thankful for.

On another happy note: I submitted the “pie” picture to Vancouver Gastropost for last week’s “Pie Oh My” Mission, it was selected and featured in Saturday’s weekend paper!  Thank you Vancouver Sun for the acknowledgement (OO).

Ingredients: (For 9 1/2 inch pie plate)

500 g wild sockeye salmon fillet, 2 leeks (white part only, finely sliced), 4 to 6 Yukon gold potatoes (peeled and grated into strips), Japanese panko (handful), fresh juice of 1 lemon, 1 Tablespoon fresh dill (chopped), 1-2 Tablespoon grapeseed oil, sea salt and white pepper (for seasoning), grated cheddar (as you like and it is optional) 

For Lemon dill infused bechamel: 4 cups of “tempered” unsweetened almond milk, 3 to 4 sprigs of fresh dill, peel of 1 lemon (strips), 1 bay leaf, 1/4 teaspoon kosher or sea salt (or to taste), 1/4 cup (approximately) of all-purpose flour, 3 to 4 Tablespoon grapeseed oil (traditional roux calls for butter, fat and flour is usually 1-1 ratio, I’ve used less than 3 Tablespoon of grapeseed oil). **Using grapeseed oil and unsweetened almond milk is my personal choice.

Preparation:

One Day Ahead: Prepare Lemon dill infused Bechamel Sauce

– In 4 quart Sauce pan, start “tempering” and flavouring of almond milk: (this is an important step as cold milk will result in lumpy and grainy sauce)

– Rinse saucepan with cold water (do not wipe dry – this will prevent the fats and protein from scorching the bottom of the saucepan), add unsweetened almond milk, then the aromatics – sprigs of fresh dill, lemon peel, bay leaf.

IMG_3252
Flavours are steeping and simmering away!

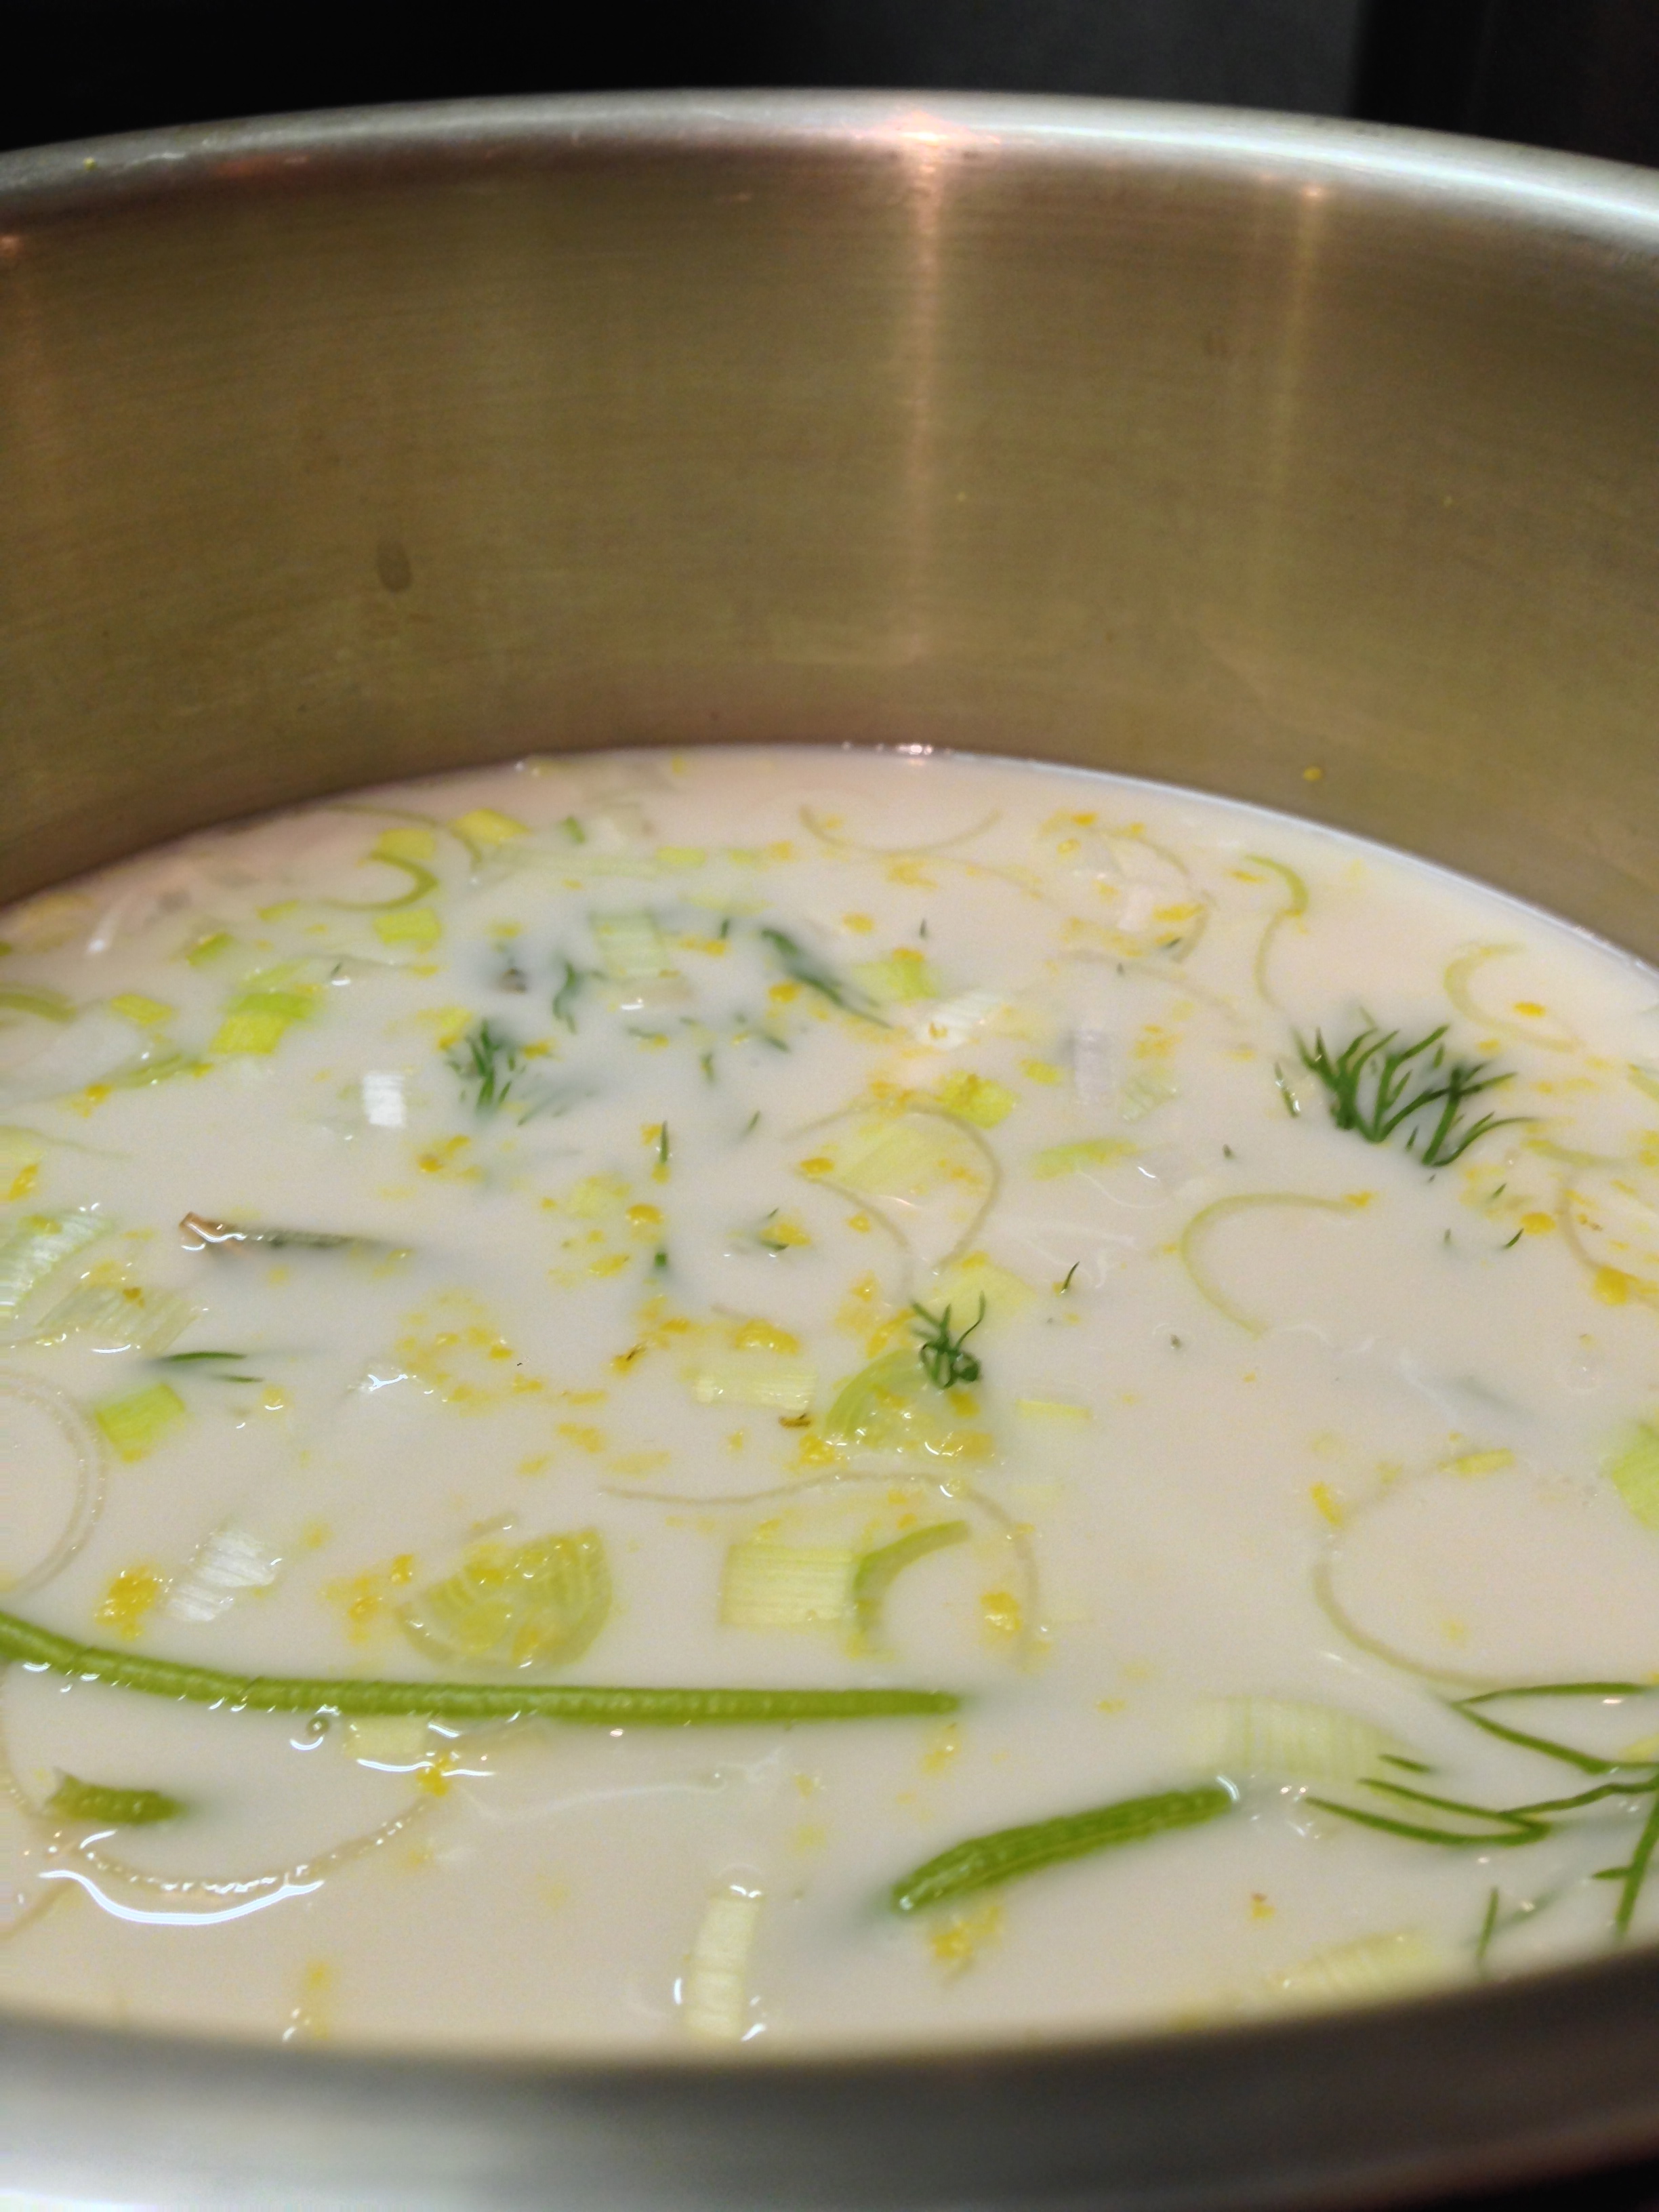
– Using medium low heat, bring liquid to a simmer (Do not bring to a boil), turn off the heat, cover with lid and let the flavours steep for at least 15 minutes (I did for 20 minutes).

– The hot milk should now be ready; it can now be strained into a measuring cup. Discard all flavouring ingredients.

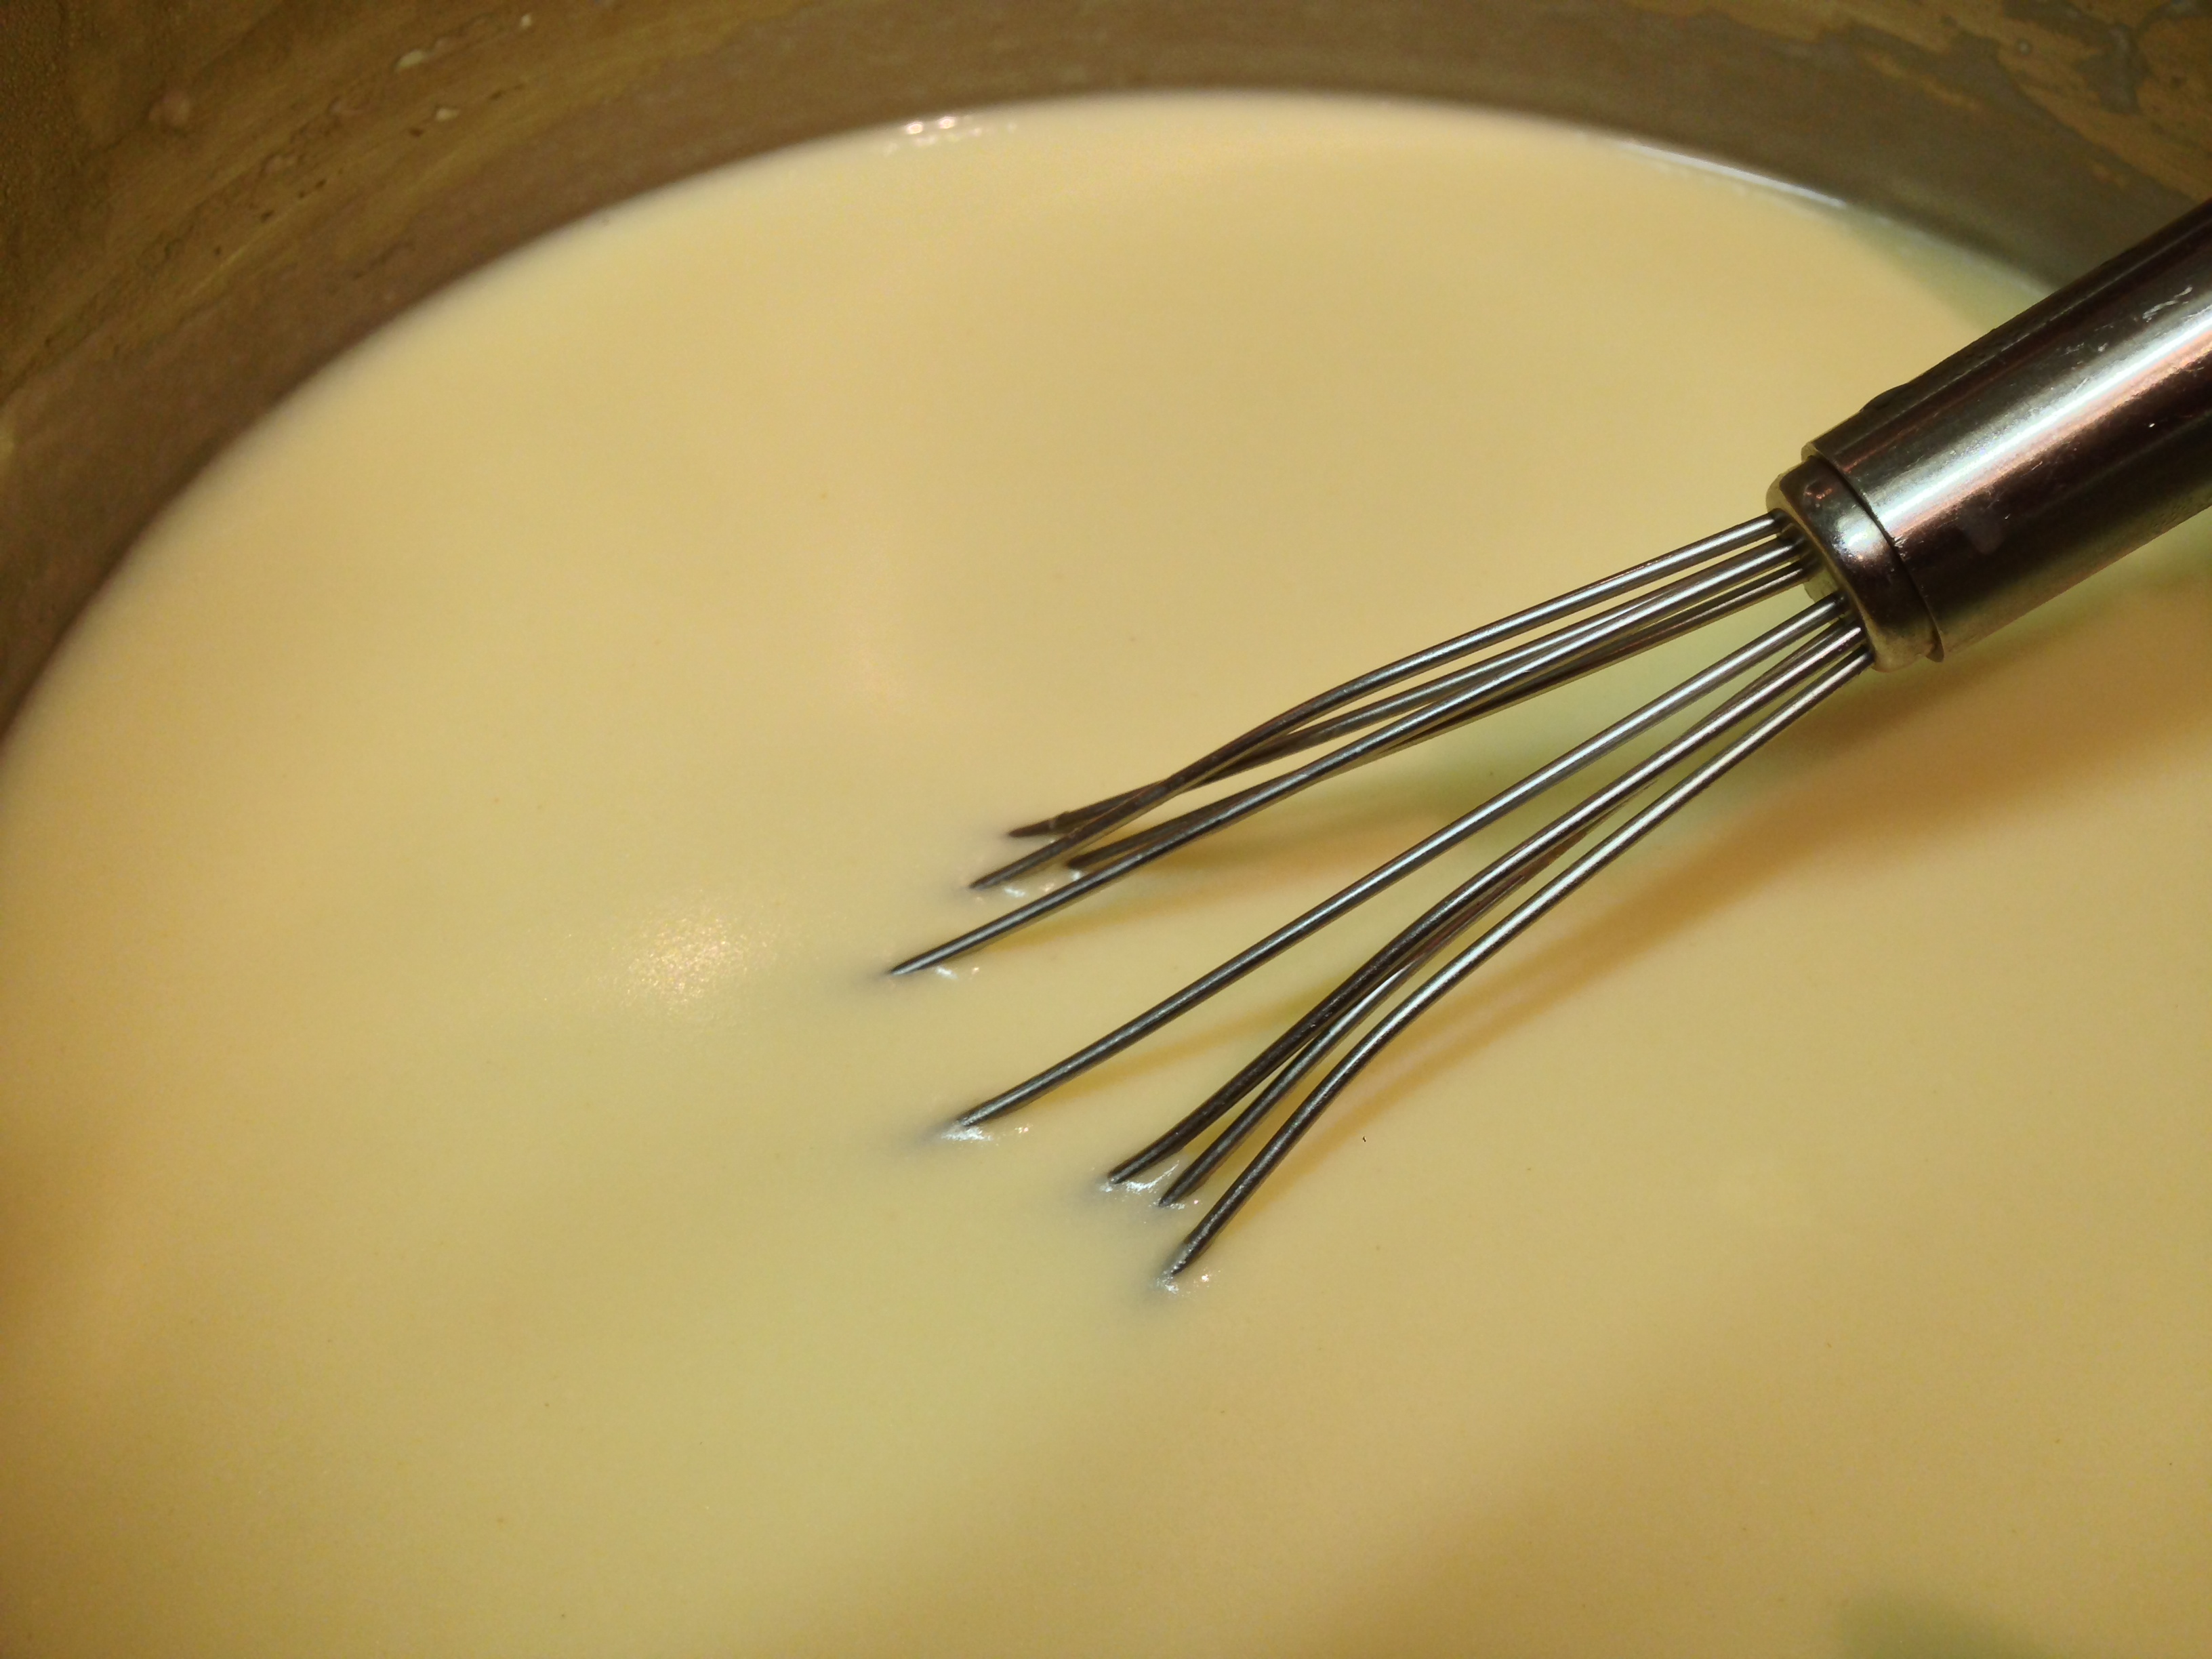
– Wipe the saucepan clean, over medium low heat, start making the white roux (combining fat and starch together): add olive oil to saucepan, when oil begins to bubble, begin adding flour, keep stirring to form a smooth thin paste.  The flour should be incorporated into the olive oil fully, continue to cook the roux by stirring constantly over medium low heat in order to prevent scorching (burning), the process should be no longer than 2 minutes (white roux does not take on colour), you are looking for a smooth and thin consistency (not thick and lumpy).

– Once the roux is ready, add hot milk to hot roux a bit a time while constantly whisking (easy to use a flat whisk) or stirring (spatula), let the mixture come back to a simmer each time before adding more hot milk.  Once all the milk has been added, bring it to a gentle simmer while stirring.  Lower The heat and simmer gently for 10 to 15 minutes, pot uncovered (important), in order to cook out the starch flavour.  Be careful not to bring to a boil as sauce will burn or split. Using a whisk, stir occasionally, make sure you scrape the bottom edges of the pot. The sauce should coat the back of a spoon nicely, once it finishes cooking, turn off heat, season to taste with sea salt and white pepper (optional). Strain the sauce into one more time for a silky smooth texture.

Whisking Away!
Whisking Away!

– To store properly, pour sauce into a glass bowl and place a plastic wrap over the hot bechamel,  when cooled completely, refrigerate. The sauce will thicken considerably; to reheat the next day, add a little water (or stock) to the cold bechamel, stir and bring to a simmer.

Preparation on The Day Of:

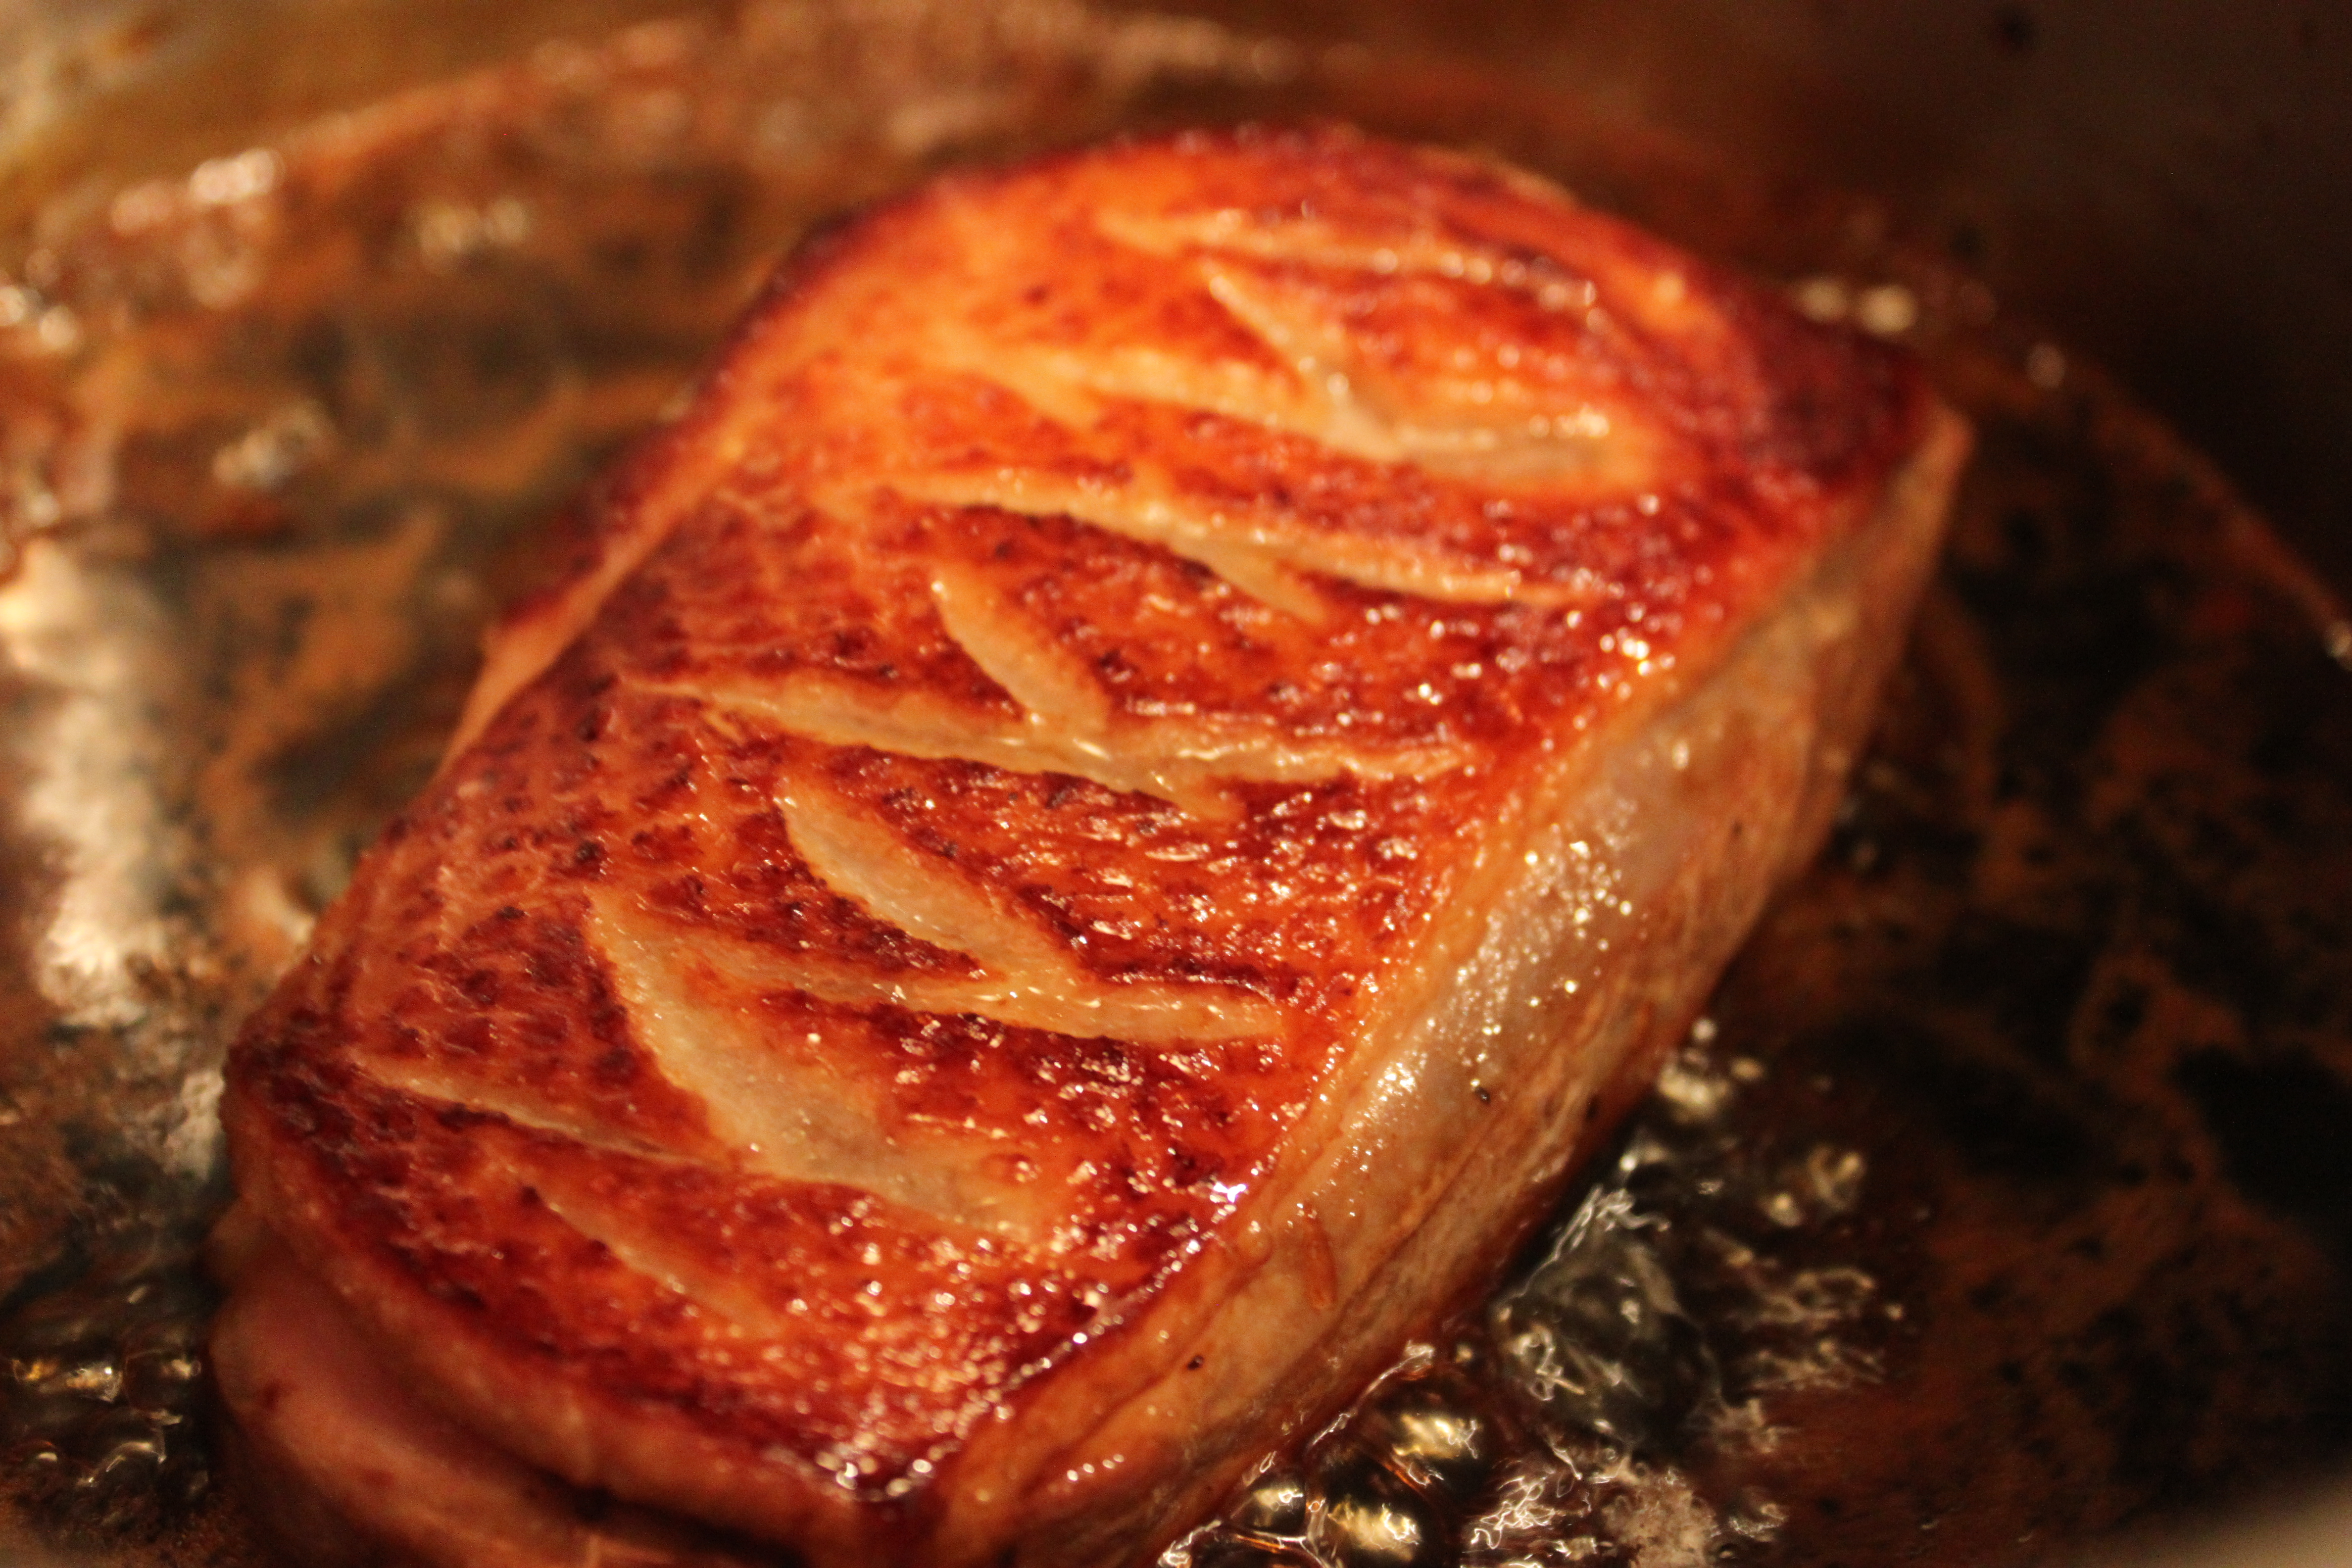
– Pre heat oven to 350 degrees F (to bake the salmon).

– Clean and pat dry salmon fillet with paper towel, using tweezers (I keep one for cooking) remove pin bones.

– Place salmon fillet (skin side down) in baking tray.  Mix 1 Tablespoon grapeseed oil and lemon juice in a small bowl, and drizzle over the salmon.  Season by evenly with chopped dill, sea salt and fresh ground pepper (optional) to taste. Bake approximately 20 to 25 minutes in the preheated oven, or until salmon is easily flaked with a fork; the salmon should still be pinkish and moist.

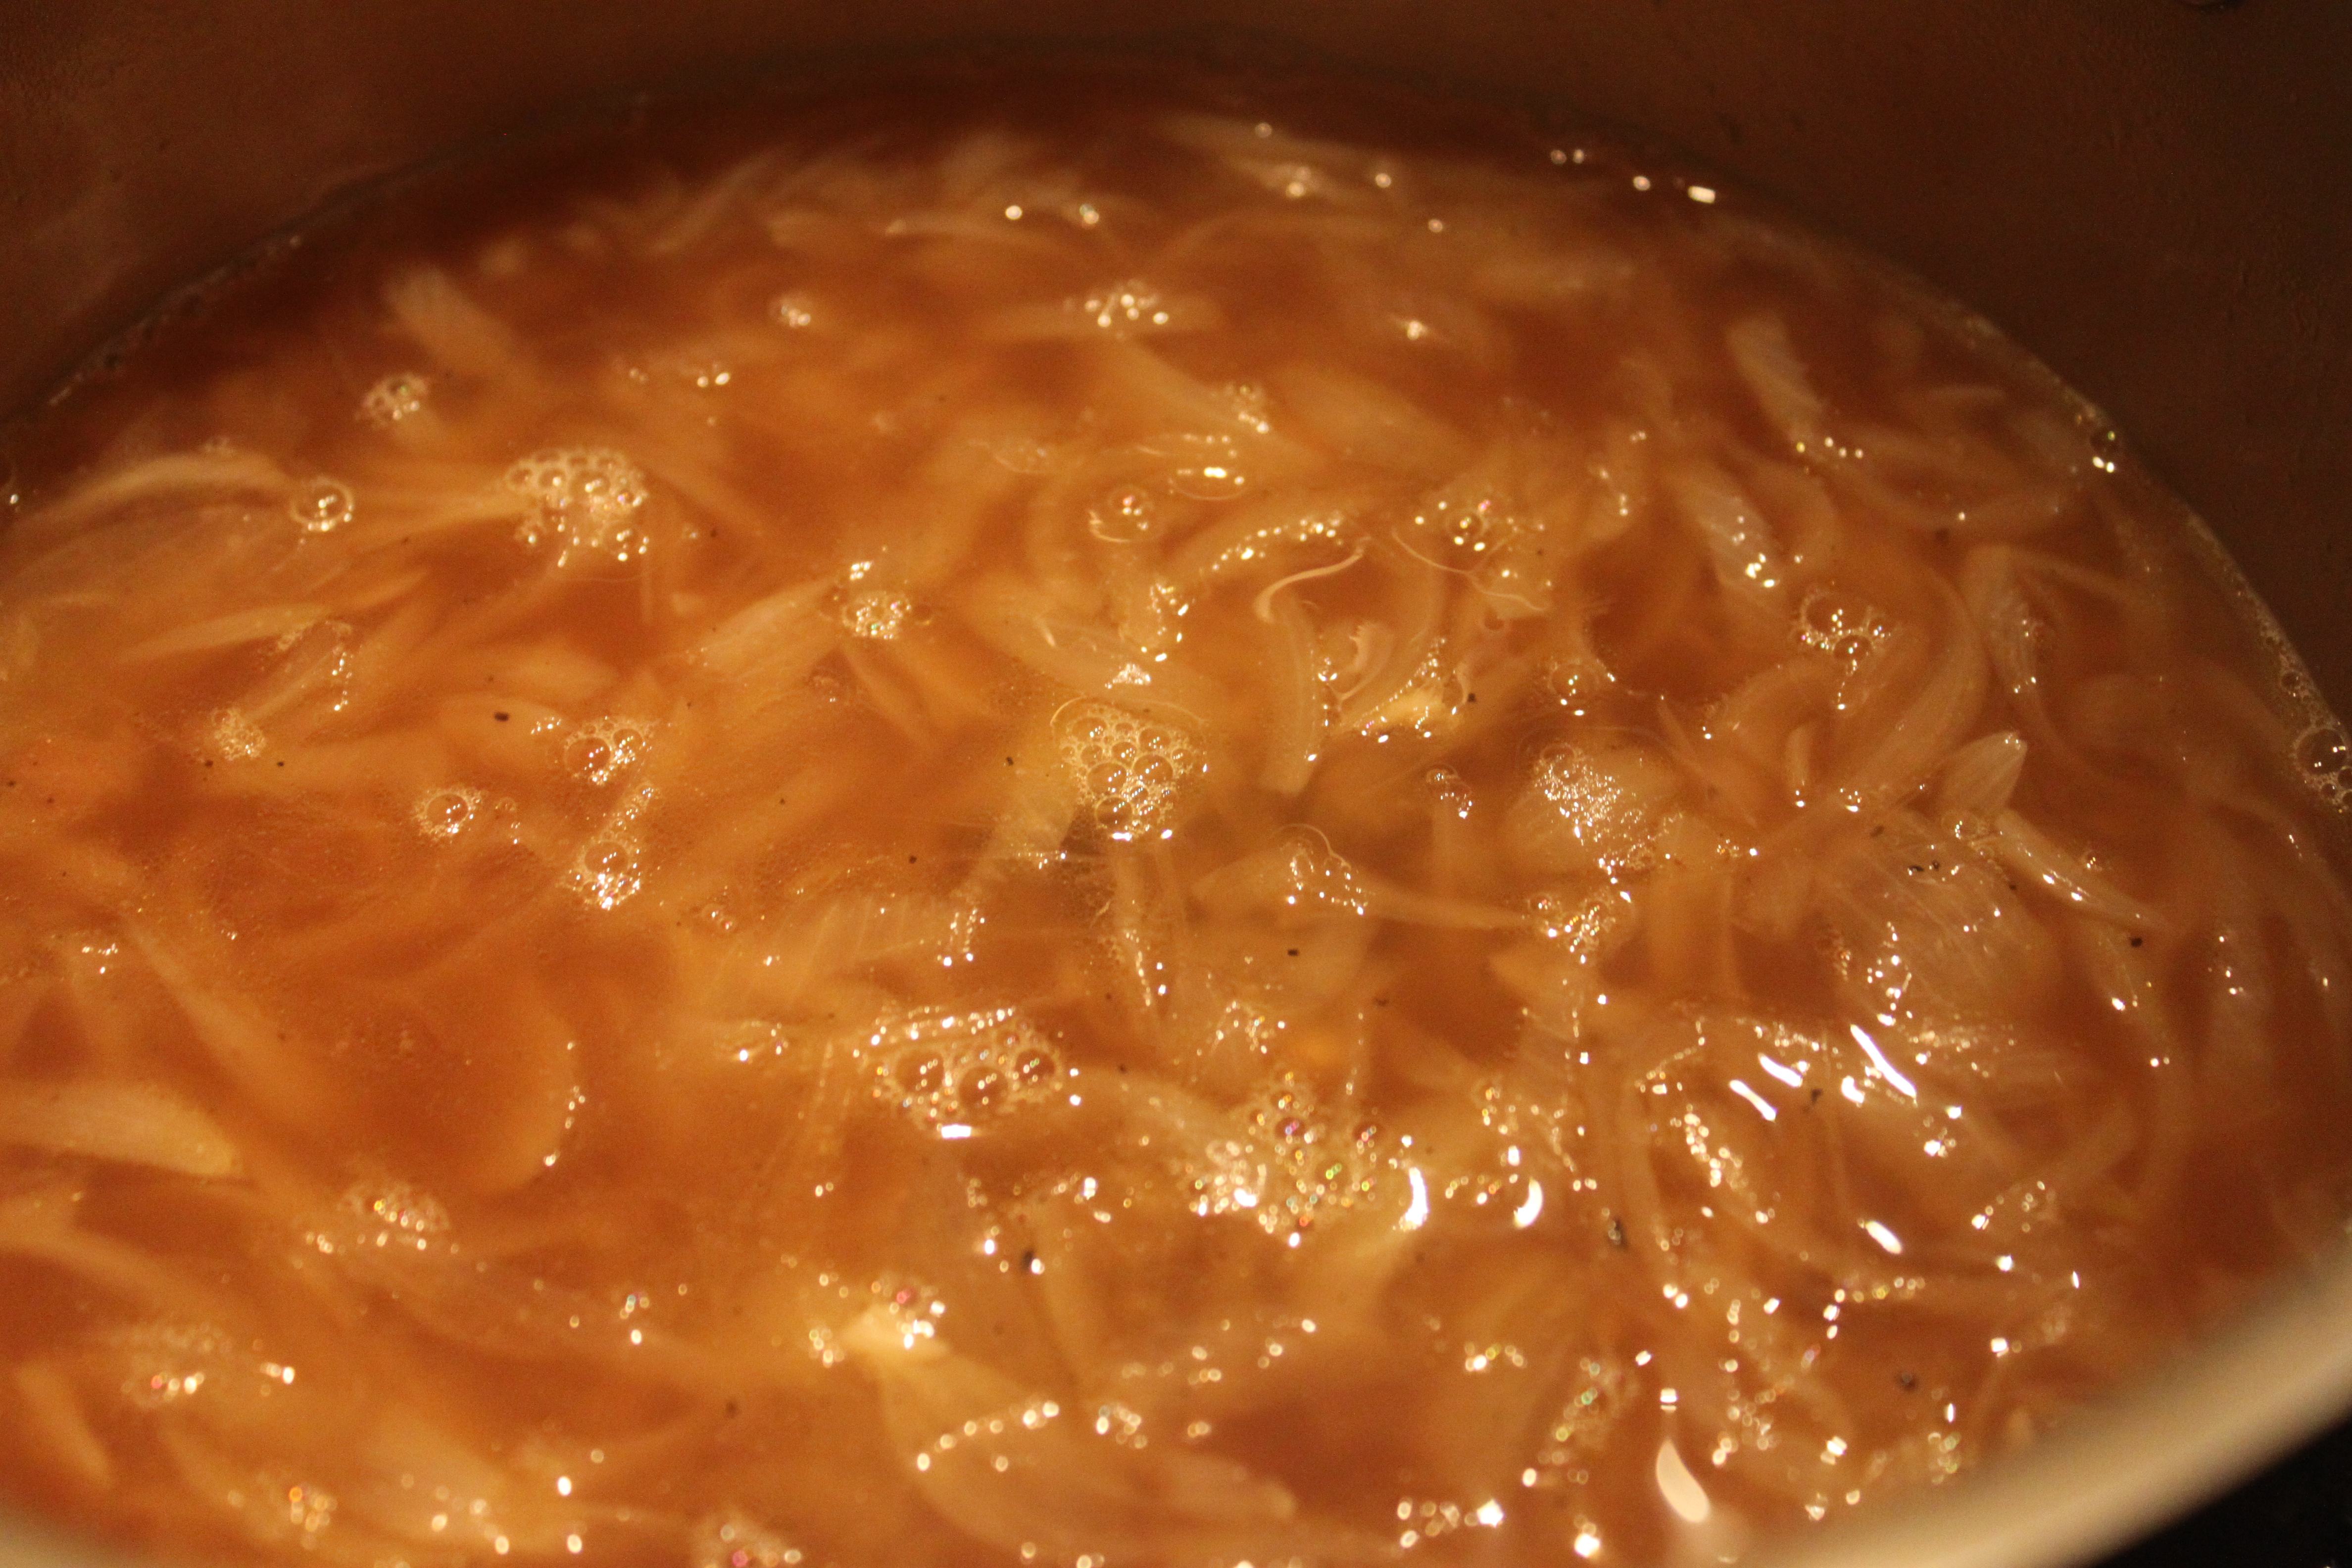
– While salmon is baking, peel and grate (or using a knife to slice) the potatoes into thin strips, place in a sieve, add 1 teaspoon of salt.  Squeeze out as much liquid as you can with your hands; leave to drain for 10 to 15 minutes.  Repeat the process again with another teaspoon of salt, leave for another 10 minutes and again squeeze hard to remove as much moisture as possible. Pat dry with paper towel, cover and set aside.

–  Once salmon is cooled considerably (don’t burn yourself!), start “flaking” the salmon by using a fork, the flakes should come off the skin easily. Flake them in “bite-size” (not large chunks), do not include salmon skin, make sure all bones have been removed.  Set aside

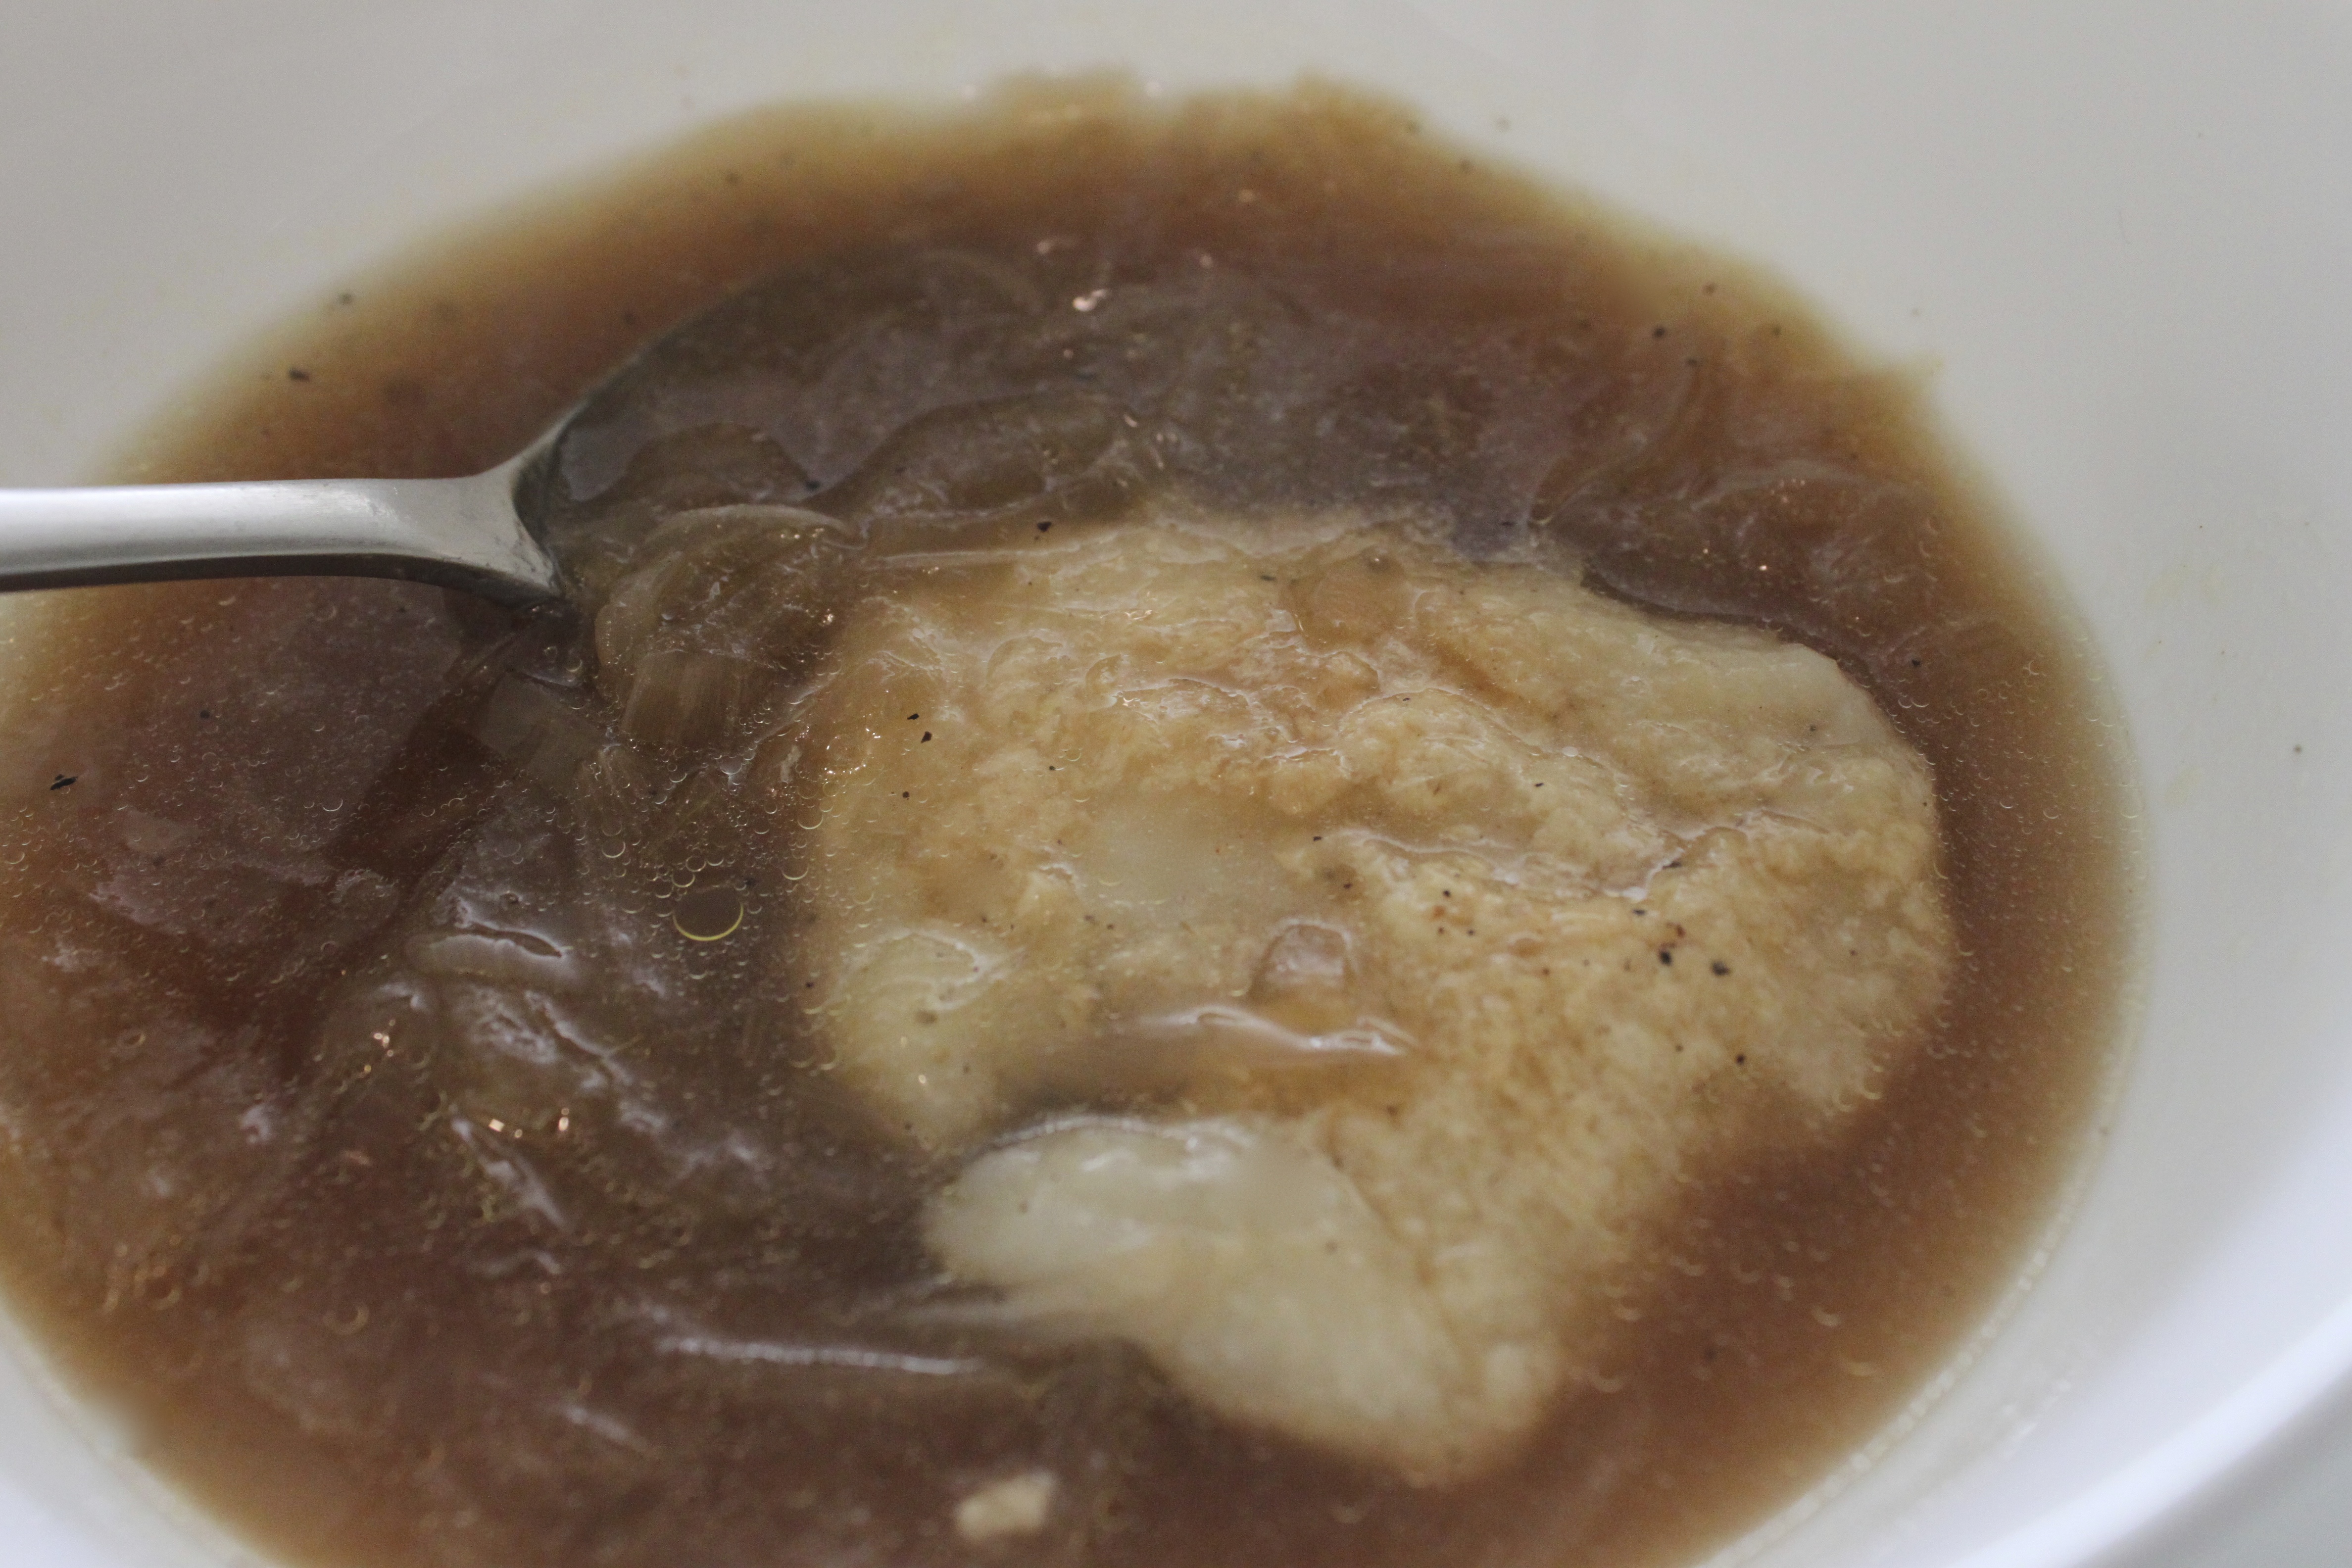
– In saucepan reheat the bechamel sauce by adding a little water to the cold sauce, stir and bring to a simmer. Turn off the heat when ready.

– In separate 6 quart pot, add drizzle of grapeseed oil over medium heat.  Add the leek and cook, stirring often, for 4 to 5 minutes, or until soft but not browned, then add salmon flakes. Turn off and remove from heat, using a spatula, slowly and gently “fold in” bechamel sauce (a few spoonfuls at a time) with salmon mixture. the filling should not appear runny (Do not stir)

– Pre heat oven to 375 degrees F.

– Mix the grated potato strips with a handful of Japanese panko. Lightly brush the bottom of the 9 1/2 inch pie plate (mine is my Mom’s  “vintage” Pyrex) with grapeseed oil, then sprinkle with chopped dill.  Then pour the salmon filling, and top with the grated potatoes in an even layer, lightly brush the potatoes with just a little grapeseed oil, the crust should brown nicely.

IMG_3277
Depend on your liking, you can put more potatoes. Remember to layer them evenly!

– Place on a baking tray in the oven and cook for 40 to 45 minutes, or until heated through and bubbling, the potato crust should be golden brown and crispy. Serve immediately.

Notes:

Bechamel sauce and salmon flakes can be made one day ahead; just remember to let all prepared foods cooled down, store in proper containers before refrigerate.

I actually prepared this salmon flakes and the bechamel the day before our family’s Thanksgiving gathering; it’s all about “mise en place” – getting organized and give yourself some breathing room on the day of!

If you choose to make the bechamel sauce at the same time, prepare it while the salmon is baking in the oven. Have to work pretty quickly!

Bechamel sauce, also known as white sauce, is made from roux (butter/flour) and milk.  It is a “mother sauce” in French and Italian cuisines, and used as a base for other sauces (for example French Mornay sauce – add cheese to bechamel), so it’s handy to learn how to make the base properly.  The choice of herbs to flavour the milk can be changed according to recipe.

The bechamel sauce cooking method is something I’ve learnt through the online cooking school Rouxbe; I am a life-time registered student/member for amateur programs.  Their instructional videos are very informative, the instructions I’ve written are based on the narration.  For serious home cooks, it may be worthwhile to register (http://rouxbe.com/); they also have professional programs available.

– Be mindful with the seasoning as salt is used to season all ingredients separately (especially the potatoes, salt was needed to “draw” the water), you don’t want to end up with a very salty pie!

– Always adjust all seasoning according to your taste and dietary needs.

– As I’m only a home cook,  I’ve tried my best to record the measurements while I was preparing this dish, please feel free to adjust if necessary.

– Adding cheese (grated cheddar) is optional as it makes the dish “heavier”: I did when I made this pie (see main picture) for Thanksgiving dinner, I skipped when I made our smaller home pot-pies for dinner, which I served with peas for dinner.  Enjoy (OO)!

IMG_3310
Smaller versions I made at home
IMG_3319
Voila!


September 24th Radio Show Recap

IMG_8884


Thank you Ms. Deborah Moore for having me on your show this morning! Until next time (OO)!

Here are the links and information for today’s radio show:

Casual Italian:

http://www.askforluigi.com/

Cream Puffs: Another new competitor in town!

http://chewyjunior.ca/

Happy Hour: Another new way to try out a restaurant?

http://theflyingpigvan.com/

Good read: Clean Eats and clean living

http://www.cleanprogram.com/clean-eats


Duck Breast Lettuce Wrap

IMG_2173
My lettuce wrap platter – “Pinkish” tone achieved!

The idea for this recipe spawned from three years ago when my friend “VG” brought back a bag of really delicious perilla flavored tea plums from her hometown (Kaohsiung); the moment I tasted the plums I immediately thought of using them for cooking and pair with duck, green tea and lychee to create an entree.

This was a work in progress and went through a few different versions, the idea of serving as lettuce wrap came this summer when I had a “Asian Food Fest ” gathering with some of my friends! I think by far it’s the best way to serve this duck breast and let it be the star with the perfect “supporting casts”. As I am  only an amateur home chef, the measurements are approximate and cooking methods are based on the knowledge I acquired through my home cooking experiments and the few cooking classes which I’ve attended.  Feel free to “tweak” it any way you think works best, and let me know if you have other suggestions.  Enjoy (OO)!

Ingredients: (Serves two as main course)

2 duck breast (small to medium size), 1 English cucumber, Bunch of green scallions, Head of butter lettuce 

Ingredients for the brine (which will be used to braise the duck breast and create the dipping sauce): 8 cups of cold water, 8 Tablespoons Organic Soy Sauce, 1 small knob of ginger (grated), 2 green scallions (roughly chopped), 1 green tea bag, 1 Tablespoon brown sugar (I’ve used rock sugar),I  8-10 lychee (fresh or canned, roughly chopped), 10-12 Taiwanese tea plums (remove seed, roughly chopped), 1-2 Tablespoons whole black peppercorn, juice and zest (grated) of 1 lemon,1-2 Tablespoons Japanese rice wine (sake), sea salt (for seasoning as required), 1-2 Tablespoons Taiwanese plum juice (optional)

IMG_1821
Left: Taiwanese Tea Plums (I found this at the Taiwanese supermarket in Richmond BC); Right: Taiwanese Tea Plum Concentrate (optional as it is difficult to find)

Preparation:

The day before: 

– Prepare the brine: With the exception of the green tea bag, put all brining ingredients into a 6 quart sauce pan. Using medium high heat, bring mixture to a boil.  Reduce to medium low heat, let the mixture simmer and reduce for at least 45 minutes to an hour, it will become more concentrated.

– Turn off the heat, add the green tea bag and let it steep for 10 to 15 minutes.  Remove from heat, remove tea bag, stir the mixture and let it cool down completely.

– Prepare the duck breast for brining: Place the duck breast on the chopping board skin side up, using a sharp knife, score the skin in a diagonal direction (45 degree angle), be careful not to cut into the flesh. Turn the duck breast around and score in the opposite direction.  Pat skin and flesh side dry and set aside.

This is a very important step as scoring the duck breast for cooking helps to render out the fat from the skin more effectively. It is best to score the skin of the duck breast when cold, as it becomes more difficult once the skin warms up.

– Pour cooled down liquid (including all ingredients) into a non-reactive container (BPA free plastic or glass with lid). Submerge the duck breasts into brining liquid, cover with lid and refrigerate overnight.

 Cooking Day:

In the morning:

– Remove the duck breasts from brining liquid, pat dry thoroughly (It must be completely dry) with paper towel, cover and refrigerate.

– Strain the liquid through a fine strainer, press hard on the solids to ensure you get every bit of the liquid.  Run it through a few times to remove any small bits.

– Sauce preparation: Pour liquid into 4 quart sauce pan, using medium high heat, bring liquid to a boil, reduce to medium low heat, and let it simmer and further reduce to approximately 2 cups, the consistency should only be a little “syrupy”.

When ready to cook and serve:

– Take the duck breasts from the refrigerator and let them come towards room temperature prior to searing.

– Wash all vegetables thoroughly: Pull of pieces of butter lettuce gently, wash thoroughly and pat dry with paper towel. Julienne the cucumbers (cut in thin slices) and shred the green scallions.

– Reheat the sauce, keep in low simmer (don’t let it burn).

– On different stove top, place duck breasts skin side down on cold dry skillet, do not add any cooking oil. Place the pan over medium to medium low heat, and slowly render down the fat, it will take approximately 6 to 8 minutes, using a spatula (be careful not to burn yourself), gently flip over and check if skin is browned evenly. Using a spoon, remove the duck fat.

IMG_2143
Duck breast skin side down on cold dry pan

– When duck breast is ready, flip over (skin side up) and remove from skillet, finish cooking by “braising” in the sauce (as shown in picture below), skin side up.  Adjust to medium low heat, Using a spoon, “spoon” the sauce constantly over the breast (this will help to cook the breast evenly), the liquid should be gently boiling (you can see bubbles).

IMG_2146

– Let them cook for approximately 5 to 6 minutes (depends on the thickness of the duck breasts), flip them over skin side down and cook for another 2 to 3 minutes. To test its doneness, the breasts should feel firm but tender, or you can should a

– Remove from heat, set aside and let them “rest” for at least 10 minutes prior to slicing.

– To finish the sauce, add a little duck fat (which you rendered earlier when browning the skin), Japanese sake and lemon juice, stir and mix well, taste and adjust the seasoning if required, finish off with a few grinds of black pepper. Strain the sauce one more time for a smoother texture.

– Slice the duck breasts thinly, it should be “pinkish” in colour.

– Assemble the platter and serve immediately.

Notes:

– I purchased the duck breasts from Armando’s at Granville Island.  The smaller ones are not as thick and easier to cook.

– This website has lots of good duck recipes and references:

http://www.greatbritishchefs.com/


Lemongrass Pork Meatball with Thai Green Curry

IMG_2092

Fall is in “full swing” here in Vancouver and it’s the season when we crave for scrumptious and hearty meals; I decided to combine two of our favourite foods together: Meatballs and Thai Green Curry with Zucchini and eggplant.

Almost two years ago I took a cooking class at the Blue Elephant Cooking School in Bangkok, the green curry recipe is a combination of what I’ve learnt at Blue Elephant and a partial adaptation from Andy Ricker’s Green curry with fish and eggplant recipe (from POK POK, see also blogger “Lady and Pup”‘s great adaptation (also pork meatball), it’s a great interpretation and I love the photos!).

Instead of jasmine rice, I decided to serve this dish with a cauliflower “fried” rice, a wonderful recipe (see separate posting) from my friend “PPQ”; it is a great way to include more vegetables into your meals and a very good option for “carb” conscious individuals; the flavors all worked wonderfully together. Enjoy (OO)!

Ingredients for the Lemongrass Meatball:

500 grams organic lean ground pork, 2 garlic cloves (finely minced), 1 stalk finely chopped lemongrass, 1 Tablespoon fresh galangal (or ginger, peeled and finely grated), 3 green scallions (white and green part finely chopped), 1/4 cup chopped cilantro (roughly chopped), 1/4 (up to 1/2 cup) of Japanese panko (as required), unsweetened almond or coconut milk (as required, approximately 1/4 cup), 1 large egg, 2 Tablespoon fish sauce, 1 Tablespoon coconut nectar (optional), 1 teaspoon sea salt and 1 teaspoon white ground pepper (seasoning can be adjusted own taste).

Ingredients for the Green Curry: 

1 Tablespoon olive oil, 1/2 cup Thai green curry paste (store-bought or you can prepare your own), 1/4 teaspoon cumin seeds (roasted and grounded), 1/4 teaspoon coriander seeds (ground roasted), 1 1/2 cup coconut milk, 1/2 cup unsweetened almond milk** , 1 medium Japanese eggplant (cut into 1 inch pieces), 2 medium zucchini (cut into 1 inch pieces), 1 (or 2) fresh Thai red chillies (sliced, seeds removed), 6 kaffir lime leaves (slightly torn by hand), sweet Thai basil leaves (1/4 – 1/2 cup for garnish), 1 Tablespoon fish sauce (more to adjust taste and seasoning) and 1 – 2 teaspoon grated palm sugar (for seasoning), coconut cream (for garnish), lime juice, chopped cilantro (for garnish).

**Almond milk is my own preference as I do not want the curry to be overly creamy. Andy Ricker’s recipe calls for 1/2 cup coconut cream and the preparation method is different.

To prepare the meatballs:

– In a large mixing bowl, using your hand, combine and gently mix ingredients (except panko and almond milk). Cover with wrap, marinade and refrigerate for at least one hour.

– Pre-heat oven to 375 degrees F.

– When ready to cook meatballs, add panko and almond milk (adjust the quantity pending the

– Lightly oil your hands, shape into 1 inch balls

– (**This step is optional – I “soaked” the meatballs in coconut milk for 20 minutes first, pat them dry then bake in the oven – see picture below).

– Lined your baking tray with foil and space them so they are not touching. Bake for approximately 20 to 25 minutes; then change to “broil” and “brown” for approximately 5 minutes, remove from the oven and set aside.

– Proceed to prepare the green curry once you place the meatballs in the oven.

IMG_2040

To prepare the zucchini and eggplant green curry:

– In large 6 quart pan, heat olive oil over medium. Add the green curry paste, ground roasted coriander and cumin seeds, stir-fry until an aroma develops and ingredients are slightly browned.

– Add 1/2 cup of the coconut milk, cook and stir occasionally, allow it to simmer until oil is extracted

– Add the rest of coconut milk and almond milk.  Bring to a boil, add eggplant then reduce the heat to medium low.  Cook for 10 minutes, stirring occasionally, then add zucchini and pork meatballs, cook until all vegetables are tender. Adjust the thickness of curry with water if necessary.

– Stir in fish sauce, palm sugar, kaffir lime leaves and chillies.  Taste the curry and adjust the seasoning if necessary.

– Remove from heat, stir in the basil leaves and a squeeze of fresh lime juice.

– Garnish with a drizzle of coconut cream, fresh sliced chillies (add more if you want more “heat”) and chopped cilantro. Serve immediately with rice on the side.

Additional notes:

– Omit the pork meatball and this becomes a great vegetarian dish.

***Here’s the recipe for Green Curry Paste from Blue Elephant Cooking School; the class was fun and informative, it’s worthwhile to attend if you happen to visit Bangkok.

10 pieces green birds eye chillies, 1 big green Serrano chilli, 1 coriander (or cilantro) root (omit if you are unable to find, use chopped coriander stems/leaf instead, approximately 1-2 tablespoon), 1/2 tablespoon kaffir lime zest (can use regular lime), 1/2 tablespoon finely sliced galangal (use ginger if you are unable to find), 1 Tablespoon lemon grass (finely sliced), 4 cloves of garlic (peeled), 3 shallots (peeled), 1 teaspoon salt, 1 teaspoon ground roasted cumin seed, 1/2 teaspoon ground roasted coriander seeds, 1/2 teaspoon white ground pepper, 1/2 teaspoon shrimp paste, 10 sweet Thai basil leaves.

To prepare the green curry paste: Dry roast the cumin seed and coriander seed in skillet until seeds begin to pop, let cool slightly and place them in spice grinder and grind finely. Using the mortar, apply a “pushing” motion and pound kaffir lime zest, coriander root, lemongrass, galangal (1/2 and all chillies together. Add the remaining ingredients (add basil leaves last) and continue to pound until everything is blended into a smooth paste. **If you find this too labour intensive, ready-made Thai green curry paste are available almost everywhere. Unused paste can be kept in an airtight container for two weeks in the refrigerator or last up to 1 month in the freezer.


Cauliflower Fried Rice

IMG_2070

More than two weeks ago, my friend “PPQ” was over at our place for mid-Autumn Festival Dinner and she made her simple version of cauliflower fried “rice” which paired surprisingly well with our semi traditional (Chinese steamed fish, roast pork belly, sautéed pea sprouts, sake steamed clams, duck breast lettuce wrap) dinner. She actually has modified the recipe based on the original posted on the award-winning site Nom Nom Paleo!  

We added garlic stems (I’ve seen them at our local Farmer’s market during early Fall season and readily available at most Asian Supermarkets); it adds a very delicate flavour and a nice crunch to the fried “rice”.

I made this again the other day and added shallots to the recipe. “PPQ”, thank you very much for your garlic stem idea! I’ve served the “rice” with Thai Green Curry, we didn’t miss the jasmine rice at all!  Basically anything goes with this excellent low carb option, same as any other recipes, feel free to modify and make it your own, Enjoy (OO)!

Ingredients:

1 small head of organic cauliflower, 1-2 Tablespoons olive oil, 1 small yellow onion (finely diced), 2 small shallots (finely diced), bunch of garlic stems – 1/2 to 1 cup (finely chopped), kosher salt and fresh ground pepper.

Preparation:

– Clean the cauliflower, core and trim the florets off the stems, cut off any blemishes (sometimes you see little brown spots). Place florets in the food processor and process until they resemble the texture and size of rice grains.

– Prepare garlic stems: wash thoroughly in cold water, pat dry, cut off end of stems and chop them finely

– In a large skillet, heat 1/2 Tablespoon of olive oil over medium high heat, add onions and cook until they become soft and translucent, add shallots and garlic stems; mix ingredients well and cook for another 3-4 minutes to bring out the flavours and aroma. Remove mixture from skillet and set aside.

– Adjust to medium low heat, using the same pan heat remaining olive oil, add cauliflower, season lightly with salt and pepper, stirring gently for approximately 5 to 10 minutes until the oil is evenly distributed and each “grain” is coated.

– Put the lid on the skillet, adjust to low heat (to avoid burning) and cook the cauliflower “covered” for another 5 minutes (to 10 minutes) until they become tender.

– Remove the lid, readjust to medium high heat, return onion/garlic stem/shallot mixture to skillet, using a spatula, gently stir fry all ingredients until mixture is slightly browned.

IMG_2050

– Taste and season with salt and pepper as required.


Wafu “French” Onion Soup

IMG_2230 - Version 2
Bon Appetite!

I love soups; I basically can have soup every day as a meal especially during the Fall and Winter season. This idea came from a wonderful Japanese soup cookbook, I’ve combined the recipe (and translated into English) with some elements from a classic French onion soup preparation; the base is made with Japanese soup stock (dashi) which is a great option for non-beef eaters; Japanese rice cake is used instead of classic baguette toasts. You will be pleasantly surprised…Enjoy (OO)!

Ingredients (serves 2 as a hearty meal, 4 as a starter)

Two medium size yellow onions (thinly sliced), 1 teaspoon unsalted organic butter, 2 teaspoon olive oil, 1 bay leaf, Japanese mochi (store-bought packaged rice cake – 2 to 4), Gruyère cheese (finely grated – 1 to 2 Tablespoons), 4 cups dashi (I made my own using kombu (kelp) and katsuobushi (bonito flakes), can use instant bonito stock packages), Japanese sake 2 Tablespoon, 2 Tablespoon organic soy sauce, pinch of sea salt and ground black pepper to taste

***see my June 16th ” Napa Shiitake Mushroom Tomato Soup” notes on Japanese soup stock (dashi)

Preparation:

– In a 6 quart pot over medium heat, melt butter and add olive oil.  Stir in the onions and season lightly with sea salt and few grinds of black pepper.

– Reduce to low heat, press a piece of foil onto the onions to cover them completely and cover the pot with the lid.  Stir occasionally (lift the foil) and cook until the onions are very soft but not falling apart, it takes approximately 30 to 40 minutes.  Remove the lid and foil, raise the heat to medium high and add Japanese sake (rice wine), gently stir often and cook onions until they are deeply browned (not burnt), approximately 10 minutes.

– Over medium high heat, add dashi broth, soy sauce and bay leaf to the caramelized onions and bring the soup to a boil. Reduce heat to medium low and simmer for 15 to 20 minutes to blend the flavours. Discard the bay leaf, season to taste with sea salt and black pepper.

IMG_2140
Soup is Simmering and Flavours developing!

– While soup is simmering, prepare the Japanese mochi – remove rice cake from individual packages, using a paring knife, make a small “slit” (or X mark) in the middle of each rice cake.

Fill the saucepan (make sure it’s big enough for 2 to 4 mochi and there’s enough room they won’t stick together) with cold water, submerge the mochi and turn on the heat to medium high. Gently stir and move the rice cakes around to ensure they don’t stick to the pan.  Once the water comes to a boil, turn the heat to medium low and let it simmer for a couple minutes.  Take them out when they begin to melt.

– Place the rice cakes in shallow baking dish and be sure to allow sufficient space between them without touching (the rice cake will expand as it bakes in the oven). Sprinkle the grated Gruyère cheese over the rice cakes,  place baking dish in oven, position the rack from the broiler and heat broiler to high. At this point you have to be very careful not to burn them; keep very close watch and after a while they will start to puff, broil until they are browned and bubbly. Remove from oven.

– Ladle the hot soup in each bowl and gently place baked rice cake on top. Serve immediately.

Notes:

– The soup can be made up to 2 days ahead and store in refrigerator; reheat soup and bake Japanese rice cake when ready to serve.

– You can find the rice cakes at Japanese food stores; in Vancouver, my go to place is Fujiya (912 Clark Drive, Vancouver, BC ).

– As always taste the dish while you’re cooking and adjust the seasoning according to your own taste and dietary requirements. For cheese lovers, be generous with the Gruyère!  I bought my aged Gruyère from one of my favourite stores, Les Amis Du Fromage (843 East Hastings Street, Vancouver, BC).

IMG_2213
Packaged Rice Cake


July 23rd Radio Show Recap

IMG_8884

Thank you Ms. Deborah Moore for having me on your show this morning! Until September…Enjoy (OO)

Here are the links and information for today’s radio show:

Beta Five Chocolates – 412 Industrial Avenue, Vancouver, BC (www.beta5myshopify.com)

(Delectable cream puffs and chocolates)

The Fish Counter – 3825 Main Street at East 22nd Avenue (www.thefishcounter.com)

(Fish and chips, dairy free clam chowder)

Fish Cafe – 2053 West 41st Avenue, Vancouver, BC

(Blackened/grilled/fried fish options, blackened halibut with saffron rice, fries,can substitute with salad (additional cost)

Hubub Sandwich and Salad Bliss (www.hubbubsandwiches.com)

Two locations – 420 Robson Street or 859 Hornby Street

(Gluten free options, fresh ingredients)


Vietnamese Style Tomato Beef Stew

IMG_2843

I’ve cooked many different types of stews in the past and this is only the second time I’ve prepared the Vietnamese Tomato Beef Stew (Bo Kho), my nephew’s favourite and he has always enjoyed this dish at another of our local favourite eateries in Vancouver, Au Petit Cafe (at Main Street and E. 32nd Avenue). I am so happy that I actually prepared this dish for my family; a big thank you to nom nom paleo for her wonderful wonderful recipe, I’ve used it as a base, made some changes and incorporated my own cooking methods. Beef stews are always more flavourful when prepared ahead of time, it’s best to start the preparation two days ahead for this dish (OO).

Ingredients:

2 1/2 pounds of boneless short rib (trimmed and chopped into 1 1/2 inch chunks, pasture fed beef if possible), 2 large lemongrass stalk (bruised and chopped into 1 to 1 1/2 inch length), 3 Tablespoons fish sauce, 1 1/2 Tablespoon Madras Curry powder, 1/2 Tablespoon Five Spice powder, 3 Tablespoons peeled and finely grated ginger, 4 Tablespoons applesauce, 1 bay leaf, 1 Tablespoon organic butter and 2 Tablespoon grape seed oil, 1 finely chopped yellow onion, 2 cups diced fresh tomatoes (peeled, seeded and crushed), 3 cups organic beef broth (or homemade pasture beef stock), 1 pound carrots (cut into one inch slices), kosher salt, cane sugar (finely grated), 1/2 cup chopped cilantro, store-bought French baguette 

Preparation:

– Two days ahead: Toss boneless short rib chunk, lemongrass, fish sauce, curry powder, five spice powder, ginger, bay leaf and 2 Tablespoons of applesauce in mixing bowl, mix everything well, sealed and marinade overnight in refrigerator.

– One day ahead: Let marinade beef mixture cool to room temperature; in Large Dutch Oven heat grape seed oil, using medium high heat, seared the short rib chunks in batches until they are browned all over.  Place the seared beef aside; Reserve the lemongrass stalk and bay leaf from marinade.

– In the same Dutch Oven, using medium low heat, add butter and saute the chopped onions until they soften; add the crushed tomatoes and kosher salt to taste, stirred to combine.  Simmer the mixture (approximately 15 minutes) until a thickened paste is formed.

– Add short rib chunks, lemongrass stalk and bay leaf to “thickened” paste, stir and mix everything well.

– Add beef stock and remaining applesauce to Dutch oven and bring mixture to a boil; lower heat to medium low and let stew simmer for approximately two hours or until short rib is really tender.

– Remove from heat; transfer beef/lemon grass to another large bowl, then strain the sauce in order to remove all residue

– Quickly clean the Dutch oven, return all ingredients and sauce, and add the carrots; simmer in medium low heat for approximately 30 to 45 minutes until carrots are softened. Season with fish sauce and cane sugar to taste.  If you think the sauce is a little thick, add more water to dilute the mixture and adjust the seasoning with fish sauce and grated cane sugar.

– When stew has cooled down, skim any visible oil and refrigerate overnight.

– Serving on the day: Skimmed all the fat (if any) and reheat the stew in low heat and bring it to a simmer.

e- To serve: Top the stew with freshly chopped cilantro and serve with oven toasted French baguette!


“Lazy” Phnom Penh Dry Noodle

IMG_2008

“Phnom Penh” is one of our favourite Vancouver eateries; my friend “PPQ” came up with this “lazy” version (without soup) and recently I have fine tuned this easy recipe. The ingredients are simple and easy to prepare, it is also fun to prepare this for a “buffet” or potluck party, all you have to do is prepare the toppings and everyone can assemble their own noodle dish and spark an interesting dinner conversation! Enjoy (OO).

Ingredients: (Serves 2 – 4 as light meal/appetizer)

1 package of fresh Chinese rice noodle “Cheong Fun” roll (650g, with scallions and dried shrimp) (available at most Asian supermarkets),  Tiger prawns (approximately 3-4 each person for each serving, shelled, deveined, boiled), lean pasture raised ground pork (250g), fish sauce (for seasoning the pork), cilantro, fresh lime, 1 package of bean sprouts, green scallions (chopped), fried garlic and fried onion (you can make your own or purchase prepackaged product from Thailand), fresh Thai chilies (seeded and finely chopped, optional), Chinese “Tianjin” preserved cabbage (small handful)

For the sauce:  Indonesian Sweet Soy Sauce, low sodium chicken stock, dark soy sauce (1-1-1 ratio)

Other condiments: Store bought Sambal Olek Chilli Sauce, chopped Thai chillies mixed with white vinegar (optional), Homemade prawn oil (optional)

Preparation:

–  Cut the rice roll into bite size (approximately 1 inch lengthwise); then slice through the middle to make them thinner; sprinkle with cold water and reheat in rice cooker (leave them in rice cooker under  “keep warm” mode”).

– To prepare the sauce: mix all ingredients and bring to boil, adjust sweetness and saltiness according to your liking

– Instead of oil, add a little water to skillet and saute the ground pork in high heat, add a little fish sauce for seasoning, set aside

– To prepare the prawns: shelled and deveined (with tail intact), add water to medium size pot (enough to cover the prawns), add a slice of lemon and a few black peppercorn and bring liquid to a boil; add prawns and cook until just opaque throughout. Have an “ice” bath ready; when prawns are cooked, pour the prawns into strainer and “shock” in ice bath immediately to stop the cooking process.  Strained and set aside.

– Parboil the bean sprouts quickly, strain and set aside.

– Prepare the preserved cabbage – soaked in cold water for at least 15 to 20 minutes, squeezed dry and chopped finely; chop green scallions, cilantro, slice the limes.

– To serve, Place each ingredient in individual serving bowls, prepare a condiment tray and set up the self-serve noodle bar.  Enjoy!

Notes:

You can adjust the meat/vegetable quantity and taste according to your taste and dietary needs.  Steamed pork belly slices are also good addition to this dish.

Indonesian Sweet Soy Sauce – the brand which I’ve used is called “ABC”, it’s available at T & T Supermarket.  When making the sauce, I diluted the sweet soy sauce with low sodium chicken broth to lessen the sweetness.

I used the prawn shells and prepared my own oil (It’s simple and easy to prepare).


June 18th Radio Show RECAP

IMG_8884


Hi everyone, thank you very much for tuning in this morning! Here are the links and information which I mentioned on Ms. Deborah Moore’s “Modern Deborah” on AM 1470;

If you have any questions, you are welcome to contact me at goldenapron@gmail.com.  ENJOY (OO)

Saturday brunch at Farmer’s Apprentice:

http://www.farmersapprentice.ca/

Pasta at MoMa Modern Bistro, delicious Beet salad

http://www.momabistro.com/

Balilicious – Tapas/Sampling Menu available now

http://www.baliliciousrestaurant.com/

Swallow Tail Winery and mushroom forage tours

http://www.swallowtail.ca/

As for my creations, I have also already posted the Napa Cabbage soup and Kale Caesar recipe.  More new postings will be coming soon!