Ever run into a cooking “snag” ? I just did the other day and my sister was my life-saver.
We always have a variety of vegetables in our every day meals, usually sautéed, blanched or roasted.
We seldom make any sauce for our vegetables, usually lightly seasoned with sea salt and olive oil. Perhaps in a huge part this is related to the types of cuisine we usually have at home, and also due to our continued efforts to restrict having “processed” foods (including prepared sauces) in our household.
The other day when we were trying to decide what to make for dinner; my sis started to tell me about this delicious Vietnamese dipping sauce which she had with steamed vegetables in Vietnam, she sent me a recipe by Ms. Vicky Phan as reference.
I was thinking dipping sauce for vegetables? Ah I get it, something similar toBagna Caudawhich I made a few months ago for our epic Italian dinner, except there’s no butter and anchovies, replaced with shallots and fish sauce.
It is very easy to make, takes less than 20 minutes including prep time. My recipe is a modified version of Ms. Vicky Phan’sSavory Vietnamese Vegetable Dipping sauce, check out her website for delightful Vietnamese recipes.
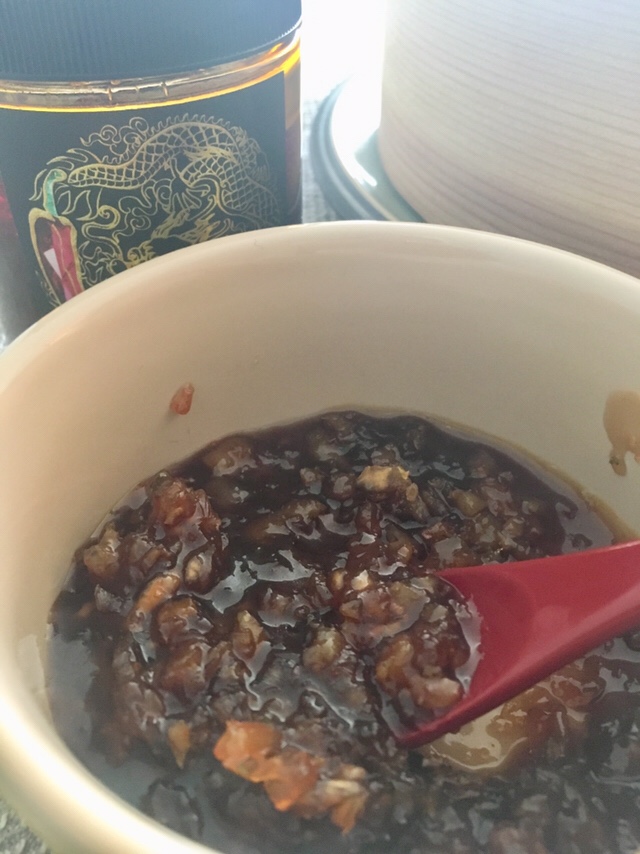
For my recipe I use more shallots than garlic, less fish sauce and substitute with hot water to make it slightly less salty, I have also added a little twist: grated lime zest, squeeze of lime juice plus a drizzle of the King Sauce (just the chili oil) from Betty King Sauce (Available online or through Instagram – check out this awesome King sauce)
Ingredients: 3 Tablespoons Fish Sauce (I used “Red Boat”, 3 Tablespoons raw cane sugar, 1 Tablespoon olive oil, 1 large shallot (minced), 2 small cloves of garlic (minced), 2 Tablespoons of dried shrimp (rehydrated in warm water, pat dry and minced), grated zest of lime and squeeze of lime juice, hot water (a few Tablespoons). ***Vegetarians – Omit the dried shrimp and use more shallots/garlic, or add chopped lemongrass to create a fragrant sauce. For some heat, add chili (or chili oil).
In small bowl mix fish sauce, a Tablespoon of hot water and raw cane sugar well. Set aside
Using medium high heat, in a sauce pan, add olive oil (or vegetable oil of your choice).
Add garlic and shallot, lightly stir fried until fragrant. Be careful they burn very easily.
Turn heat to medium low, add dried shrimp, mix well with garlic and shallot, stir until fragrant.
Add fish sauce sugar mixture into the pot, stir gently and cook until sauce thickens. You can add hot water (by Tablespoons – optional) to adjust thickness and taste according to your liking.
Add chili oil (optional), lime zest and squeeze of lime juice
Keep watch closely and dont let the sauce burn – patience!
When sauce is cooking, steam the vegetables which should be ready in a few minutes. Serve hot.
For our meal we served the sauce with steamed Brussel sprouts, zucchini, carrots, purple kale and brocolini. I lined the steamer with “cooking steam cloth” (available at Chinese cookery stores).
I used a really great steamer which I first saw on Youtube used by home cooks/bloggers; I searched for a long time and one fine day in December when I walked byOrling and Wu …..there it was…and I bought it home..
A bowl of savory and mouth-watering curry noodle soup on a cold Vancouver winter day!
My recipe is loosely based and adapted from Japanese Soul Cooking (By Tadashi Ono and Harris Salat), one of my great recent cookbook finds! They use soba broth (it’s called kake soba broth) to enhance the flavor of curry; I added turmeric (when sautéed the onions and vegetables), diced apple and fukujinzuke, commonly used to serve with Japanese curry rice, are used as garnish (in addition to green onion) to a hint of sweetness and add “crunch” to the dish, the end result is much more flavorful. Leftover curry taste even better the next day, add more vegetables or meat then serve with rice as a donburi (you can always add crispy fried pork cutlet (tonkatsu), or simply freeze it ready for use anytime for quick ready-to-go weeknight dinner; Enjoy (OO).
Serves 2-4:
Ingredients:4 bricks of fresh-frozen sanuki udon, 1 large onion (thinly sliced), 1 small head of cauliflower (florets roughly chopped), 1 medium zucchini (diced), 4 small bunched carrots (peeled and chopped), 3 Tablespoons of ground turmeric, 1 Tablespoon of mirin, 1 Tablespoon extra virgin olive oil, 1 package (110g) Japanese curry roux (I used Glico Medium Premium), 6 cups of katsuobushi dashi, green scallions (white part only, thinly sliced on an angle), kosher salt (light seasoning when cooking vegetables).
Note:
To make the dish completely vegetarian, simply substitute the katsuobushi dashi with kombu dashi broth
For Meat Lovers: Thinly sliced pork or minced pork goes very well with the curry, I used the a bit of ground ginger and apple, turmeric powder and kaeshi to marinade the pork (minced or thinly sliced) night before if I am adding protein to the curry.
You can use curry powder and potato starch instead of the instant curry roux.
Check out Ms. Namiko Chen’s Just One Cookbook, she has a great pork curry udon recipe.
Here’s a picture of the fukujinzuke!
*Recipe for kaeshi (makes 2 1/2 cups) – from Japanese Soul Cooking
Prepare 2 to 3 days in advance this recipe : Add 2 cups Japanese soy sauce (I used only 1 1/2 cups + 1/2 cup katsuobushi dashi to make it less salty), 1/2 cup mirin, 3 Tablespoons sugar (I used coconut nectar instead, adjust the sweetness accordingly) – Add all ingredients into saucepan and bring to boil over high heat. Turn off the heat and allow mixture to cool off to room temperature. Refrigerate for 2-3 days to allow the flavors time to mingle, store in glass bottle and refrigerate up to a month.
**In Japanese Soul Cooking – they prepare the kake soba broth (combining the kaeshi and dashi and a lot of mirin) ahead of time, I did not combine the katsuobushi dashi broth and kaeshi, I add them separately into the curry and use a lot less mirin. Check out their book, it’s filled with wonderful recipes, thank you very much for your inspiration.
Preparation:
2 to 3 days before – prepare kaeshi (see recipe above, refrigerate in glass container ready for use)
Prepare dashi broth (can be done 1 to 2 days ahead, refrigerate in glass container ready for use)
Prep all the vegetables
In a large saucepan, reheat the dashi broth (if you did not make from scratch the same day) and keep it warm
In a different large heavy pot, heat 1/2 tablespoon olive oil using medium high heat, add cauliflower and cook for 2 minutes, then add carrot (cook for another 2 minutes) and zucchini, lightly seasoned with kosher salt and 1 Tablespoon ground turmeric, saute in total 5 to 6 minutes then remove from pot, set aside.
In the same pot, heat another 1/2 Tablespoon olive oil (medium high heat), add sliced onion and 1 Tablespoon of mirin and saute, stirring constantly for 2-3 minutes, until onion becomes soft and turn translucent (I let it caramelize a little). Add the remaining 2 Tablespoons ground turmeric and cook, stirring constantly and mix well, be careful not to burn the turmeric!
Add the warm dashi broth and 1/2 cup of kaeshi to the pot , scrape the bottom of the pot, cook for 2-3 minutes and bring to a boil. Skim off any scum and fat from the broth. Reduce heat then let the flavors mix and cook for another 10 minutes.
Turn off the heat, add the curry roux, using a strainer or chopsticks, melt the roux and blend nicely with broth mixture.
Turn on the heat to medium high, heat the curry, stir occasionally, making sure it will not stick and burnt on the bottom. Using small fine mesh strainer, remove any scum.
Add cauliflower, carrot and zucchini mixture to curry, using medium low heat, let it simmer for another 15 to 20 minutes, gently stir occasionally to prevent sticking and don’t break the vegetables. Keep it warm using low heat (and it will not burn), taste the curry and add seasoning (using kaeshi) if necessary.
Prepare garnish – diced apples (squeeze a bit of lemon juice to prevent it from turning “brown”) and scallions
Meanwhile using a separate pot, boil water to cook the sanuki udon (according to instructions approximately 1 to 2 minutes) – I prepare each serving individually
Turn off the heat, put udon into bowl, ladle the curry over noodles, garnish with diced apples, scallions and fukujinzuke, now ready to serve and enjoy!
If you are adding ground or sliced pork to this dish, lightly saute the pork in the beginning and set it aside, add the meat last when vegetables are cooked, bring curry to boil and turn off heat immediately, the meat will cook through and remain juicy!
Where to shop for ingredients in Vancouver: Fujiya (Japanese groceries, fukujinzuke is available – 912 Clark Drive, Vancouver, BC), Nikuya (11220 Voyageur Way, Richmond, BC – for sliced pork), T and T Supermarket (Various locations – for Sakura Farms ground pork), Japanese Soul Cooking (Available at Indigo, Amazon, I purchased mine from Crate and Barrel at Oakridge Centre).
You must wonder what’s with the faux “Omurice” and Tomato Caramelized Onion “Jam-chup” (see other posting)?
Last month’s cauliflower “fried rice” was a food “jackpot”; I decided to continue to run with the idea and see what other variations I can come up with…
Over a dinner gathering with friends, we were talking about childhood comfort foods and our favours we love..my hubby Andy mentioned “Omelet Rice”….and voila!
I must give him full credit for coming up with this idea; It’s not a surprise at all as the Japanese “yoshoku” omelet is one of his all time favourite comfort foods! As an adult his tastes may have evolved in many ways but some things just never change – wonderful food memories and tastes just stay with us forever, we all have our own short list of “go-to” comfort foods.
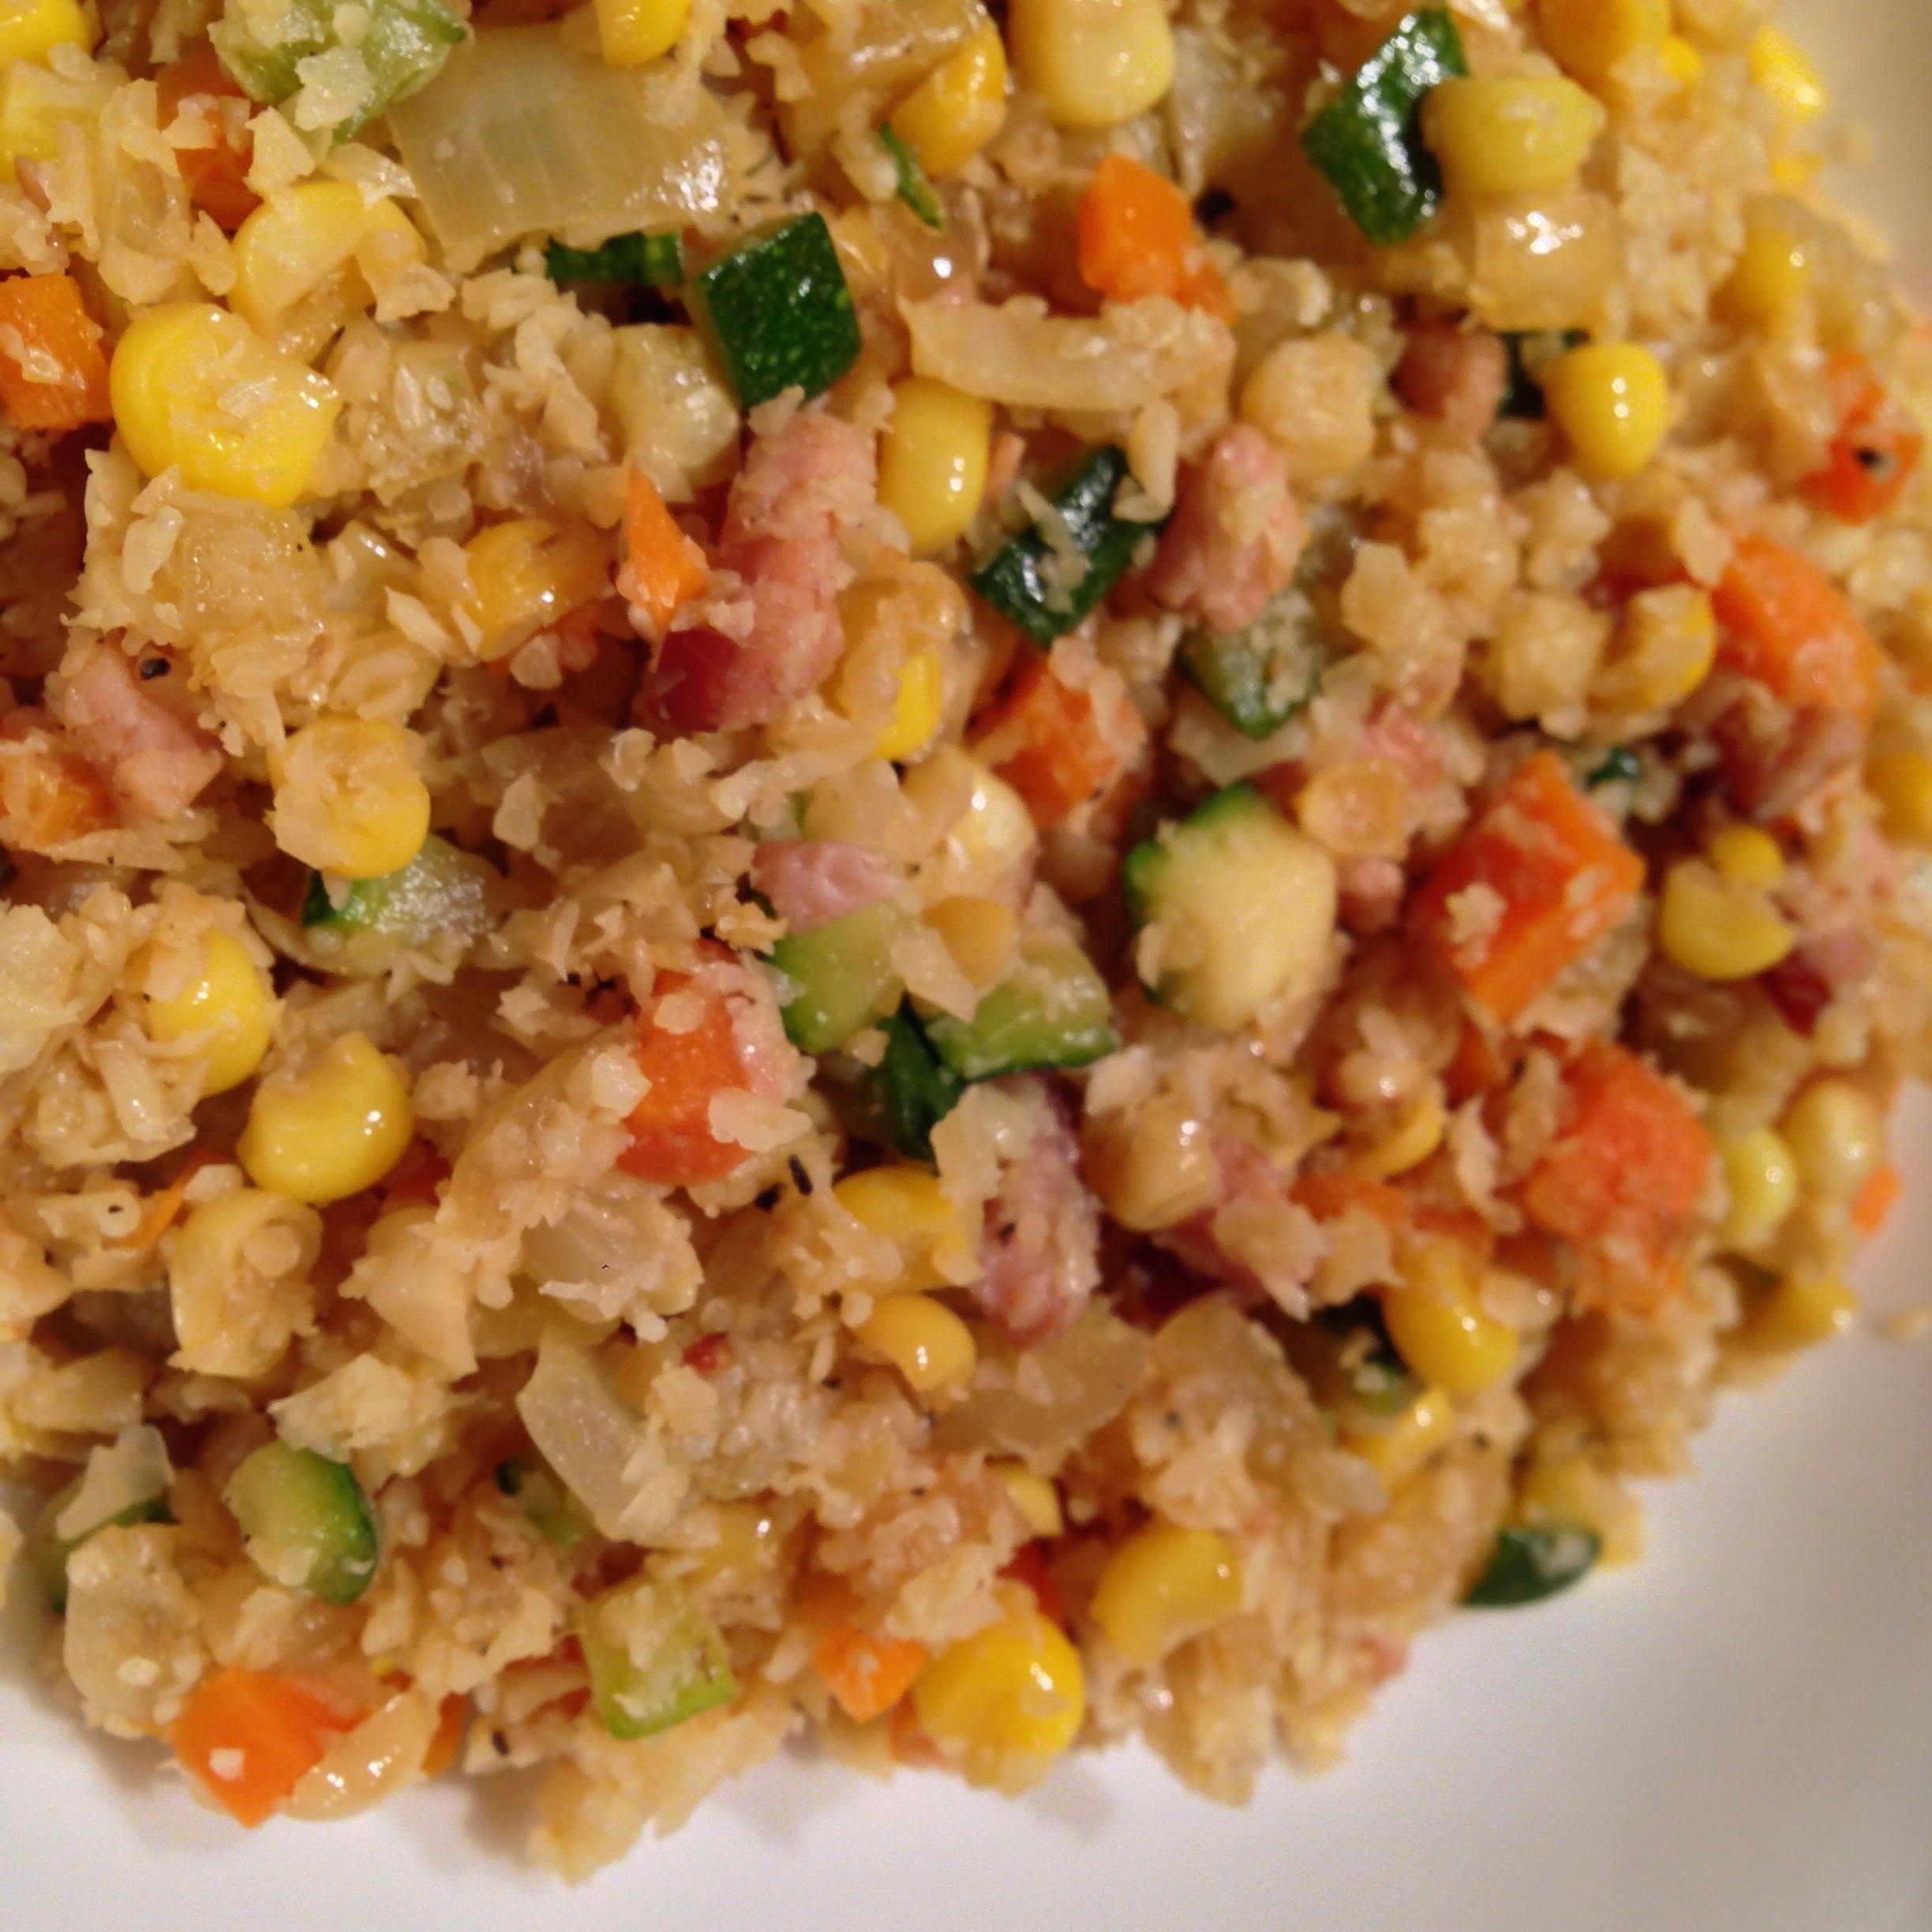
As for the choice of vegetables: I picked carrots, corn and zucchini for their crunchy texture! Although we are treating the cauliflower as “fried rice”, overall the texture is still a bit soft, it needs the “crunch” to add textural interest. The onions adds a sweet flavour and the Canadian back bacon lends a subtle smoky flavor, it is also leaner and I added just enough to satisfy a meat lover’s (like my husband) craving.
Canadian back bacon is also one of Andy’s favourites; this dish actually celebrates who he is, and pays homage to both his Japanese and Canadian roots.
The Tomato caramelized onion jam “jam-chup” (Andy calls it as it’s a replacement for ketchup, just a play on words) is a very lucky find (Serious Eats), I’m so happy and proud that I “tweaked” the original recipe and made it work for my dish.
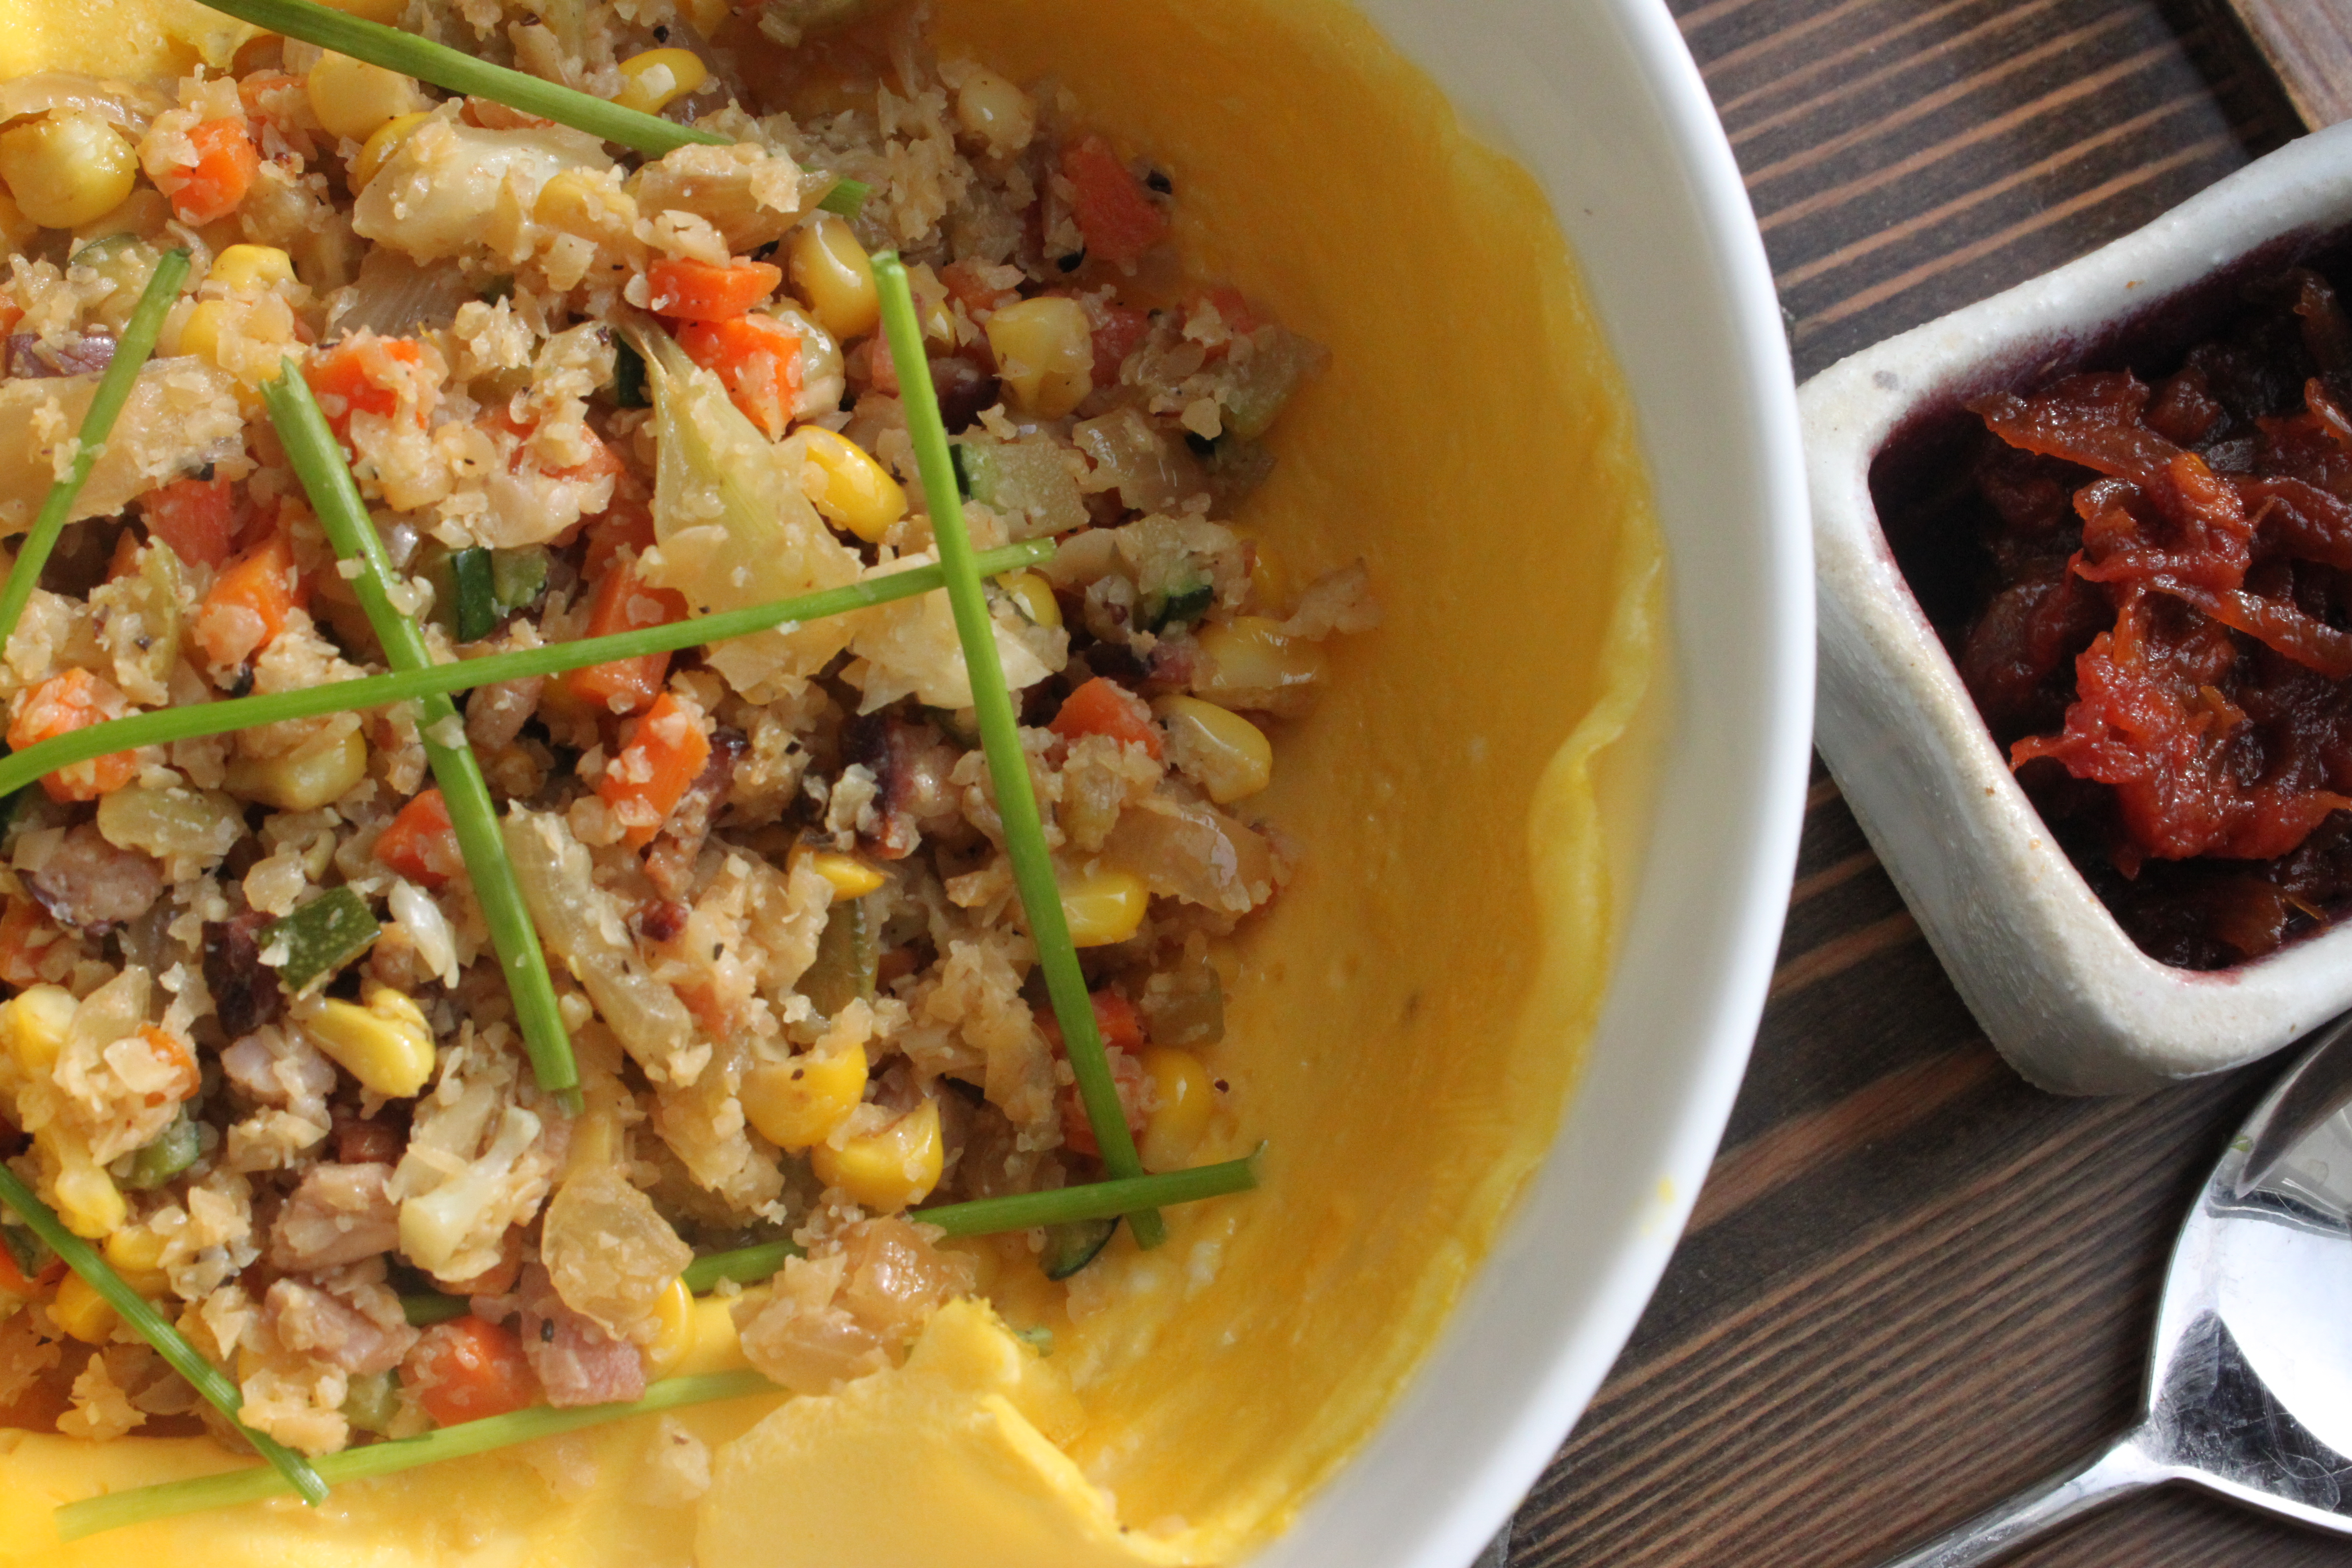
You may wonder how I came up with this Deconstructed version in a bowl? Aesthetically this works beautifully; it’s practical and easy to serve. The cauliflower “rice” is actually quite filling and since it’s in small bits, you need to put a lot to “stuff’ the omelet to make it “full”, I think the serving will become too big.
Besides…It’s time for me to practice flipping omelets!! Enjoy (OO)
Ingredients: (serves 2-4)
1 small head of organic cauliflower, 3-4 teaspoons grapeseed oil, 1 medium yellow onion (finely diced), 1 large carrot (peeled and finely diced), 2 ears of fresh corn (husked and kernels removed), 1 large zucchini (finely diced), 2 slices of Canadian back bacon (diced), organic eggs (1 for each serving), unsweetened almond milk (1 Tablespoon for each portion), 2 Tablespoons of stock (I’ve used homemade Japanese dashi stock, you can substitute with chicken broth or vegetable broth), organic Japanese soy sauce (season to taste), sea salt and ground black pepper, chives for garnish (optional).
**For a vegetarian version – omit the Canadian bacon, substitute the Japanese dashi stock (from kelp and bonito flakes) vegetable broth. I find the dashi adds a very nice flavor to this dish.
Preparation:
– Clean the cauliflower,core and trim the florets off the stems, cut off any blemishes (sometimes there are brown spots!). Process florets in the food processor until they resemble the texture and size of rice grains.
– Chop the onion finely, dice carrot and zucchini finely, husked and removed corn kernels, set aside.
– Slice and dice the Canadian back bacon into small bits separately, set aside.
– In a large pot (I used a 5 quart pot with lid) or wok/saute pan, using high heat, heat 2 teaspoons of grape seed oil; add 1/2 the diced onion and cook until they become soft and translucent. Add carrots, saute for 2 minutes; add corn and saute for another 2 minutes; add zucchini and 1 Tablespoon of dashi stock (you will hear a “sizzling” sound), saute and mix the vegetables well (takes approximately 2-3 minutes). The entire process takes less than 10 minutes; vegetables should be cooked yet crunchy in texture. Remove from pan and set aside.
– Using the same pot, adjust to medium low heat, add another teaspoon of oil, add the remaining diced onion, again cook until they become soft and translucent. Add cauliflower, stirring gently for 5 minutes until the oil is evenly distributed and each “grain” is coated.
– Add 1 Tablespoon of dashi stock, put the lid on, adjust to low heat (to avoid burning) and “steam” the cauliflower for 3 to 4 minutes. If you like it softer, cook a little longer.
– Remove the lid, readjust to medium high heat, add Canadian back bacon bits, saute for 2 minutes; return carrot/corn/zucchini mixture to pot. Using spatula, gently fold and stir fry ingredients until mixture is slightly browned, taste and season with soy sauce and black ground pepper, Turn off heat and set cooked mixture aside.
Filling ready to go!
– Whisk the egg, add a pinch of sea salt and almond milk (1 Tablespoon to 1 egg) together in small bowl, you are preparing each portion individually.
– Lightly greased a small frying pan (I’ve used an 8 inch), coat the surface with a thin coat of grape seed oil.
– Heat the pan over medium high heat, when pan gets hot, pour the egg mixture and tilt to cover the pan evenly; once the egg has set, turn off and remove from heat.
– Gently remove “omelet” from frying pan and lay in a round bowl (find one that fits the omelet perfectly!), ladle the filling on top of “omelet”. (At this time you can decide whether you would like to make this version or a real omelet**).
– Garnish with chives (optional) and serve immediately with tomato caramelized onion jam “jam-up” (see separate recipe).
Notes:
– Namiko Chen’s website “Just One Cookbook”has an excellent “traditional” Japanese Omelet Rice Recipe with very clear instructions and excellent demonstration on how to assemble the omelet.
– I always try to keep oil usage to minimum; you can always add a little more to adjust.
– In a regular omelet rice recipe, ketchup is added to rice directly. It’s my humble opinion that it will not work and make the cauliflower soggy and taste funny, besides we don’t use ketchup much these days and decided to look for a healthier option.
– This is an anything goes recipe; You can choose whatever vegetables you have or to your liking to substitute the corn, zucchini or carrots. I chose them because they add a crunchy texture. Feel free to use chicken (in regular recipe) instead of back bacon. Be creative!
– To all Moms: this may be a great option to encourage (or “fool”) your kids into eating more vegetables (OO). It makes a great bento box lunch and a wonderful one-dish dinner.
– I choose Canadian back bacon as it is leaner. If you are using regular bacon, render the fat and use it to saute the vegetables to add more flavor. As bacon is salty, adjust the seasoning as required.
– As always, remember to taste and season according to your liking and dietary needs!
Fall is in “full swing” here in Vancouver and it’s the season when we crave for scrumptious and hearty meals; I decided to combine two of our favourite foods together: Meatballs and Thai Green Curry with Zucchini and eggplant.
Almost two years ago I took a cooking class at the Blue Elephant Cooking School in Bangkok, the green curry recipe is a combination of what I’ve learnt at Blue Elephantand a partial adaptation from Andy Ricker’s Green curry with fish and eggplant recipe (from POK POK, see also blogger “Lady and Pup”‘s great adaptation (also pork meatball), it’s a great interpretation and I love the photos!).
Instead of jasmine rice, I decided to serve this dish with a cauliflower “fried” rice, a wonderful recipe(see separate posting) from my friend “PPQ”; it is a great way to include more vegetables into your meals and a very good option for “carb” conscious individuals; the flavors all worked wonderfully together. Enjoy (OO)!
Ingredients for the Lemongrass Meatball:
500 grams organic lean ground pork, 2 garlic cloves (finely minced), 1 stalk finely chopped lemongrass, 1 Tablespoon fresh galangal (or ginger, peeled and finely grated), 3 green scallions (white and green part finely chopped), 1/4 cup chopped cilantro (roughly chopped), 1/4 (up to 1/2 cup) of Japanese panko (as required), unsweetened almond or coconut milk (as required, approximately 1/4 cup), 1 large egg, 2 Tablespoon fish sauce, 1 Tablespoon coconut nectar (optional), 1 teaspoon sea salt and 1 teaspoon white ground pepper (seasoning can be adjusted own taste).
Ingredients for the Green Curry:
1 Tablespoon olive oil, 1/2 cup Thai green curry paste (store-bought or you can prepare your own), 1/4 teaspoon cumin seeds (roasted and grounded), 1/4 teaspoon coriander seeds (ground roasted), 1 1/2 cup coconut milk, 1/2 cup unsweetened almond milk** , 1 medium Japanese eggplant (cut into 1 inch pieces), 2 medium zucchini (cut into 1 inch pieces), 1 (or 2) fresh Thai red chillies (sliced, seeds removed), 6 kaffir lime leaves (slightly torn by hand), sweet Thai basil leaves (1/4 – 1/2 cup for garnish), 1 Tablespoon fish sauce (more to adjust taste and seasoning) and 1 – 2 teaspoon grated palm sugar (for seasoning), coconut cream (for garnish), lime juice, chopped cilantro (for garnish).
**Almond milk is my own preference as I do not want the curry to be overly creamy. Andy Ricker’s recipe calls for 1/2 cup coconut cream and the preparation method is different.
To prepare the meatballs:
– In a large mixing bowl, using your hand, combine and gently mix ingredients (except panko and almond milk). Cover with wrap, marinade and refrigerate for at least one hour.
– Pre-heat oven to 375 degrees F.
– When ready to cook meatballs, add panko and almond milk (adjust the quantity pending the
– Lightly oil your hands, shape into 1 inch balls
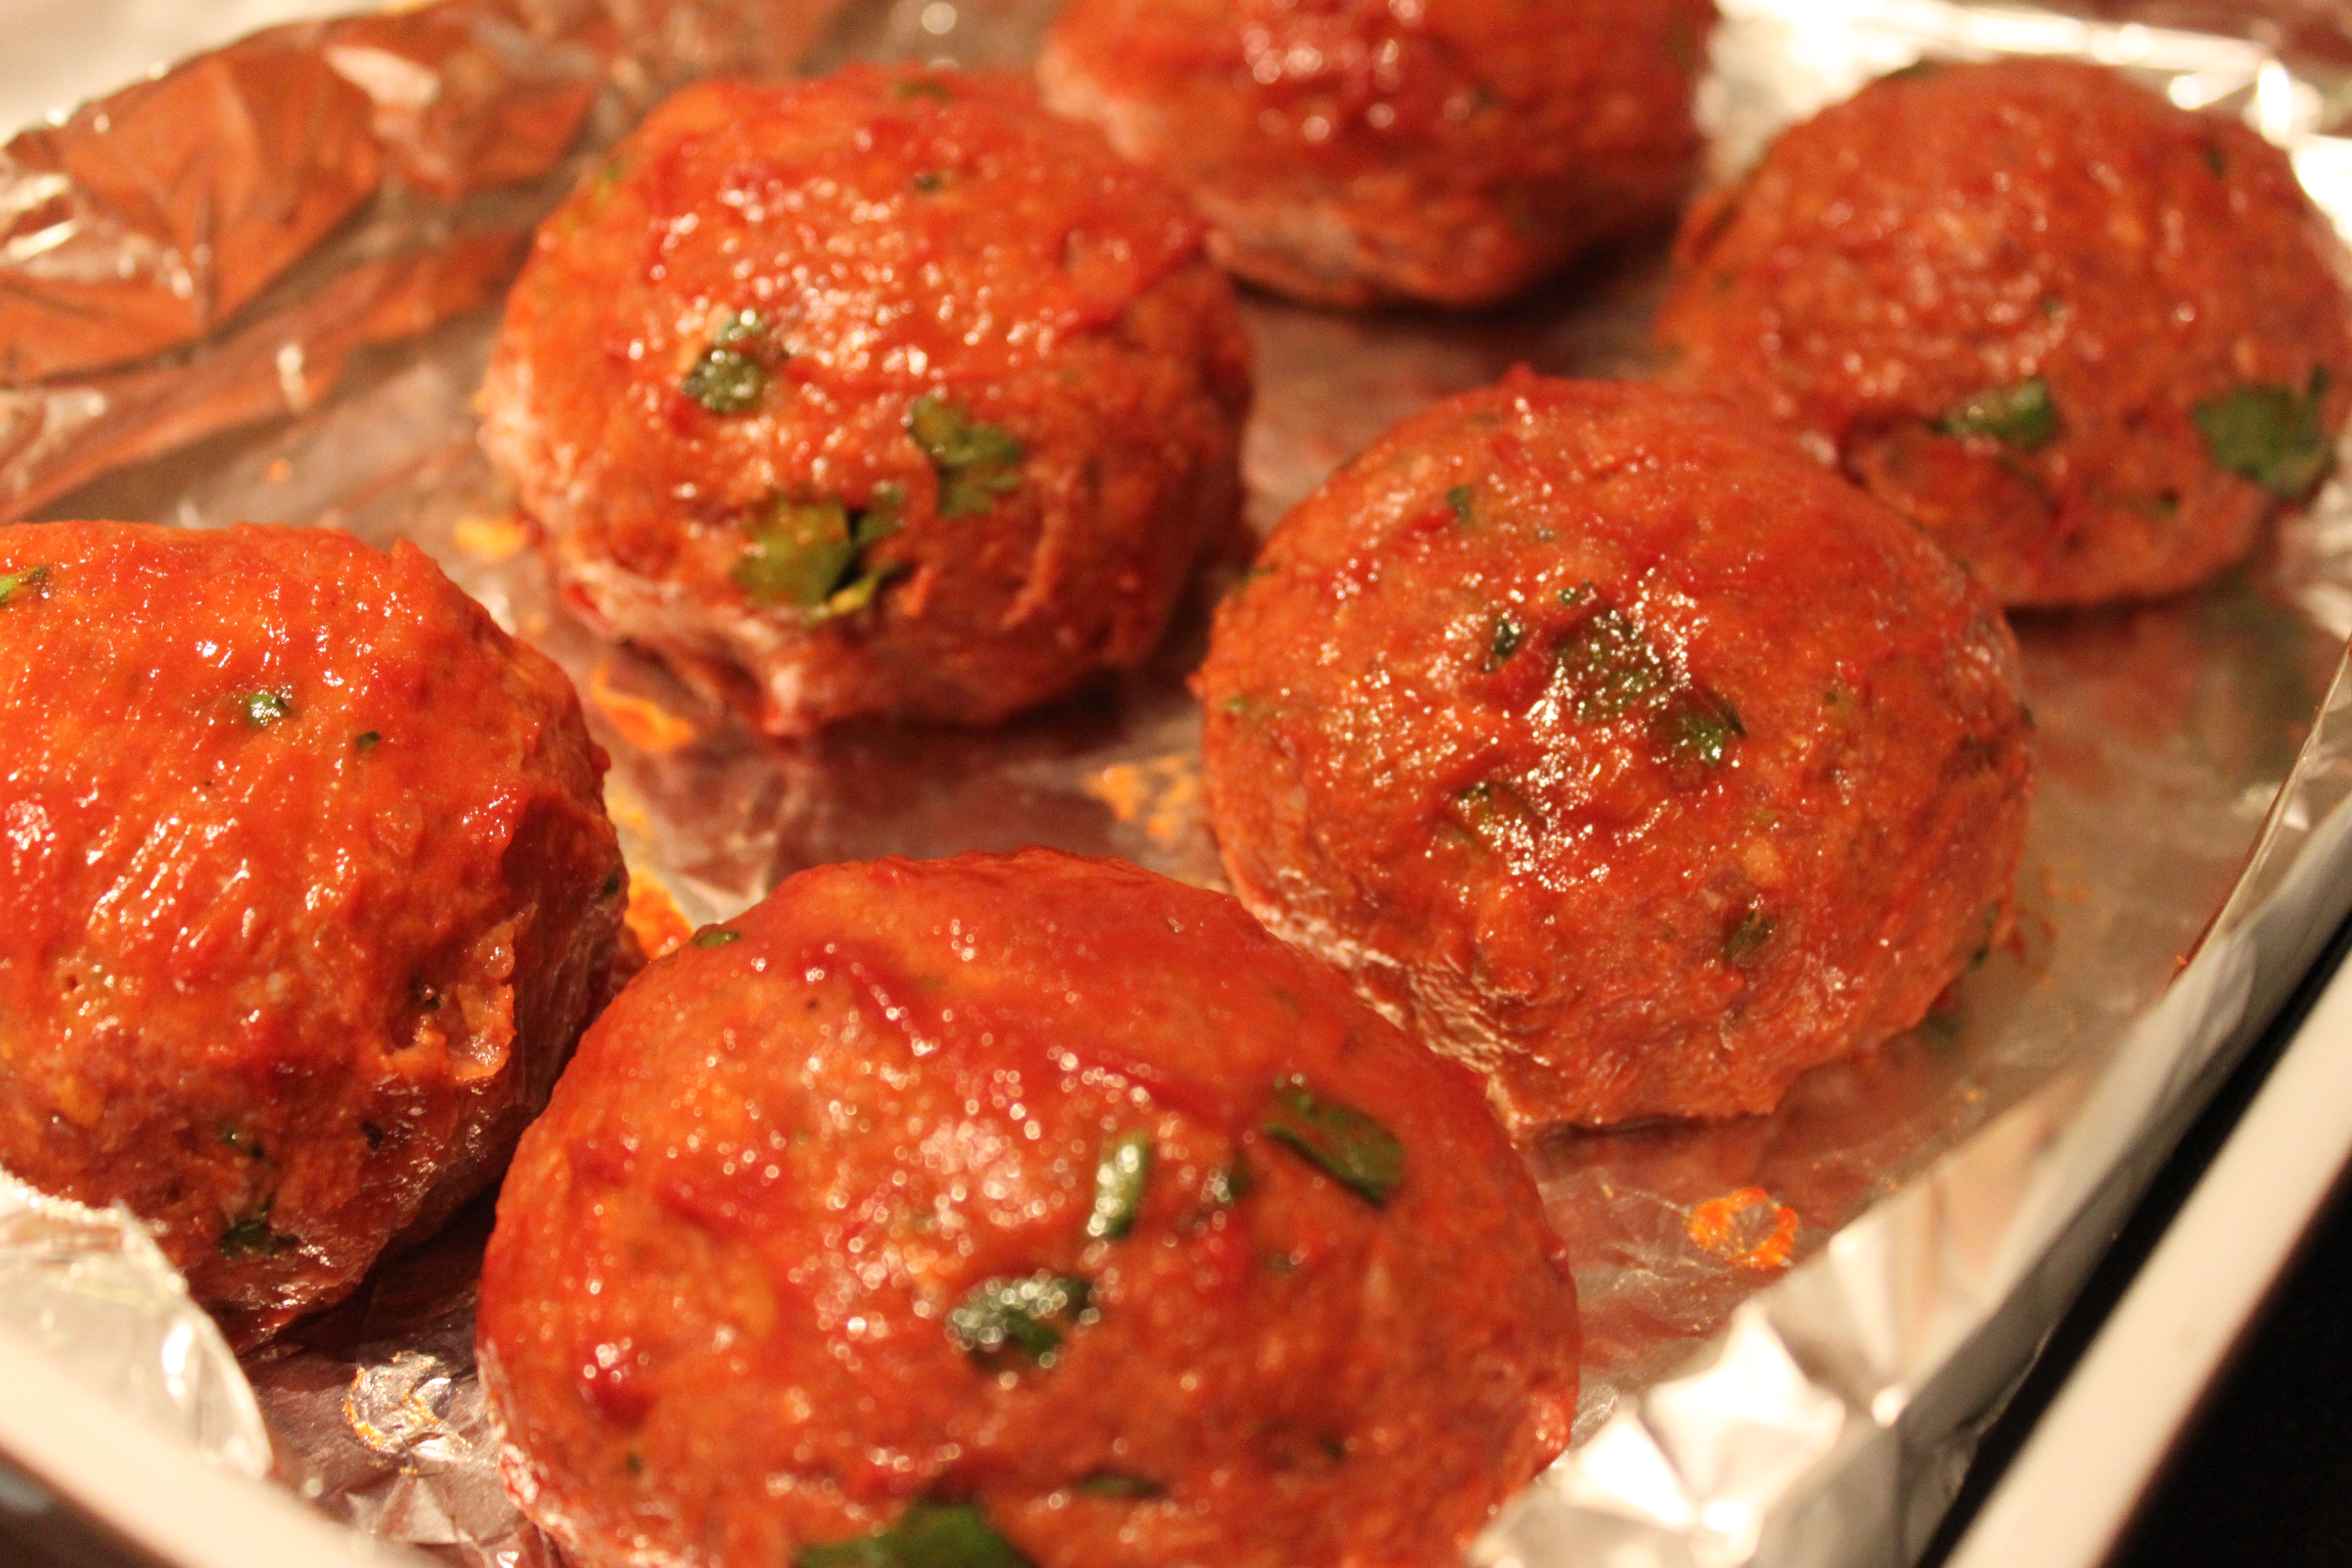
– (**This step is optional – I “soaked” the meatballs in coconut milk for 20 minutes first, pat them dry then bake in the oven – see picture below).
– Lined your baking tray with foil and space them so they are not touching. Bake for approximately 20 to 25 minutes; then change to “broil” and “brown” for approximately 5 minutes, remove from the oven and set aside.
– Proceed to prepare the green curry once you place the meatballs in the oven.
To prepare the zucchini and eggplant green curry:
– In large 6 quart pan, heat olive oil over medium. Add the green curry paste, ground roasted coriander and cumin seeds, stir-fry until an aroma develops and ingredients are slightly browned.
– Add 1/2 cup of the coconut milk, cook and stir occasionally, allow it to simmer until oil is extracted
– Add the rest of coconut milk and almond milk. Bring to a boil, add eggplant then reduce the heat to medium low. Cook for 10 minutes, stirring occasionally, then add zucchini and pork meatballs, cook until all vegetables are tender. Adjust the thickness of curry with water if necessary.
– Stir in fish sauce, palm sugar, kaffir lime leaves and chillies. Taste the curry and adjust the seasoning if necessary.
– Remove from heat, stir in the basil leaves and a squeeze of fresh lime juice.
– Garnish with a drizzle of coconut cream, fresh sliced chillies (add more if you want more “heat”) and chopped cilantro. Serve immediately with rice on the side.
Additional notes:
– Omit the pork meatball and this becomes a great vegetarian dish.
***Here’s the recipe for Green Curry Paste from Blue Elephant Cooking School; the class was fun and informative, it’s worthwhile to attend if you happen to visit Bangkok.
10 pieces green birds eye chillies, 1 big green Serrano chilli, 1 coriander (or cilantro) root (omit if you are unable to find, use chopped coriander stems/leaf instead, approximately 1-2 tablespoon), 1/2 tablespoon kaffir lime zest (can use regular lime), 1/2 tablespoon finely sliced galangal (use ginger if you are unable to find), 1 Tablespoon lemon grass (finely sliced), 4 cloves of garlic (peeled), 3 shallots (peeled), 1 teaspoon salt, 1 teaspoon ground roasted cumin seed, 1/2 teaspoon ground roasted coriander seeds, 1/2 teaspoon white ground pepper, 1/2 teaspoon shrimp paste, 10 sweet Thai basil leaves.
To prepare the green curry paste: Dry roast the cumin seed and coriander seed in skillet until seeds begin to pop, let cool slightly and place them in spice grinder and grind finely. Using the mortar, apply a “pushing” motion and pound kaffir lime zest, coriander root, lemongrass, galangal (1/2 and all chillies together. Add the remaining ingredients (add basil leaves last) and continue to pound until everything is blended into a smooth paste. **If you find this too labour intensive, ready-made Thai green curry paste are available almost everywhere. Unused paste can be kept in an airtight container for two weeks in the refrigerator or last up to 1 month in the freezer.
A simple and easy way to prepare zucchini; instead of pasta, I recently served this with Tomato glazed meatloaves (see other recipe posting).
Ingredients (Serves 4)
4 medium size zucchini, kosher salt and pepper to taste
Preparation:
– Using a vegetable peeler, from top to bottom of each zucchini, slice the zucchini into ribbons.
– Place ribbons in a covered microwave safe dish
– Nuked them high for two minutes
– Drained the excess liquid (if any), and toss with kosher salt and freshly ground pepper to taste.
Notes: An old fashion vegetable peeler or mandoline works. To turn zucchini into “spaghetti” style noodles, you will need a spiral slicer. Enjoy the zucchini ribbons raw as a salad! Enjoy (OO).
The recipe is adapted from Deb Perelman’s Smitten Kitchen’s “Tomato glazed meatloaves with brown butter mashed potatoes“; I’ve changed things up a bit by mixing different meats for the meatballs, and served them with zucchini “noodles”; I’ve also doubled the quantity of the glaze. The results? A wholesome and hearty meal…a bit nostalgic..a perfect Sunday evening dinner.
Ingredients:
Glaze:6 teaspoons olive oil, 1/2 cup tomato paste, 4 Tablespoons cider vinegar, 3 teaspoons honey, 4 teaspoons Worcestershire sauce, 2 Tablespoons Dijon mustard, kosher salt to taste (**I’ve doubled most of the ingredients from the original recipe, we love sauce!)
Meatballs:
2 slices sandwich bread (I’ve used approximately 2 ounces of organic bread crumbs), 2 garlic cloves (minced), 1 medium onion (finely chopped), 1 medium stalk celery (finely chopped), 1 medium carrot (peeled and finely chopped), olive oil (for cooking), 1 teaspoon kosher salt plus more for vegetables, freshly ground black pepper, 1 pound extra lean ground beef, 1/2 pound ground pork, 1/2 pound ground veal, 1 to 2 tablespoon tomato paste, 2 teaspoon Dijon mustard, 2 Tablespoons Worcestershire sauce, 1/2 cup milk (I’ve used almond milk), 1/4 to 1/2 cup chopped fresh flat leaf parsley, 2 large eggs
Preparation:
To make the glaze: Combine glaze ingredients in a small saucepan, let it simmer and whisk constantly, for 2 to 3 minutes, set aside.
To make the meatballs:
– Pre-heat the oven to 350 degrees.
– Tear the bread into chunks then blend it, in a food processor, into breadcrumbs. Place breadcrumbs into large bowl.
– Add onion, garlic, celery and carrot to the food processor, pulse it until they are finely chopped.
– Heat a large skillet over medium heat. Once skillet is hot, coat the bottom with olive oil, heat for a minute then add the finely chopped vegetables. Season with kosher salt and pepper to taste, and cook, stirring frequently until they begin to brown (not burn), about 10 to 15 minutes.
– Add the cooked vegetables to large bowl with bread crumbs, then add the remaining ingredients. Hand mix the ingredients together, then form the mixture into twelve 3-inch meatballs, each will weigh about 4 ounces.
– Space the meatballs in a baking dish so they are not touching. Drizzle or brush each meatball with a teaspoon or so of the tomato glaze.
– Bake the meatballs until cooked through, for approximately 20 to 25 minutes. By using an instant thermometer inserted into the centre of the meatball, a cooked meatball will register 160 to 165 degrees.
– Adjust the oven temperature to 400 degrees and let the meatballs “brown” for approximately 5 minutes
– To serve: Serve with remaining glaze on a bed of garlic mashed potatoes and zucchini “noodles” on the side.
***Ms. Deb Perelman served the meatballs with her brown butter mashed potatoes; I’ve made my own version with way less butter, almond milk (instead of buttermilk) and added garlic. Recipe for the simple zucchini noodles posted separately.
Notes: Always remember to cook ground meats thoroughly! I opted to “brown” the meatballs for an extra 5 minutes and it was a perfect finish. Adjust the breadcrumbs and quantity of milk according to need, the meatloaf mixture should feel “moist”, not runny; adjust the seasoning according to your taste and dietary needs. Enjoy!